
In this tutorial, you will learn how to setup ELK stack Fleet server. Recent versions of Elastic Stack now ships with Fleet, a web-based UI in Kibana for centrally managing Elastic Agents. Elastic agents provides “a single, unified way to add monitoring for logs, metrics, and other types of data to a host. It can also protect hosts from security threats, query data from operating systems, forward data from remote services or hardware, and more.“
Fleet Server on the other hand is a component of Elastic stack that connects Elastic Agents to Fleet itself.
How to Setup ELK Stack Fleet Server
So, how can you setup ELK stack Fleet server?
To begin with, there are different deployment options for setting up ELK stack Fleet server;
- Provision Fleet Server on Elastic Cloud as part of the hosted Elasticsearch Service.
- Deploy Fleet Server on-premises to work with Elasticsearch running on-premises.
- Deploy Fleet Server on-premises to work with a hosted Elasticsearch Service.
Our ELK stack is self-managed and this we are using the second option in this guide.
Also note that we are running a single node Elastic stack 8.5.
Install ELK Stack 8 on Ubuntu 22.04/Ubuntu 20.04
Thus, to setup ELK Stack Fleet Server;
- Ensure all the compatibility requirements and prerequisites are satisfied.
- Add Fleet Server and Elasticsearch hosts to your stack
- Install Fleet server Agent on your central host.
Add Fleet Server and Elasticsearch hosts to your stack
In this guide, we are setting up Fleet server on the same node as ELK stack.
Thus, to add Fleet server;
- Login to Kibana UI and navigate to Management menu > Fleet.
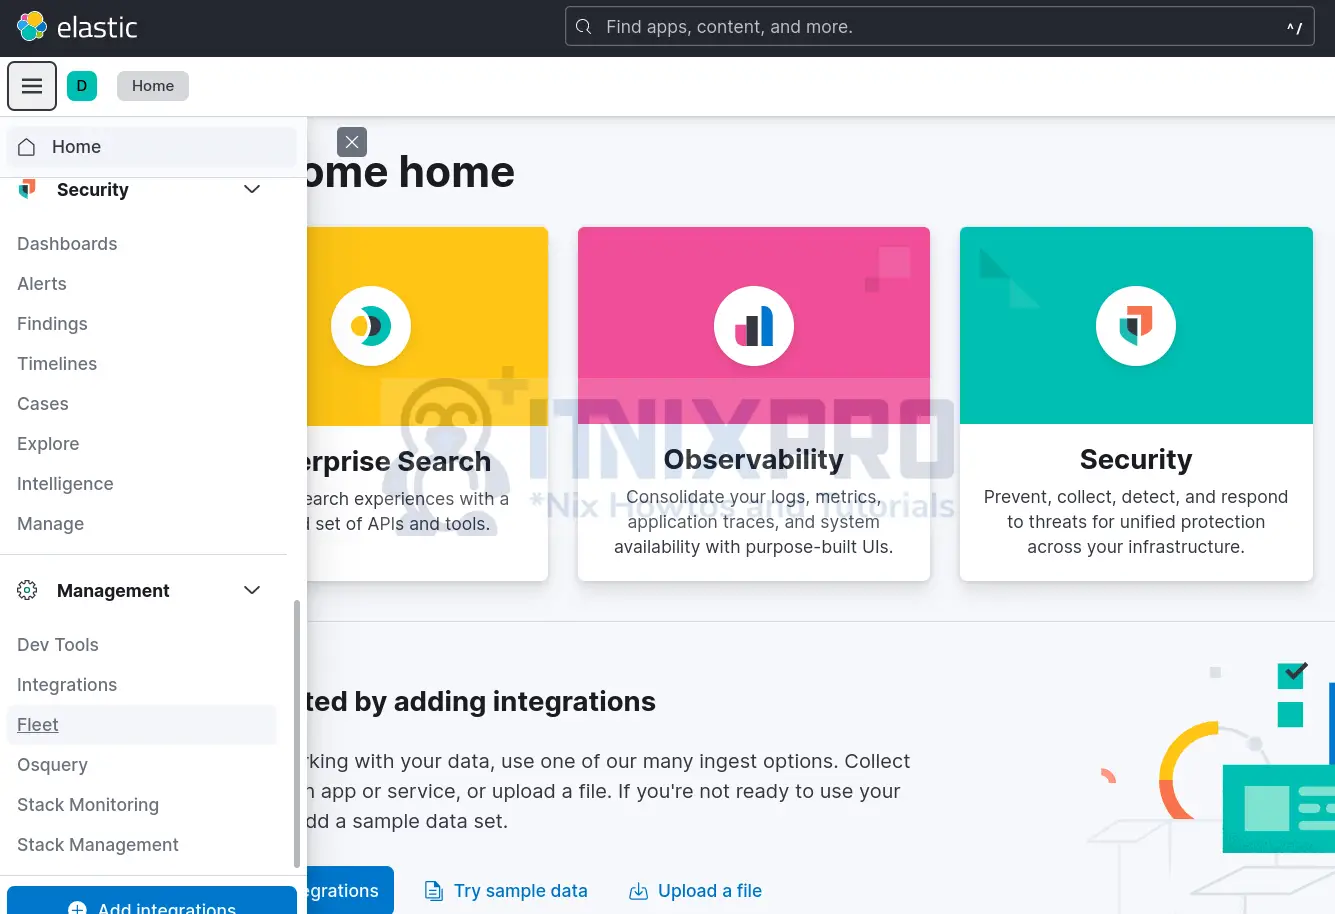
- Under Fleet interface, click settings.
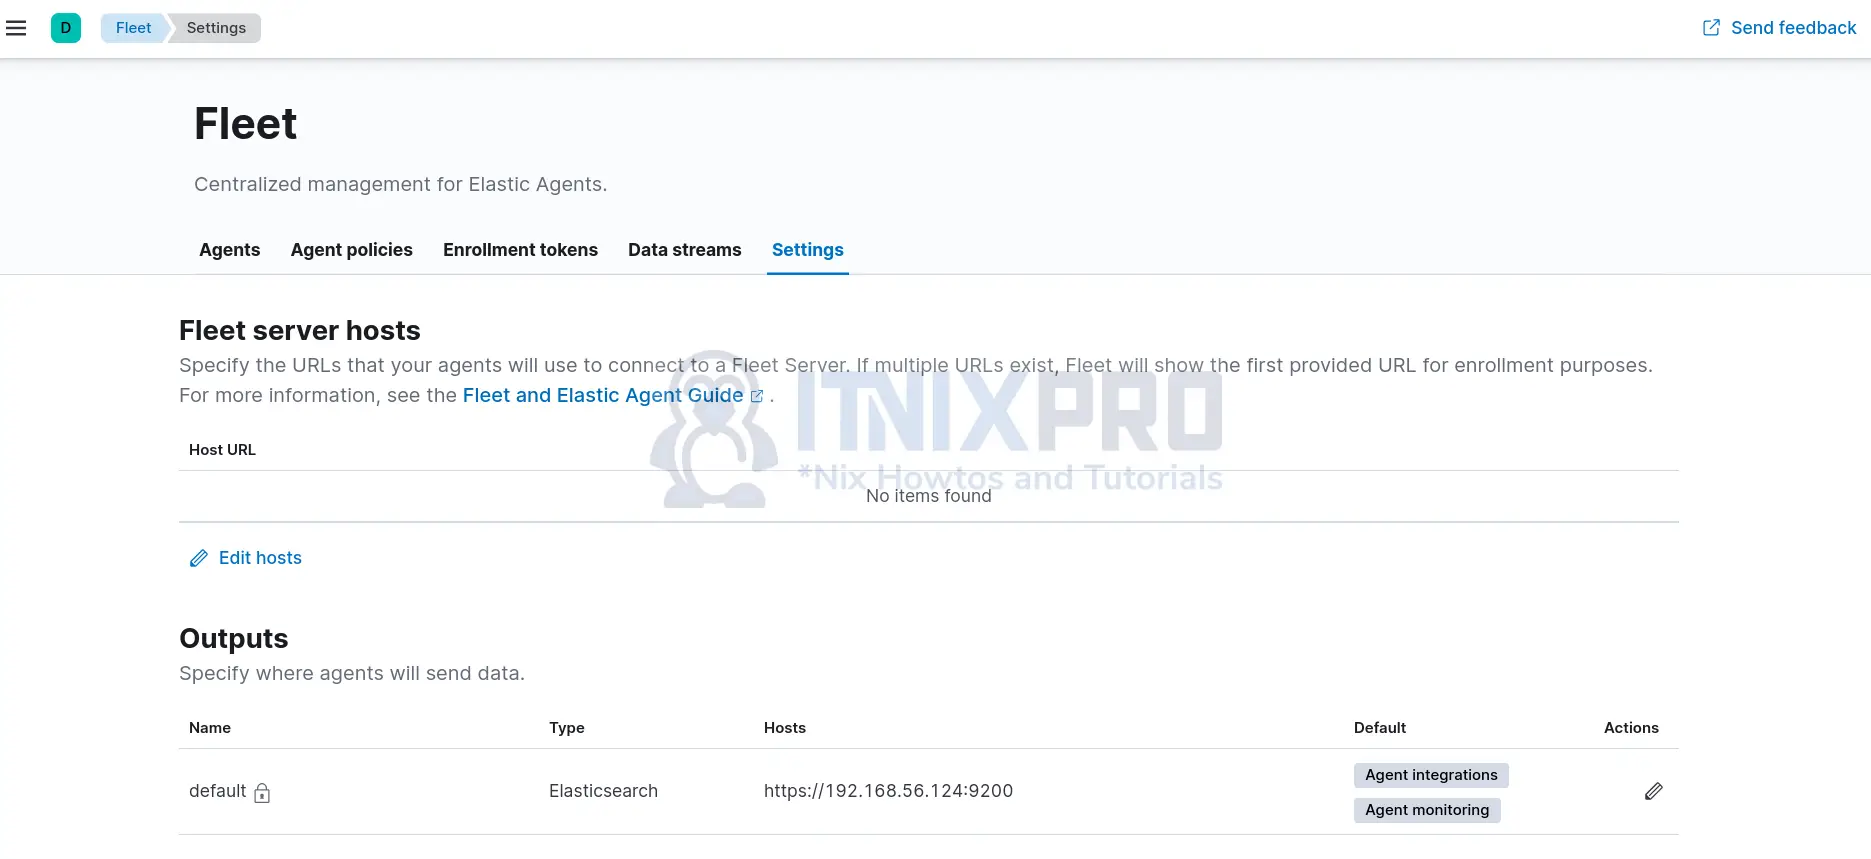
- Under Fleet server hosts, you need to define the URLs that your agents will use to connect to a Fleet Server. Thus, click Edit hosts and enter the URL of your would be Fleet server. For self-managed clusters, Fleet server is exposed on port 8220/tcp.
- In the Fleet server host url below, https://192.168.56.124:8220, 192.168.56.124 is our ELK stack server IP.
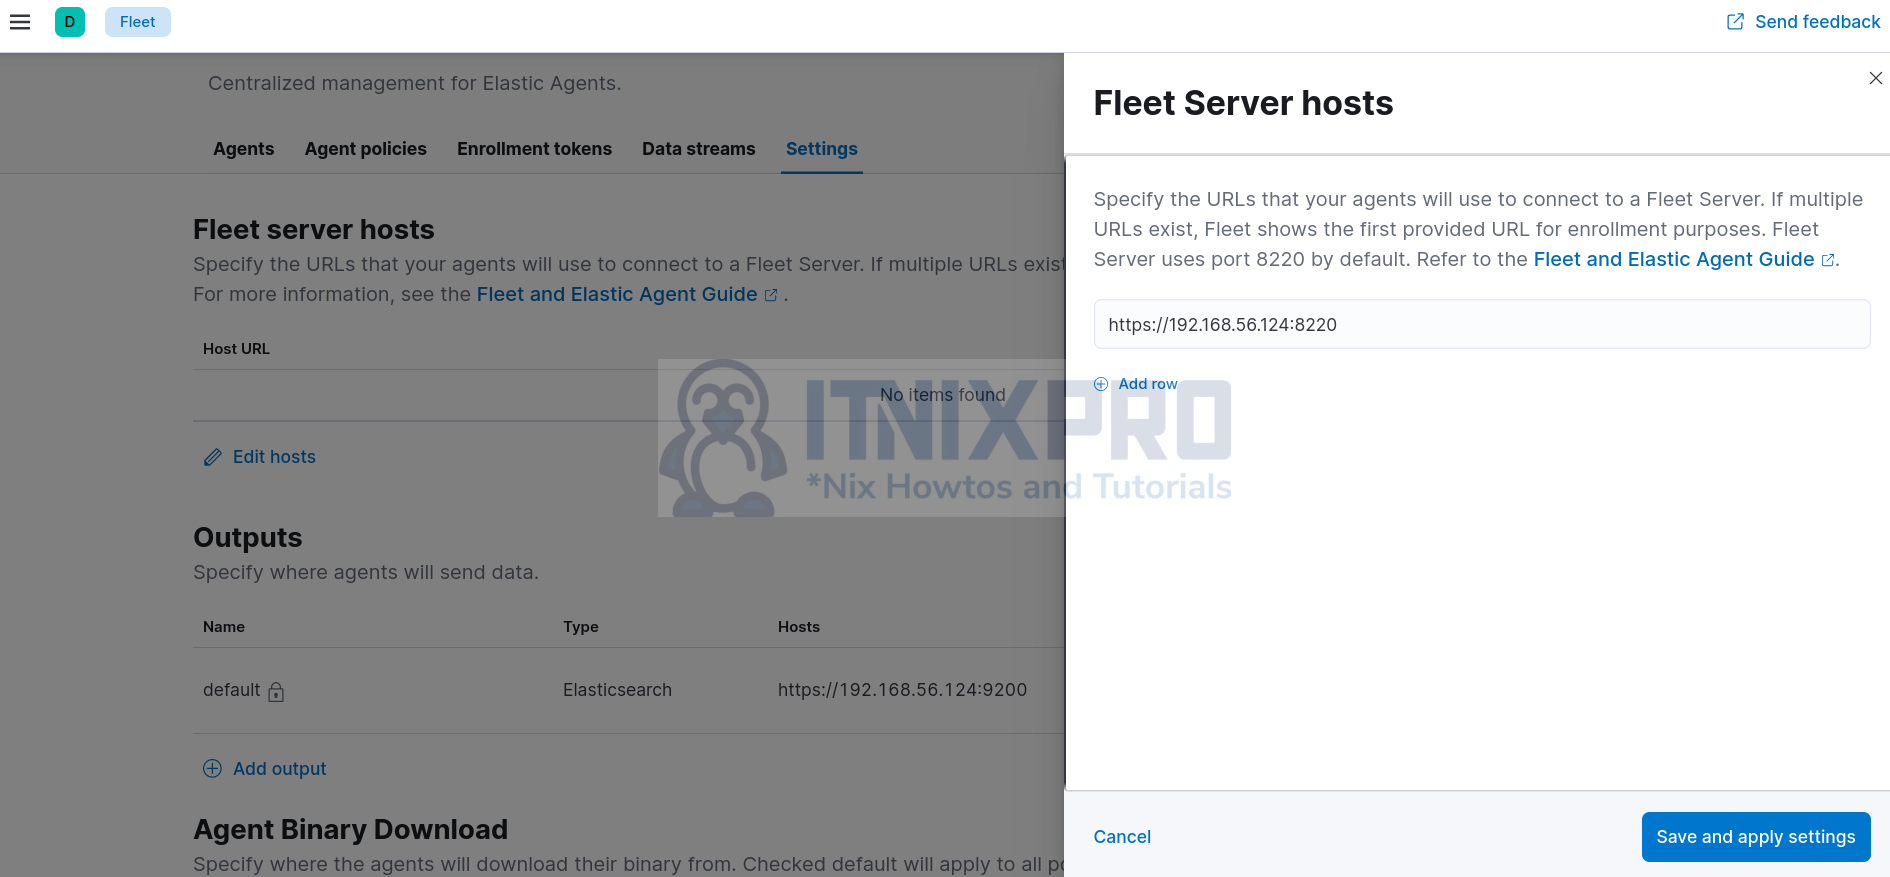
- Click Save and Apply settings.
- We will leave the default ES output settings.
- The settings now look like;
Install Fleet Server Elastic Agent on your central host
Next, you need to install Fleet server Elastic agent on your central host server.
Hence;
- Navigate to Agents tab.
- You will see two deployment options, Quick Start and Advanced.
- In this demo, we will deploy Fleet server agent using the Advanced method.
- Thus;
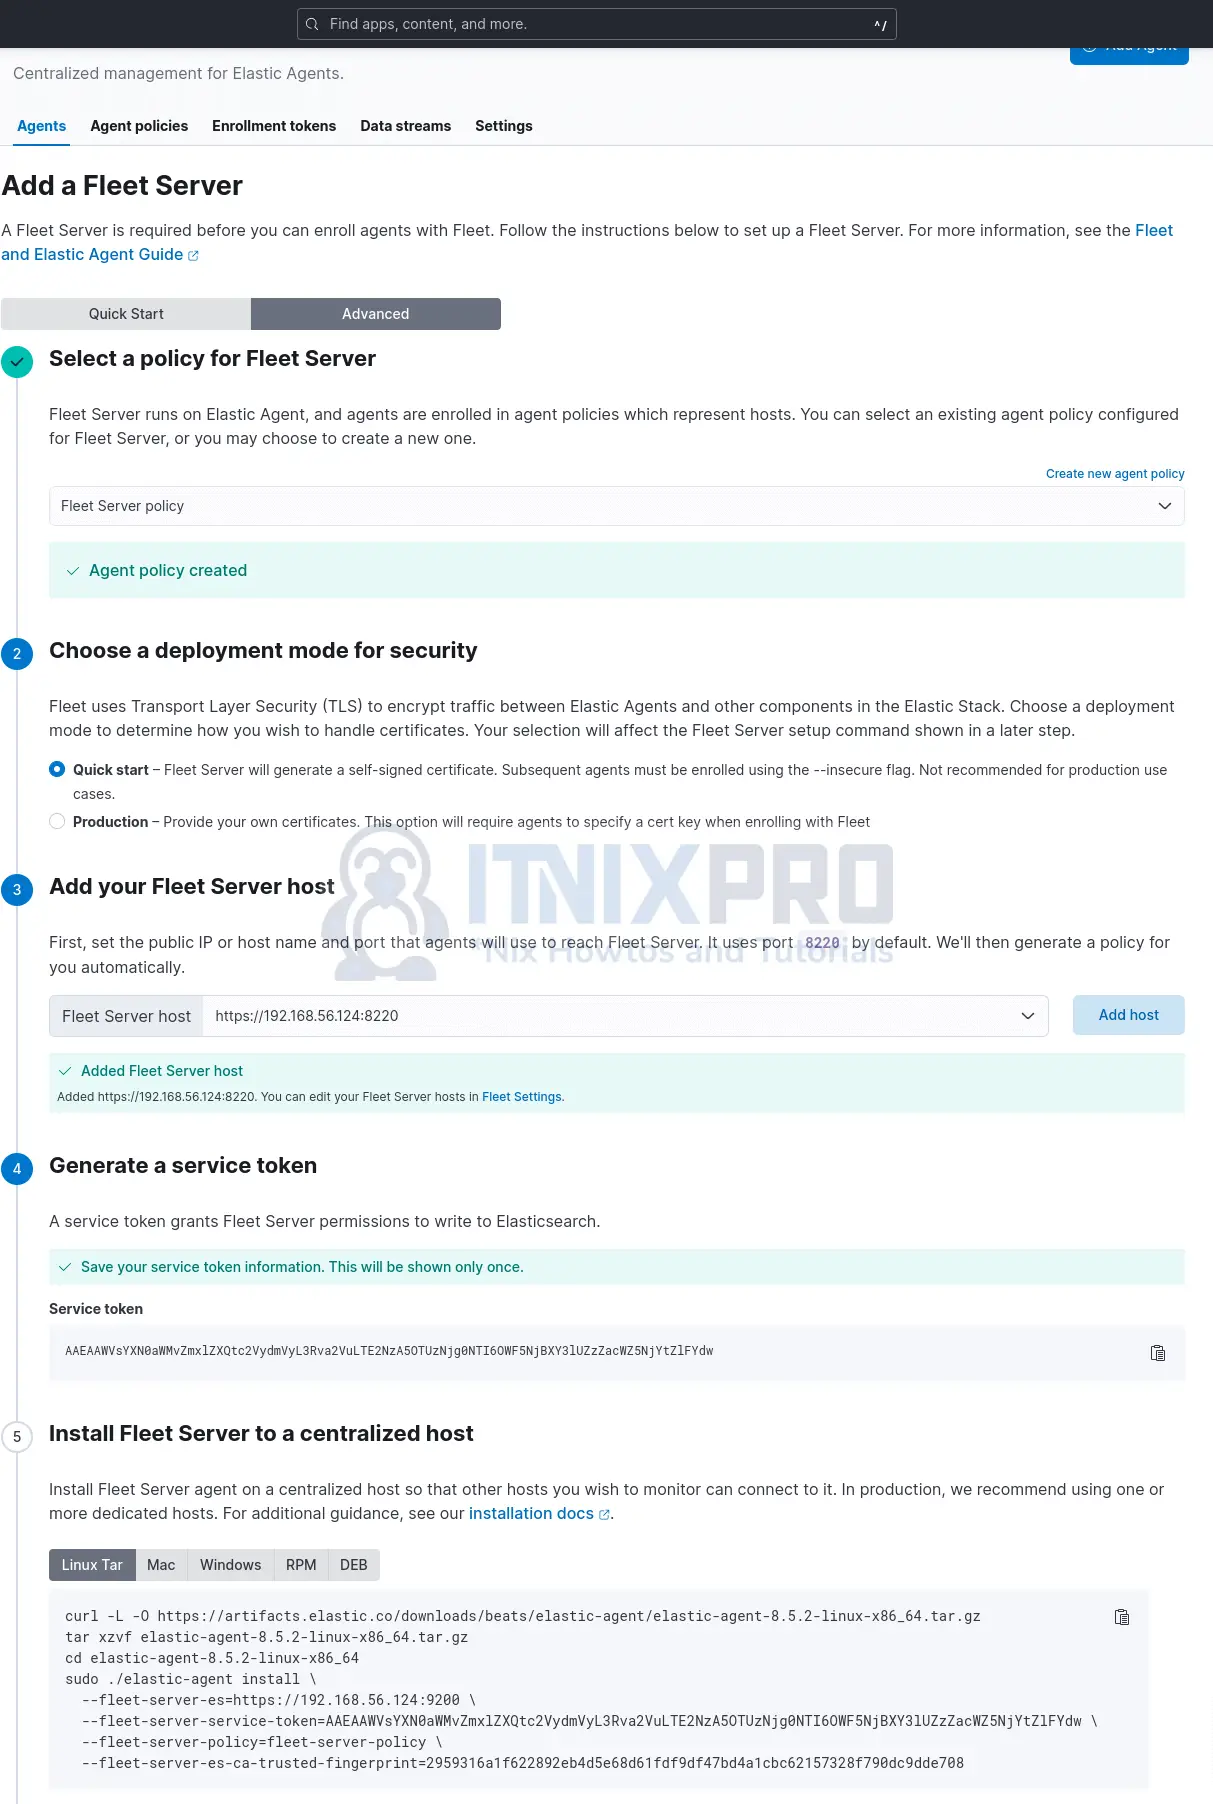
- Define the name of the policy and click Create policy to create a policy for Fleet Server. Enable system integration to collect system logs and metrics. You can also click on Advanced settings drop down to see more configuration options.
- Once the agent policy is created, choose a deployment mode for security. You can choose to deploy Fleet server with self-signed ssl certs (Quick start method) or deploy it with your custom commercial certs (Production). We will use quick start method in this demo.
- Define your Fleet Server host/port and click Add host.
- Generate a service token to grant Fleet Server permissions to write to Elasticsearch.
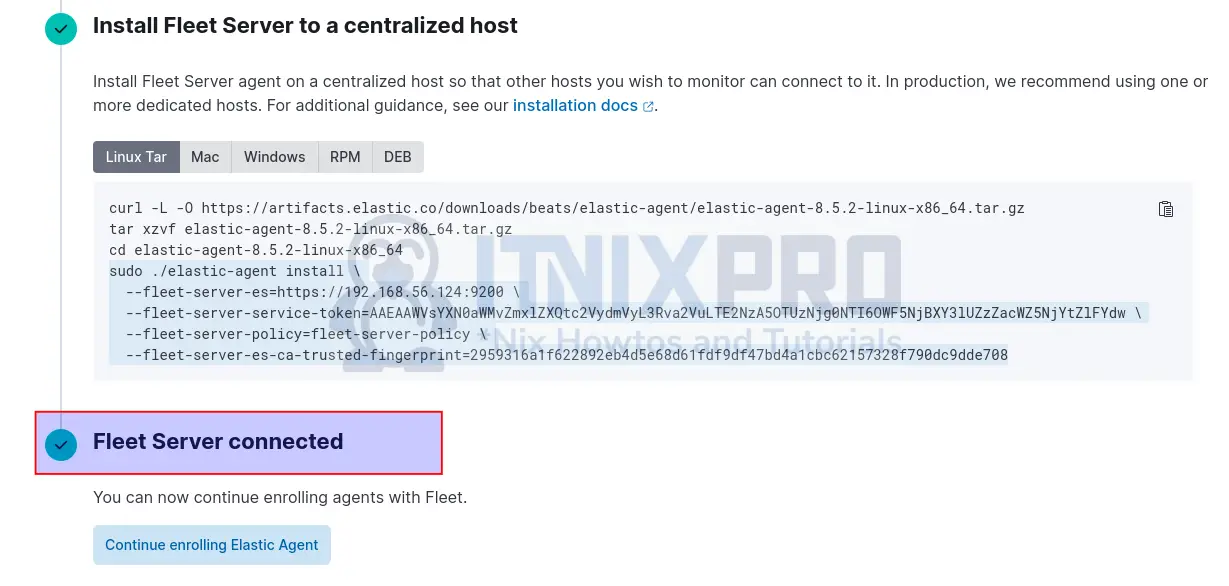
- Install Fleet Server to a centralized host. It is recommended to install Fleet server on Linux using Linux Tar method over RPM/DEB files. Thus, copy the Linux Tar method commands and execute on the ELK stack server to deploy Fleet server agent.
Installing the Fleet server Elastic agent on my ELK stack node;
- Download the Elastic agent tarball;
curl -L -O https://artifacts.elastic.co/downloads/beats/elastic-agent/elastic-agent-8.5.2-linux-x86_64.tar.gz- Extract the Elastic agent tarball;
tar xzvf elastic-agent-8.5.2-linux-x86_64.tar.gz- Navigate to the extracted Elastic agent directory and run the installation.
cd elastic-agent-8.5.2-linux-x86_64sudo ./elastic-agent install \
--fleet-server-es=https://192.168.56.124:9200 \
--fleet-server-service-token=AAEAAWVsYXN0aWMvZmxlZXQtc2VydmVyL3Rva2VuLTE2NzA5OTUzNjg0NTI6OWF5NjBXY3lUZzZacWZ5NjYtZlFYdw \
--fleet-server-policy=fleet-server-policy \
--fleet-server-es-ca-trusted-fingerprint=2959316a1f622892eb4d5e68d61fdf9df47bd4a1cbc62157328f790dc9dde708- Once the installation command runs, you will be prompted to confirm the installation path and whether to run the agent as a service.
Elastic Agent will be installed at /opt/Elastic/Agent and will run as a service. Do you want to continue? [Y/n]: Y- Confirm and proceed with installation.
- Sample installation command
{"log.level":"info","@timestamp":"2022-12-14T05:47:57.587Z","log.origin":{"file.name":"cmd/enroll_cmd.go","file.line":403},"message":"Generating self-signed certificate for Fleet Server","ecs.version":"1.6.0"}
{"log.level":"info","@timestamp":"2022-12-14T05:48:06.986Z","log.origin":{"file.name":"cmd/enroll_cmd.go","file.line":773},"message":"Fleet Server - Running on policy with Fleet Server integration: fleet-server-policy; missing config fleet.agent.id (expected during bootstrap process)","ecs.version":"1.6.0"}
{"log.level":"info","@timestamp":"2022-12-14T05:48:07.723Z","log.origin":{"file.name":"cmd/enroll_cmd.go","file.line":471},"message":"Starting enrollment to URL: https://elk.itnixpro.com:8220/","ecs.version":"1.6.0"}
{"log.level":"info","@timestamp":"2022-12-14T05:48:08.798Z","log.origin":{"file.name":"cmd/enroll_cmd.go","file.line":273},"message":"Successfully triggered restart on running Elastic Agent.","ecs.version":"1.6.0"}
Successfully enrolled the Elastic Agent.
Elastic Agent has been successfully installed.
Go back to Kibana interface and confirm that the Fleet server is connected.
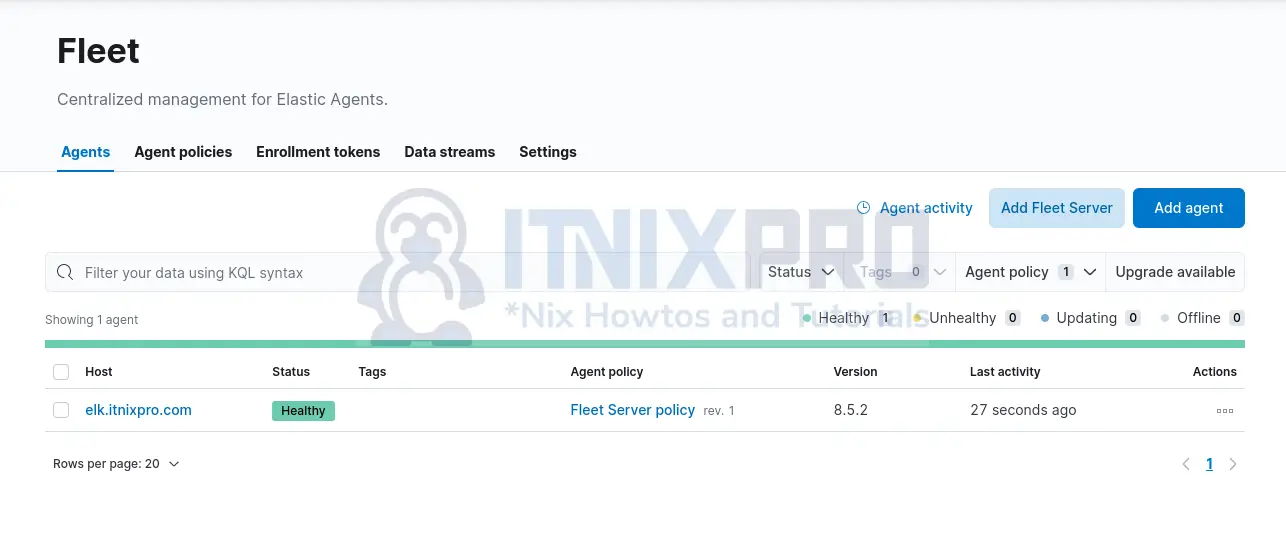
On the agent tabs, you can also see the server is added, up and running.
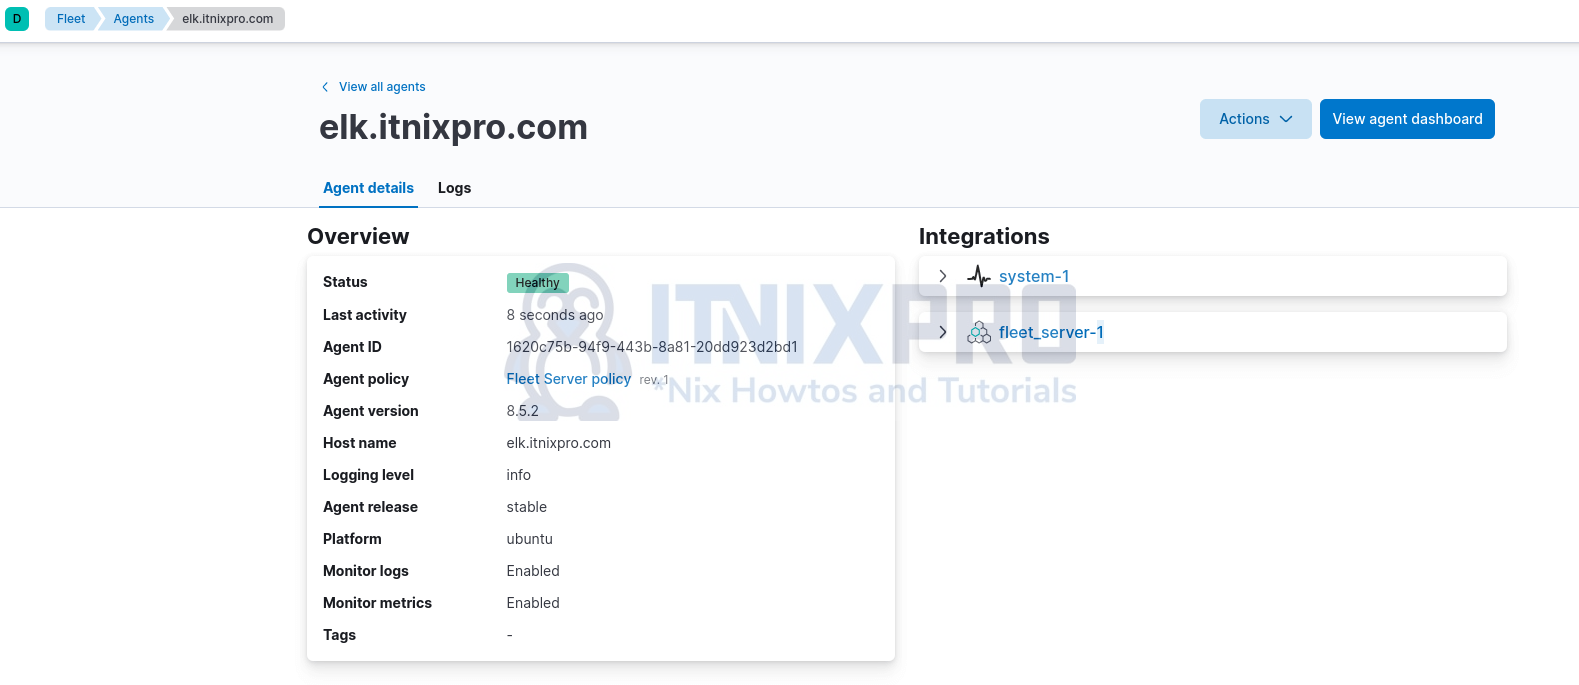
Click on the host agent name to view more details and even the logs collected from the server;
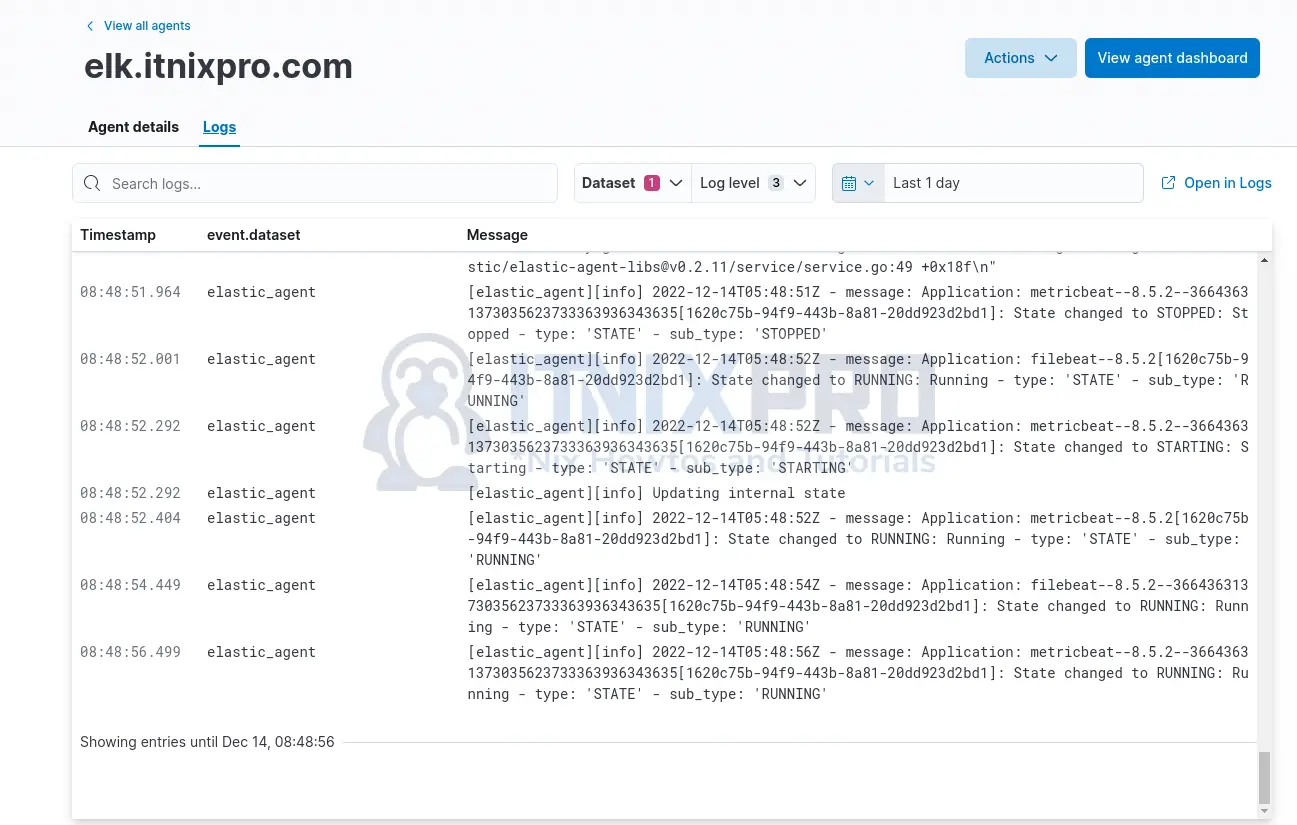
Agent dashboards;
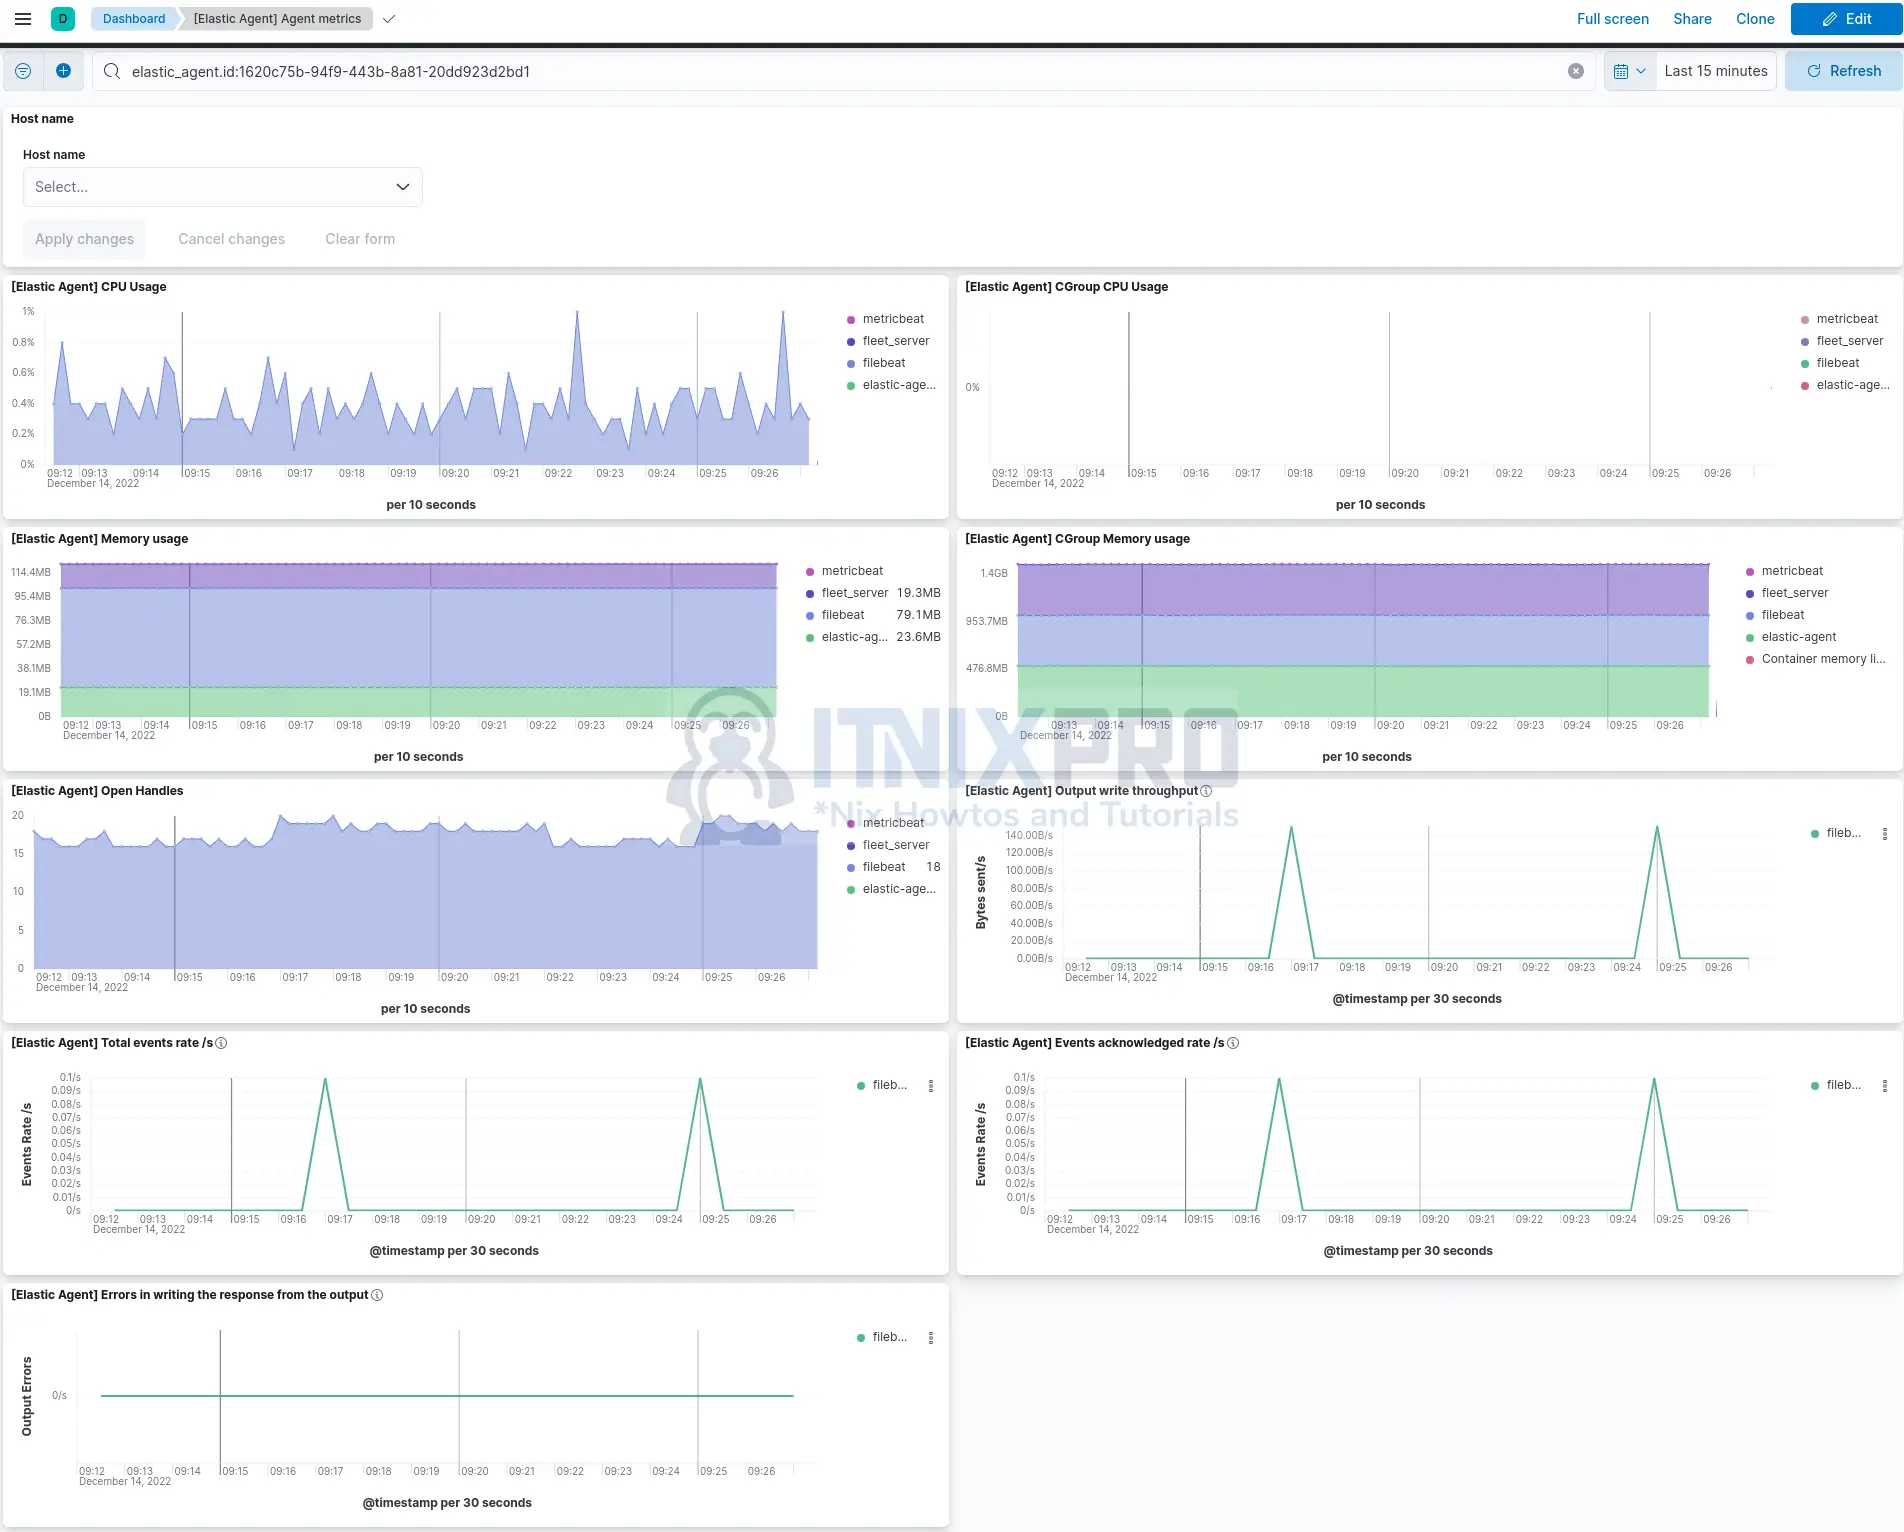
And that is it.
That is how you can easily setup ELK stack Fleet server. You can now proceed to install and enroll Elastic agents on your remote end points for system logs and metrics collection.
Other Tutorials
Create Data Map Visualization in Kibana