
This guide covers how to install Wazuh manager, Indexer and Dashboard on Ubuntu 24.04. Wazuh is an opensource security platform that offers a wide range of capabilities in matters system/end point security. Read more on wazuh.com.
Table of Contents
Installing Wazuh Manager, Indexer and Dashboard on Ubuntu 24.04
Wazuh SIEM is made up various components that makes it a unified SIEM tool.
The main Wazuh SIEM components include:
- Wazuh Indexer: This is the search and analytics engine for Wazuh which stores and indexes security events collected from monitored end points.
- Wazuh Server: This is the main Wazuh engine responsible for processing, persing and analyzing security event data collected from end points.
- Wazuh Dashboard: Dashboard offers user interface to help security analysts to visualize and analyse system security events.
- Wazuh Agents: Agents are installed on the monitored end points and are used to collect system security data and sent them to Wazuh server for processing.
Wazuh SIEM System Requirements
Ensure that your server has enough system hardware requirements to support your use case.
Provision enough compute (RAM/CPU) and Disk space depending on the expected alerts per second and total data retention period.
There is no one-size-fits-all requirements. It all depends on your use cases.
In my current test environment, these are the basic system specs;
RAM:
free -htotal used free shared buff/cache available Mem: 7.8Gi 438Mi 7.3Gi 1.1Mi 221Mi 7.3Gi Swap: 2.0Gi 0B 2.0Gi
vCPUs
nproc4Disk
df -hT -P /Filesystem Type Size Used Avail Use% Mounted on /dev/mapper/ubuntu--vg-ubuntu--lv ext4 465G 20G 422G 42% /
Install Wazuh APT Repository on Ubuntu 24.04
To ensure we are running latest and stable release versions of Wazuh components, install Wazuh APT repository.
Install repository GPG key;
sudo apt install gnupg apt-transport-https debconf procpscurl -s https://packages.wazuh.com/key/GPG-KEY-WAZUH | \
sudo gpg --dearmor -o /etc/apt/trusted.gpg.d/wazuh.gpgInstall Wazuh repository;
echo "deb https://packages.wazuh.com/4.x/apt/ stable main" | sudo tee /etc/apt/sources.list.d/wazuh.listRun system update to update package cache;
sudo apt updateInstall Wazuh Indexer on Ubuntu 24.04
Install Wazuh Indexer
The Wazuh repos are now in place. Proceed to install Wazuh indexer.
sudo apt install wazuh-indexerGenerate Wazuh the SSL certificates
To encrypt communication among Wazuh components, SSL certs are required.
Wazuh provides a script that can be executed to generate the SSL certs. Download the script by running the command below. Ensure to replace the Wazuh version numbers accordingly. Currently, it is v4.7.
curl -sO https://packages.wazuh.com/4.7/wazuh-certs-tool.shTo generate the SSL certs that works for all Wazuh SIEM components, Indexer, Manager and Dashboard, you need to define the name and IP address of each of these components. Such parameters are defined in a configuration file that is also provided by Wazuh.
Download the configuration file and update it accordingly.
curl -sO https://packages.wazuh.com/4.7/config.ymlvim config.ymlSee my updated configuration.
nodes:
  # Wazuh indexer nodes
  indexer:
    - name: wazuh-indexer
      ip: "192.168.56.111"
    #- name: node-2
    #  ip: ""
    #- name: node-3
    #  ip: ""

  # Wazuh server nodes
  # If there is more than one Wazuh server
  # node, each one must have a node_type
  server:
    - name: wazuh-server
      ip: "192.168.56.111"
    #  node_type: master
    #- name: wazuh-2
    #  ip: ""
    #  node_type: worker
    #- name: wazuh-3
    #  ip: ""
    #  node_type: worker

  # Wazuh dashboard nodes
  dashboard:
    - name: wazuh-dashboard
      ip: "192.168.56.111"
Update the config file to match your environment setup. If you are running all components on same node, then use same IP address and respective name for each component.
Once the configuration file is updated, proceed to generate the SSL certs using it.
bash wazuh-certs-tool.sh -AThis generate the ssl certs and stores the in the wazuh-certificates directory in the current working directory.
You can see more script options using the –help option.
bash wazuh-certs-tool.sh --helpls -1 wazuh-certificates/*wazuh-certificates/admin-key.pem wazuh-certificates/admin.pem wazuh-certificates/root-ca.key wazuh-certificates/root-ca.pem wazuh-certificates/wazuh-dashboard-key.pem wazuh-certificates/wazuh-dashboard.pem wazuh-certificates/wazuh-indexer-key.pem wazuh-certificates/wazuh-indexer.pem wazuh-certificates/wazuh-server-key.pem wazuh-certificates/wazuh-server.pem
It is also possible to use your own CA. Check this discussion around the same topic.
Configure Wazuh Indexer
Next, just like how you would usually configure Elasticsearch, you need to configure Wazuh indexer.
The default configuration file for Wazuh indexer is /etc/wazuh-indexer/opensearch.yml.
There is only a few items we will change in the default configuration, and this is the node name and the CN name used in the Indexer certificate. Remember in the config.yml file used in generating the SSL certificates, we set the name of the indexer as wazuh-indexer. This is the same name we will be using as the node name.
Below is our updated Indexer configuration file.
sudo cat /etc/wazuh-indexer/opensearch.ymlnetwork.host: "0.0.0.0" node.name: "wazuh-indexer" cluster.initial_master_nodes: - "wazuh-indexer" #- "node-2" #- "node-3" cluster.name: "wazuh-cluster" #discovery.seed_hosts: # - "wazuh-indexer-ip" # - "node-2-ip" # - "node-3-ip" node.max_local_storage_nodes: "3" path.data: /var/lib/wazuh-indexer path.logs: /var/log/wazuh-indexer plugins.security.ssl.http.pemcert_filepath: /etc/wazuh-indexer/certs/indexer.pem plugins.security.ssl.http.pemkey_filepath: /etc/wazuh-indexer/certs/indexer-key.pem plugins.security.ssl.http.pemtrustedcas_filepath: /etc/wazuh-indexer/certs/root-ca.pem plugins.security.ssl.transport.pemcert_filepath: /etc/wazuh-indexer/certs/indexer.pem plugins.security.ssl.transport.pemkey_filepath: /etc/wazuh-indexer/certs/indexer-key.pem plugins.security.ssl.transport.pemtrustedcas_filepath: /etc/wazuh-indexer/certs/root-ca.pem plugins.security.ssl.http.enabled: true plugins.security.ssl.transport.enforce_hostname_verification: false plugins.security.ssl.transport.resolve_hostname: false plugins.security.authcz.admin_dn: - "CN=admin,OU=Wazuh,O=Wazuh,L=California,C=US" plugins.security.check_snapshot_restore_write_privileges: true plugins.security.enable_snapshot_restore_privilege: true plugins.security.nodes_dn: - "CN=wazuh-indexer,OU=Wazuh,O=Wazuh,L=California,C=US" #- "CN=node-2,OU=Wazuh,O=Wazuh,L=California,C=US" #- "CN=node-3,OU=Wazuh,O=Wazuh,L=California,C=US" plugins.security.restapi.roles_enabled: - "all_access" - "security_rest_api_access" plugins.security.system_indices.enabled: true plugins.security.system_indices.indices: [".plugins-ml-model", ".plugins-ml-task", ".opendistro-alerting-config", ".opendistro-alerting-alert*", ".opendistro-anomaly-results*", ".opendistro-anomaly-detector*", ".opendistro-anomaly-checkpoints", ".opendistro-anomaly-detection-state", ".opendistro-reports-*", ".opensearch-notifications-*", ".opensearch-notebooks", ".opensearch-observability", ".opendistro-asynchronous-search-response*", ".replication-metadata-store"] ### Option to allow Filebeat-oss 7.10.2 to work ### compatibility.override_main_response_version: true
Next, install the SSL certificates for Wazuh indexer.
In the Wazuh indexer configuration file, the certs directory is defined as /etc/wazuh-indexer/certs/.
Thus, create this directory;
sudo mkdir /etc/wazuh-indexer/certs/Copy the respective certificates that we generated before to the directory created above.
sudo cp wazuh-certificates/wazuh-indexer-key.pem /etc/wazuh-indexer/certs/indexer-key.pemsudo cp wazuh-certificates/wazuh-indexer.pem /etc/wazuh-indexer/certs/indexer.pemsudo cp wazuh-certificates/{root-ca.key,root-ca.pem} /etc/wazuh-indexer/certs/Similarly, copy the Admin certs;
sudo cp wazuh-certificates/{admin-key.pem,admin.pem} /etc/wazuh-indexer/certs/Update the permissions and ownership of the certificate files.
sudo chmod 500 /etc/wazuh-indexer/certssudo find /etc/wazuh-indexer/certs -type f -exec sudo chmod 400 {} \;sudo chown -R wazuh-indexer: /etc/wazuh-indexer/certsIf you are running multiple nodes, be sure to copy certs accordingly!
Running Wazuh Indexer
At this point, you can now start and enable Wazuh Indexer to run on system boot.
sudo systemctl enable --now wazuh-indexerYou can check status;
systemctl status wazuh-indexerOr logs;
sudo journalctl -f -u wazuh-indexerMar 23 19:54:44 noble-numbat systemd[1]: Starting wazuh-indexer.service - Wazuh-indexer... Mar 23 19:54:45 noble-numbat systemd-entrypoint[3816]: WARNING: A terminally deprecated method in java.lang.System has been called Mar 23 19:54:45 noble-numbat systemd-entrypoint[3816]: WARNING: System::setSecurityManager has been called by org.opensearch.bootstrap.OpenSearch (file:/usr/share/wazuh-indexer/lib/opensearch-2.8.0.jar) Mar 23 19:54:45 noble-numbat systemd-entrypoint[3816]: WARNING: Please consider reporting this to the maintainers of org.opensearch.bootstrap.OpenSearch Mar 23 19:54:45 noble-numbat systemd-entrypoint[3816]: WARNING: System::setSecurityManager will be removed in a future release Mar 23 19:54:46 noble-numbat systemd-entrypoint[3816]: WARNING: A terminally deprecated method in java.lang.System has been called Mar 23 19:54:46 noble-numbat systemd-entrypoint[3816]: WARNING: System::setSecurityManager has been called by org.opensearch.bootstrap.Security (file:/usr/share/wazuh-indexer/lib/opensearch-2.8.0.jar) Mar 23 19:54:46 noble-numbat systemd-entrypoint[3816]: WARNING: Please consider reporting this to the maintainers of org.opensearch.bootstrap.Security Mar 23 19:54:46 noble-numbat systemd-entrypoint[3816]: WARNING: System::setSecurityManager will be removed in a future release Mar 23 19:54:51 noble-numbat systemd[1]: Started wazuh-indexer.service - Wazuh-indexer.
Similarly, ports 9200/9300 TCP should now be opened.
Initialize Wazuh Indexer Cluster
You can then initialize Wazuh Indexer cluster once it is up and running. This ensures that the SSL certificates are loaded well.
Also, you can only run the initialization ONLY once!
sudo /usr/share/wazuh-indexer/bin/indexer-security-init.shSample initialization output;
**************************************************************************
** This tool will be deprecated in the next major release of OpenSearch **
** https://github.com/opensearch-project/security/issues/1755           **
**************************************************************************
Security Admin v7
Will connect to 127.0.0.1:9200 ... done
Connected as "CN=admin,OU=Wazuh,O=Wazuh,L=California,C=US"
OpenSearch Version: 2.8.0
Contacting opensearch cluster 'opensearch' and wait for YELLOW clusterstate ...
Clustername: wazuh-cluster
Clusterstate: GREEN
Number of nodes: 1
Number of data nodes: 1
.opendistro_security index does not exists, attempt to create it ... done (0-all replicas)
Populate config from /etc/wazuh-indexer/opensearch-security/
Will update '/config' with /etc/wazuh-indexer/opensearch-security/config.yml
   SUCC: Configuration for 'config' created or updated
Will update '/roles' with /etc/wazuh-indexer/opensearch-security/roles.yml
   SUCC: Configuration for 'roles' created or updated
Will update '/rolesmapping' with /etc/wazuh-indexer/opensearch-security/roles_mapping.yml
   SUCC: Configuration for 'rolesmapping' created or updated
Will update '/internalusers' with /etc/wazuh-indexer/opensearch-security/internal_users.yml
   SUCC: Configuration for 'internalusers' created or updated
Will update '/actiongroups' with /etc/wazuh-indexer/opensearch-security/action_groups.yml
   SUCC: Configuration for 'actiongroups' created or updated
Will update '/tenants' with /etc/wazuh-indexer/opensearch-security/tenants.yml
   SUCC: Configuration for 'tenants' created or updated
Will update '/nodesdn' with /etc/wazuh-indexer/opensearch-security/nodes_dn.yml
   SUCC: Configuration for 'nodesdn' created or updated
Will update '/whitelist' with /etc/wazuh-indexer/opensearch-security/whitelist.yml
   SUCC: Configuration for 'whitelist' created or updated
Will update '/audit' with /etc/wazuh-indexer/opensearch-security/audit.yml
   SUCC: Configuration for 'audit' created or updated
Will update '/allowlist' with /etc/wazuh-indexer/opensearch-security/allowlist.yml
   SUCC: Configuration for 'allowlist' created or updated
SUCC: Expected 10 config types for node {"updated_config_types":["allowlist","tenants","rolesmapping","nodesdn","audit","roles","whitelist","internalusers","actiongroups","config"],"updated_config_size":10,"message":null} is 10 (["allowlist","tenants","rolesmapping","nodesdn","audit","roles","whitelist","internalusers","actiongroups","config"]) due to: null
Done with success
Check the status of the cluster;
sudo curl https://<IP-or-indexer-hostname>:9200 -u admin --cacert /etc/wazuh-indexer/certs/indexer.pemWhere <IP-or-indexer-hostname> is or name of IP address or Indexer name defined in config.yml file used to generate SSL certs.
Authenticate to Wazuh Indexer using admin/admin credentials.
Enter host password for user 'admin':
{
  "name" : "wazuh-indexer",
  "cluster_name" : "wazuh-cluster",
  "cluster_uuid" : "8UdoUs1DTR-QLvSKK5d4Yg",
  "version" : {
    "number" : "7.10.2",
    "build_type" : "rpm",
    "build_hash" : "db90a415ff2fd428b4f7b3f800a51dc229287cb4",
    "build_date" : "2023-06-03T06:24:25.112415503Z",
    "build_snapshot" : false,
    "lucene_version" : "9.6.0",
    "minimum_wire_compatibility_version" : "7.10.0",
    "minimum_index_compatibility_version" : "7.0.0"
  },
  "tagline" : "The OpenSearch Project: https://opensearch.org/"
}
Install Wazuh Server on Ubuntu 24.04
Installing Wazuh server and Filebeat
Next, install Wazuh server using the command below. Remember we already have the Wazuh repository in place.
Filebeat is required to collect the event alert data from Wazuh manager to push them to the indexer.
sudo apt install wazuh-manager filebeatStart and enable Wazuh manager to run on system boot;
sudo systemctl enable --now wazuh-managerConfigure Filebeat
Filebeat has to be configured to collect the Wazuh event alert data and push them to indexer.
Update Filebeat configuration using Wazuh Filebeat template configuration file;
sudo wget -qO /etc/filebeat/filebeat.yml https://packages.wazuh.com/4.7/tpl/wazuh/filebeat/filebeat.ymlThe Wazuh filebeat template configuration file look like (we have updated the output host IP from 127.0.0.1 (default) to our Wazuh server IP, 192.168.56.111.
Similarly, we have updated Wazuh credentials to default admin/admin.
sudo cat /etc/filebeat/filebeat.yml# Wazuh - Filebeat configuration file
output.elasticsearch:
hosts: ["192.168.56.111:9200"]
protocol: https
username: admin
password: admin
ssl.certificate_authorities:
- /etc/filebeat/certs/root-ca.pem
ssl.certificate: "/etc/filebeat/certs/filebeat.pem"
ssl.key: "/etc/filebeat/certs/filebeat-key.pem"
setup.template.json.enabled: true
setup.template.json.path: '/etc/filebeat/wazuh-template.json'
setup.template.json.name: 'wazuh'
setup.ilm.overwrite: true
setup.ilm.enabled: false
filebeat.modules:
- module: wazuh
alerts:
enabled: true
archives:
enabled: false
logging.level: info
logging.to_files: true
logging.files:
path: /var/log/filebeat
name: filebeat
keepfiles: 7
permissions: 0644
logging.metrics.enabled: false
seccomp:
default_action: allow
syscalls:
- action: allow
names:
- rseq
You need to update the output host name/IP to the IP address or hostname used for Wazuh server in the config.yml used in generating the SSL certs.
Next, copy the server certs and name them as filebeat certs. Also copy the root CA cert.
sudo mkdir /etc/filebeat/certssudo cp wazuh-certificates/root-ca.pem /etc/filebeat/certs/sudo cp wazuh-certificates/wazuh-server-key.pem /etc/filebeat/certs/filebeat-key.pemsudo cp wazuh-certificates/wazuh-server.pem /etc/filebeat/certs/filebeat.pemUpdate the certificate permissions;
sudo chmod 500 /etc/filebeat/certssudo find /etc/filebeat/certs -type f -exec sudo chmod 400 {} \;Install Filebeat Wazuh-Indexer Template and Module
Install the template used by Filebeat to write the Wazuh alerts to Wazuh-indexer.
sudo wget -qO /etc/filebeat/wazuh-template.json https://raw.githubusercontent.com/wazuh/wazuh/v4.7.3/extensions/elasticsearch/7.x/wazuh-template.jsonUpdate the read permissions;
sudo chmod go+r /etc/filebeat/wazuh-template.jsonInstall Filebeat Wazuh module.
curl -s https://packages.wazuh.com/4.x/filebeat/wazuh-filebeat-0.3.tar.gz | sudo tar -xvz -C /usr/share/filebeat/moduleRunning Filebeat
Ensure Filebeat has no configuration syntax. Test using the command below;
sudo filebeat test configIt should print Config OK if all is good.
Also, test connection to Indexer;
sudo filebeat test outputEnsure everything is okay.
Then start Filebeat.
sudo systemctl enable --now filebeatInstall Wazuh Dashboard on Ubuntu 24.04
Install Wazuh Dashboard
Install Wazuh dashboard by running the command below;
sudo apt install wazuh-dashboardConfigure Wazuh Dashboard
The same way you configure Kibana to connect to Elasticsearch is the same way you configure Wazuh dashboard to connect to Wazuh indexer.
sudo vim /etc/wazuh-dashboard/opensearch_dashboards.ymlWe have only updated Wazuh indexer IP address;
server.host: 0.0.0.0
server.port: 443
opensearch.hosts: https://192.168.56.111:9200
opensearch.ssl.verificationMode: certificate
#opensearch.username:
#opensearch.password:
opensearch.requestHeadersAllowlist: ["securitytenant","Authorization"]
opensearch_security.multitenancy.enabled: false
opensearch_security.readonly_mode.roles: ["kibana_read_only"]
server.ssl.enabled: true
server.ssl.key: "/etc/wazuh-dashboard/certs/dashboard-key.pem"
server.ssl.certificate: "/etc/wazuh-dashboard/certs/dashboard.pem"
opensearch.ssl.certificateAuthorities: ["/etc/wazuh-dashboard/certs/root-ca.pem"]
uiSettings.overrides.defaultRoute: /app/wazuh
Install the Wazuh dashboard certs.
sudo mkdir etc/wazuh-dashboard/certsCopy the certs;
sudo cp wazuh-certificates/wazuh-dashboard-key.pem /etc/wazuh-dashboard/certs/dashboard-key.pemsudo cp wazuh-certificates/wazuh-dashboard.pem /etc/wazuh-dashboard/certs/dashboard.pemsudo cp wazuh-certificates/root-ca.pem /etc/wazuh-dashboard/certs/root-ca.pemUpdate the permissions and ownership of the certificate files.
sudo chmod 500 /etc/wazuh-dashboard/certssudo find /etc/wazuh-dashboard/certs -type f -exec sudo chmod 400 {} \;sudo chown -R wazuh-dashboard: /etc/wazuh-dashboard/certsRunning Wazuh Dashboard
Start and enable Wazuh dashboard to run on system boot;
sudo systemctl enable --now wazuh-dashboardCheck status;
systemctl status wazuh-dashboardor
sudo journalctl -n 50 -f -u wazuh-dashboard...
Mar 23 21:12:47 noble-numbat opensearch-dashboards[49860]: {"type":"log","@timestamp":"2024-03-23T21:12:47Z","tags":["info","http","server","OpenSearchDashboards"],"pid":49860,"message":"http server running at https://0.0.0.0:443"}Accessing Wazuh Dashboard Web Interface
You can now access your Wazuh dashboard from the web, https://<server-IP-or-hostname>
If firewall is running, ensure port 443/TCP is opened to allow external access.
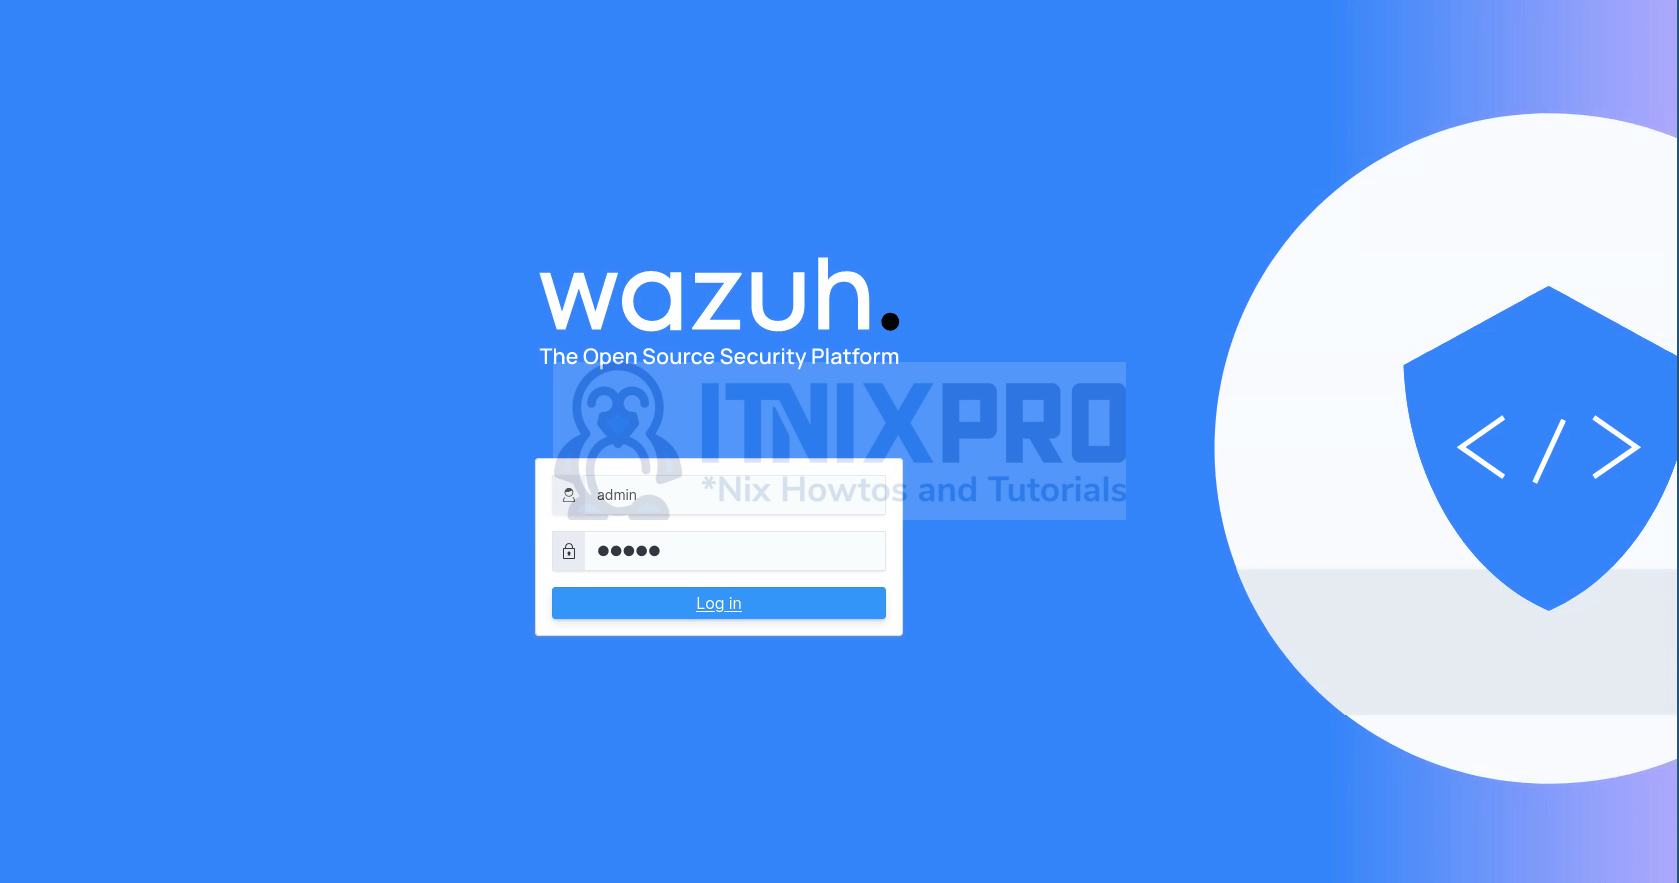
Accept the self-signed SSL warning and proceed to login page.
Default credentials are admin/admin.
You can change the default credentials using the script, /usr/share/wazuh-indexer/plugins/opensearch-security/tools/wazuh-passwords-tool.sh.
sudo /usr/share/wazuh-indexer/plugins/opensearch-security/tools/wazuh-passwords-tool.sh --helpWazuh dashboard. No Wazuh agents currently sending any data!
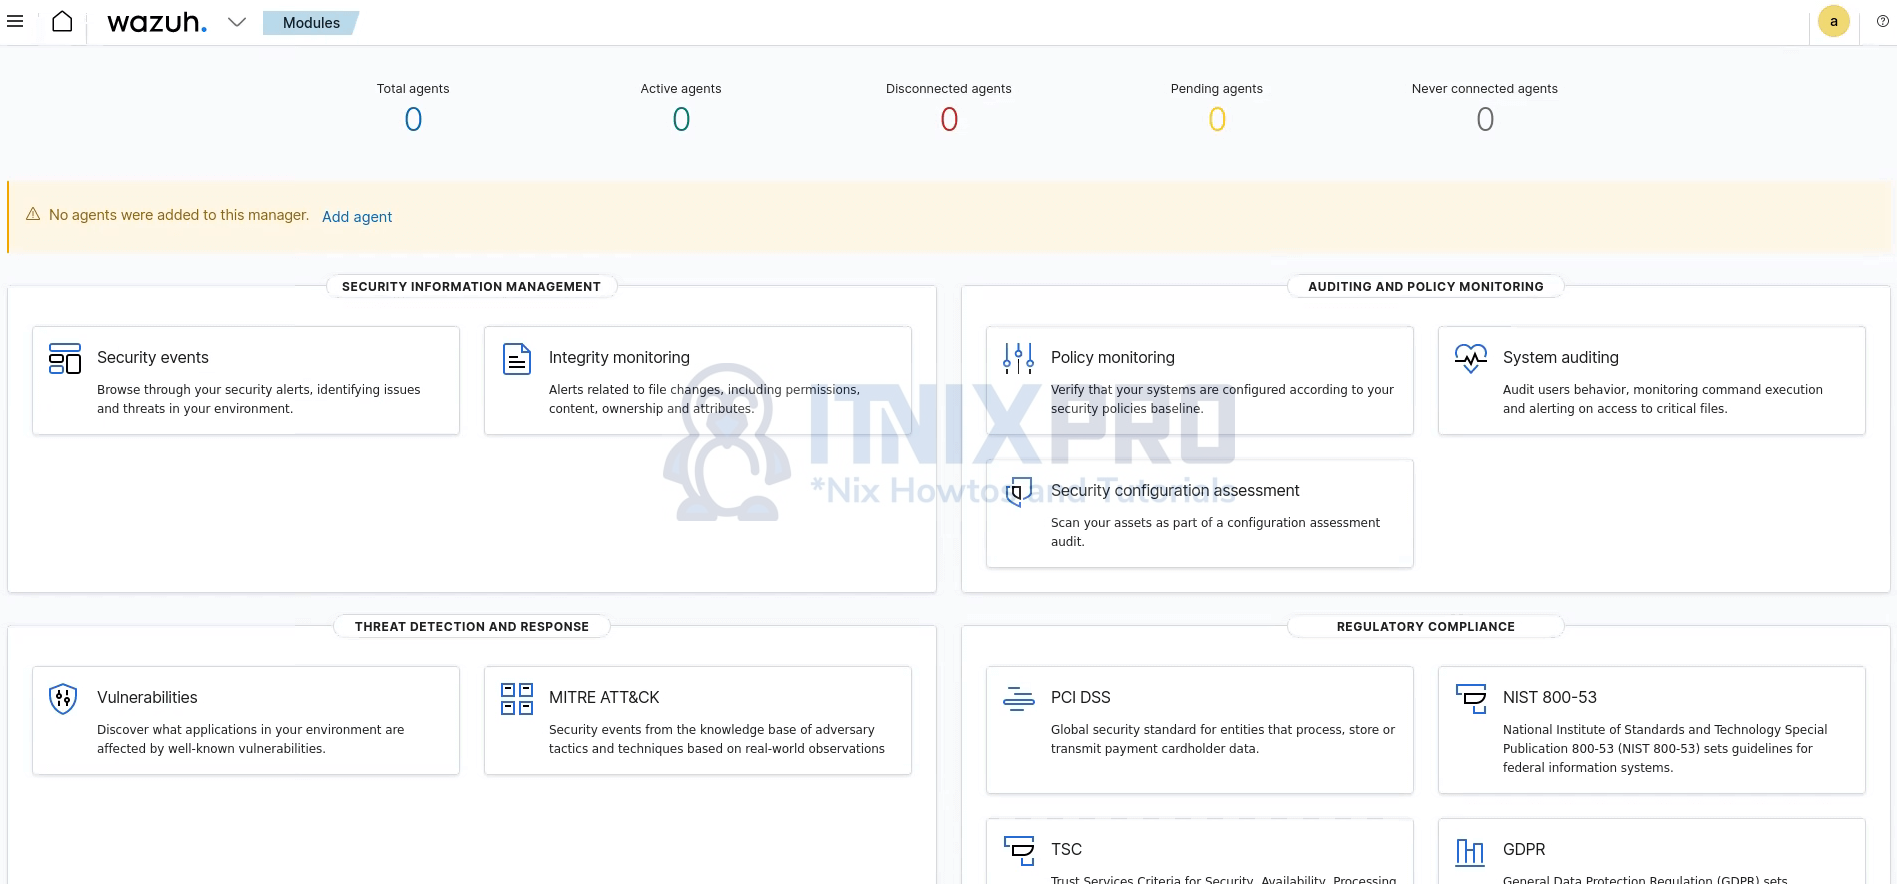
Wazuh is now installed with Wazuh Server, Indexer and Dashboard, all in one server, up and running.
Next, install Wazuh agents on your monitored end points to gain visibility into the security posture of those systems.