In this tutorial, you will learn how to configure Elastic Endpoint security malware detection and prevention. According to Elastic Security Overview, Elastic Security combines SIEM threat detection features with endpoint prevention and response capabilities that enables analysts to defend their organization from threats.
Configure Elastic Endpoint Security Malware Detection and Prevention
In order to configure Elastic Endpoint security malware detection and prevention;
- Install and setup Elastic Stack server
- Install and setup Elastic Fleet Server
- Enable and configure Elastic Defend Integration
- Load and Enable Elastic Prebuilt Security Detection Rules
- Install Elastic Agents on Remote Endpoints
- Configure Elastic Defend Malware Detection
- Configure Elastic Defend Malware Prevention
Install and setup Elastic Stack server
You can check our guides on how to install Elastic stack server.
Install ELK Stack on Ubuntu 22.04/Ubuntu 20.04/Rocky Linux/Debian
Install and setup Elastic Fleet Server
Follow the link below to learn how to setup Elastic Fleet server.
How to Setup ELK Stack Fleet Server
Enable and configure Elastic Defend Integration
This guide will take you through how to enable and configure Elastic Defend integration which enables you to protect your hosts with threat prevention, detection, and deep security data visibility.
Enable and Configure Elastic Defend Integration
Load and Enable Elastic Prebuilt Security Detection Rules
Elastic security ships with prebuilt security detection rules that you need to load and enable to utilize them.
To load the prebuilt rules, navigate to Kibana Security app menu > Manage > Rules > Load Elastic prebuilt rules and Timeline templates.
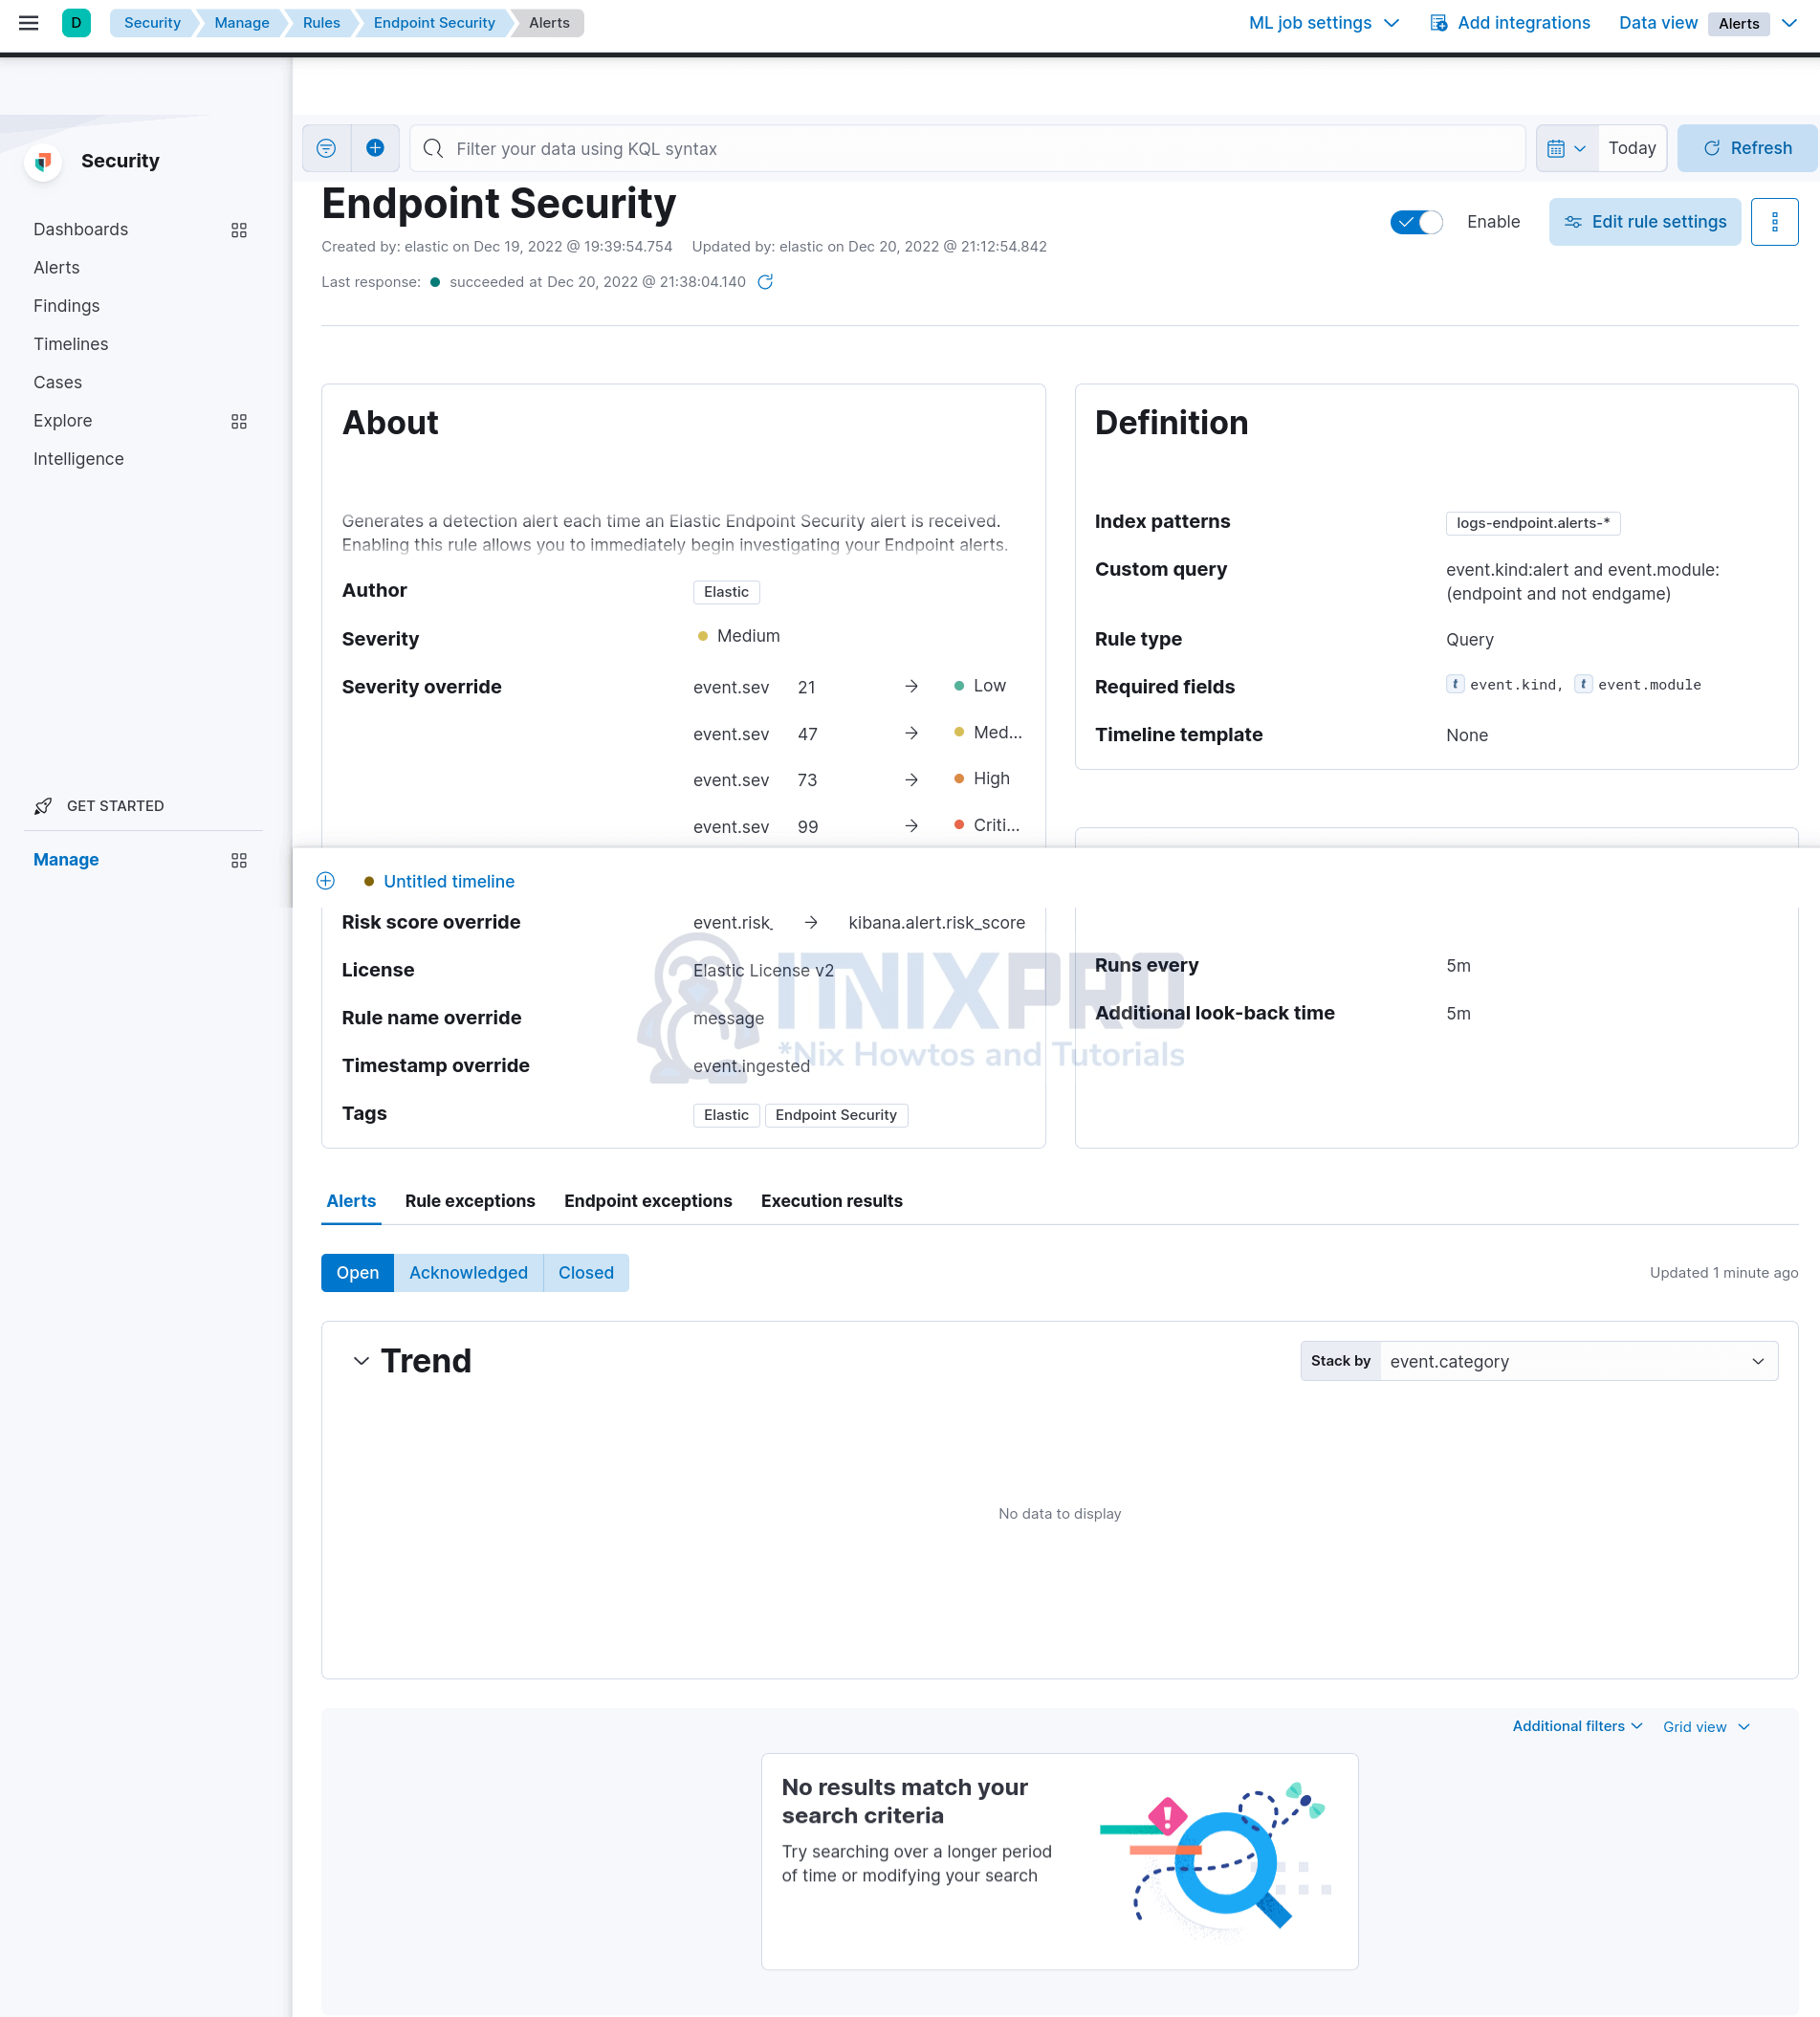
Once the rules are loaded, you can select which one to enable. Endpoint Security is the only rule that is enabled by default.
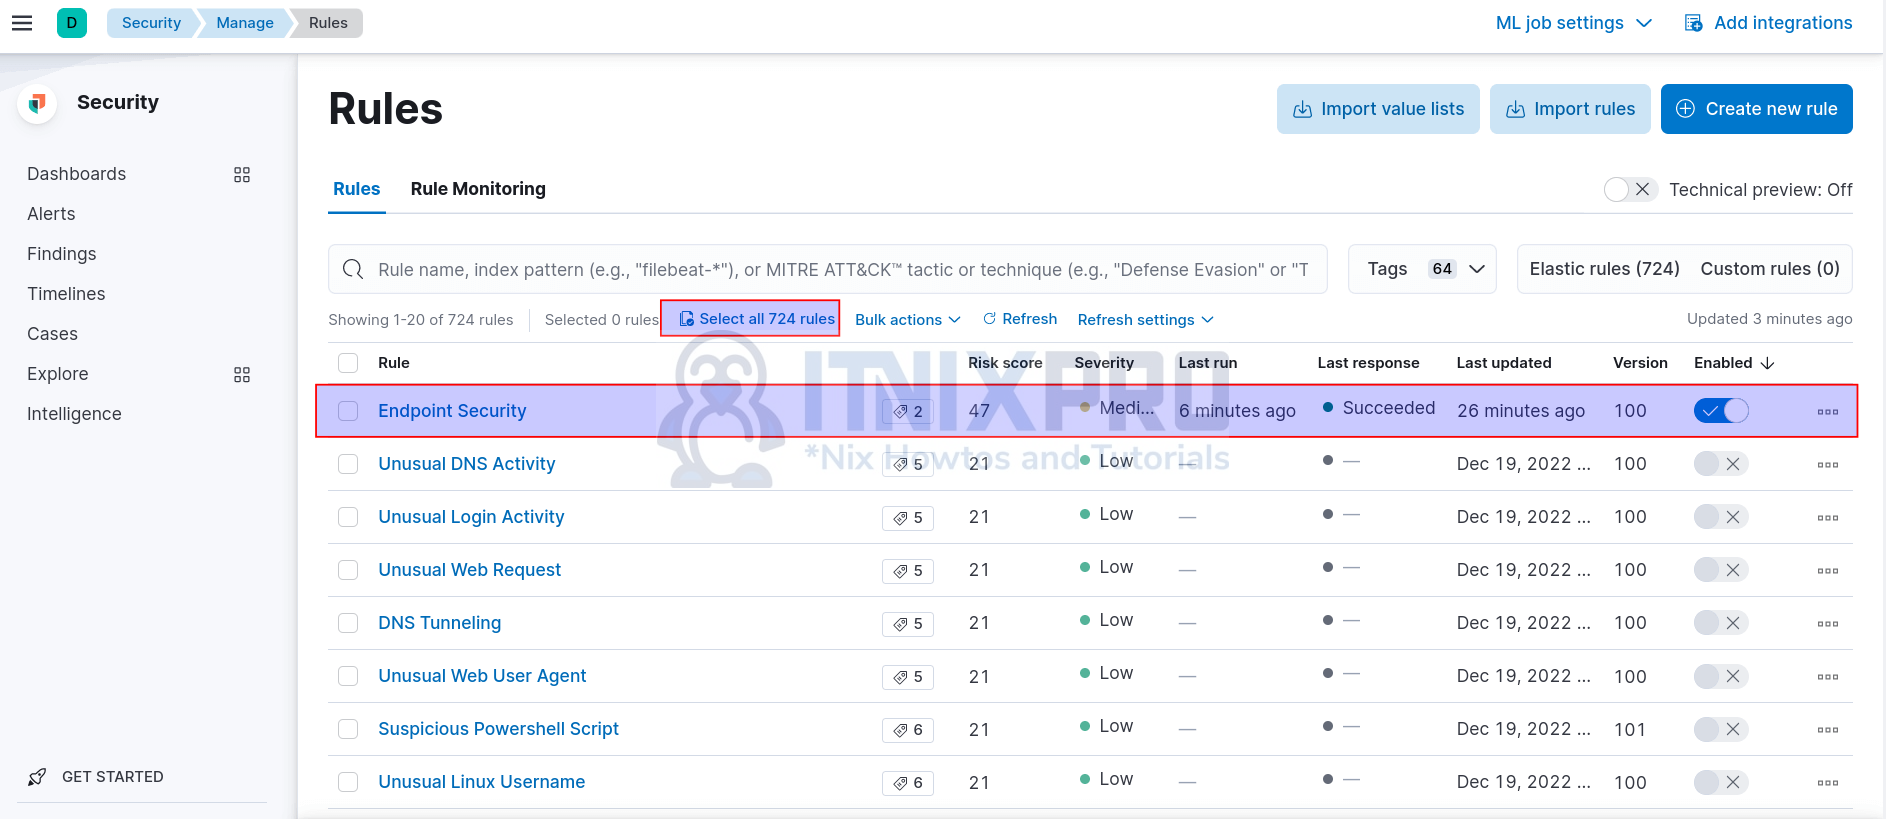
A total of 724 prebuilt rules are available.
Click Select all 724 rules > Bulk actions > Enable to enable these rules. Or select whichever you want!
Some of the rules may fail to enable as they require a premium license!
Mostly for our Malware detection and prevention, we will be utilizing Endpoint Security Prebuilt rules;
Install Elastic Agents on Remote Endpoints
You will need Elastic agents installed on the remote endpoints to enable you configure Elastic Endpoint security malware detection and prevention.
Elastic agents are required for shipping event data for analysis.
Install Elastic Agents on Windows Systems
Install Elastic Agents on Linux systems
Configure Elastic Endpoint Security Malware Detection and Prevention
Elastic Security has been built with anti-malware capabilities. Elastic agents collect processes, network, file, DNS, registry, DLL, driver loads event data and ship them to Elasticsearch indices. Armed with multiple detection rules that periodically searches Elasticsearch indices for suspicious activity, Elastic Defend can help you detect or prevent such activities. Alerts are also generated when ever a rule match is true.
So how can you configure Elastic Endpoint security malware detection and prevention?
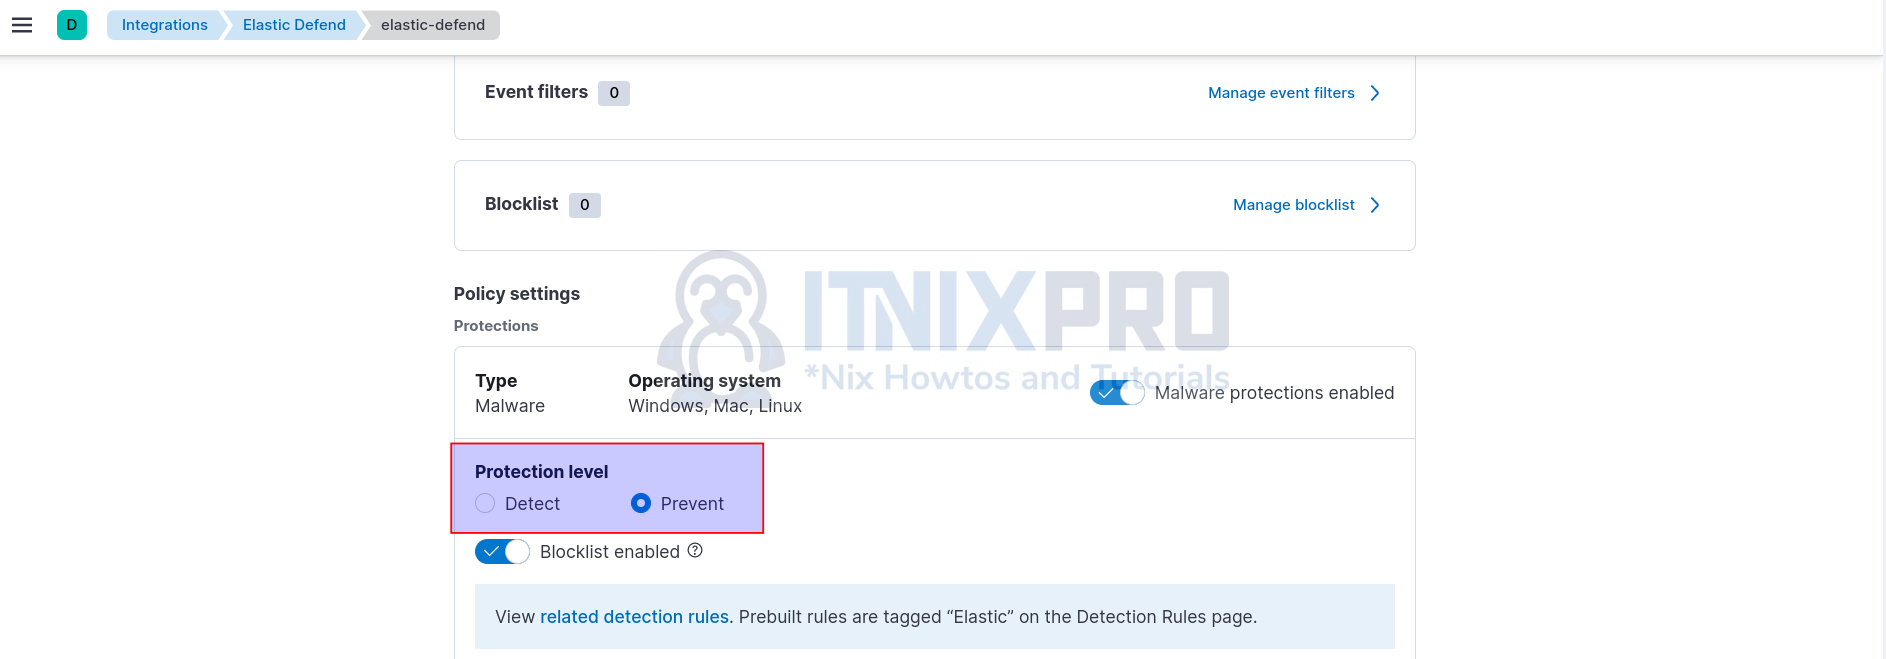
If you check Elastic Defend integration policy configuration; Management > Integrations > Elastic Defend > Integration Policies. Click on your policy name;
Under Policy settings, you see that the integration has two levels of malware protection; Detect and Prevent.
Configure Elastic Defend Malware Detection
In order to enable malware detection on Linux, Windows and Mac systems, set the Elastic defend integration policy malware protection level to Detect.
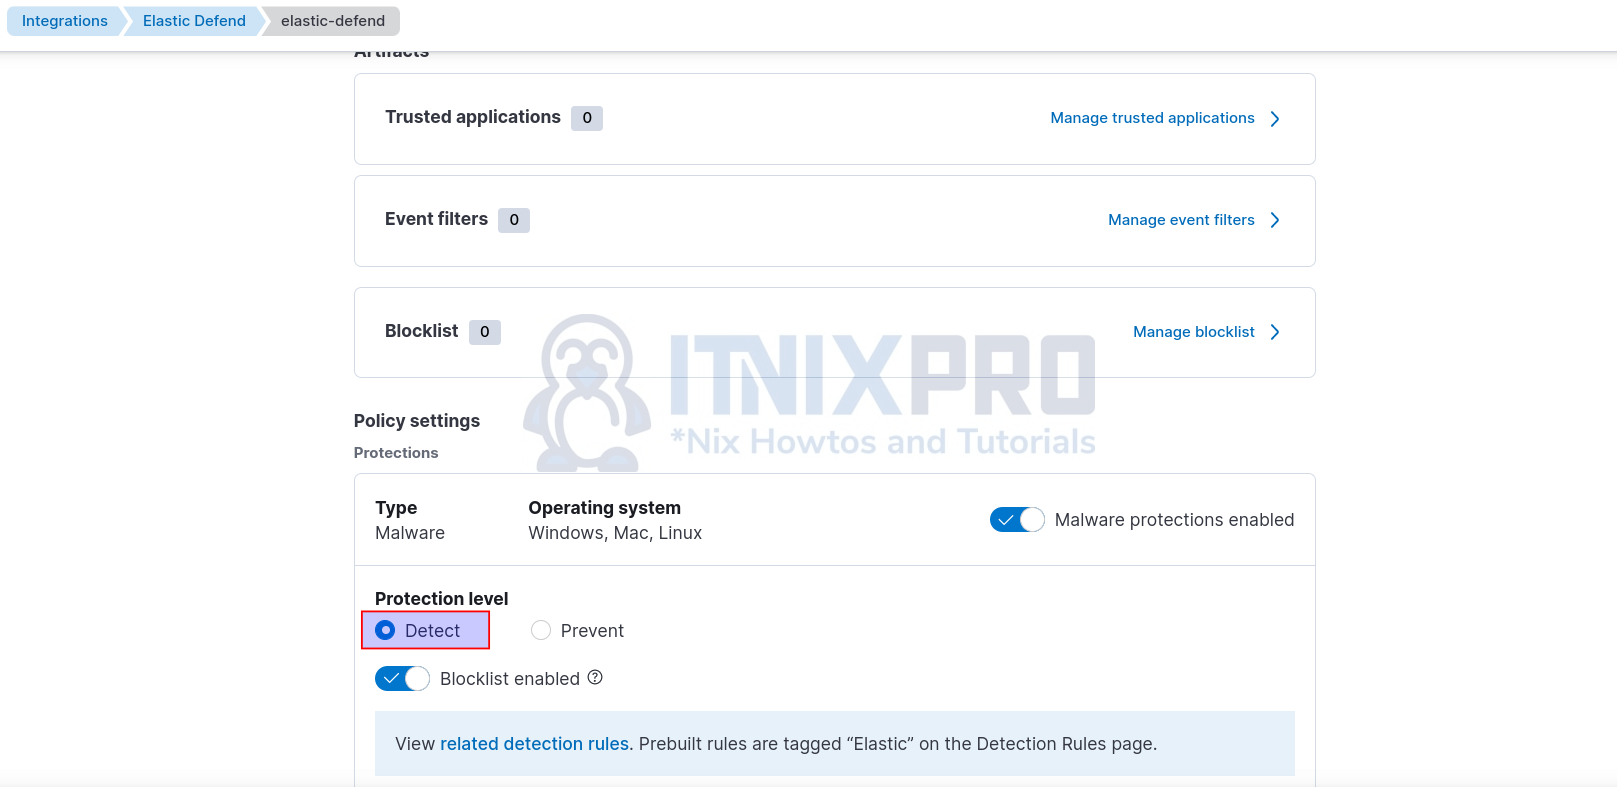
Other capabilities such as Ransomware, Memory Threat, malicious behavior, attack surface reduction requires a platinum license. We are using community license in this guide.
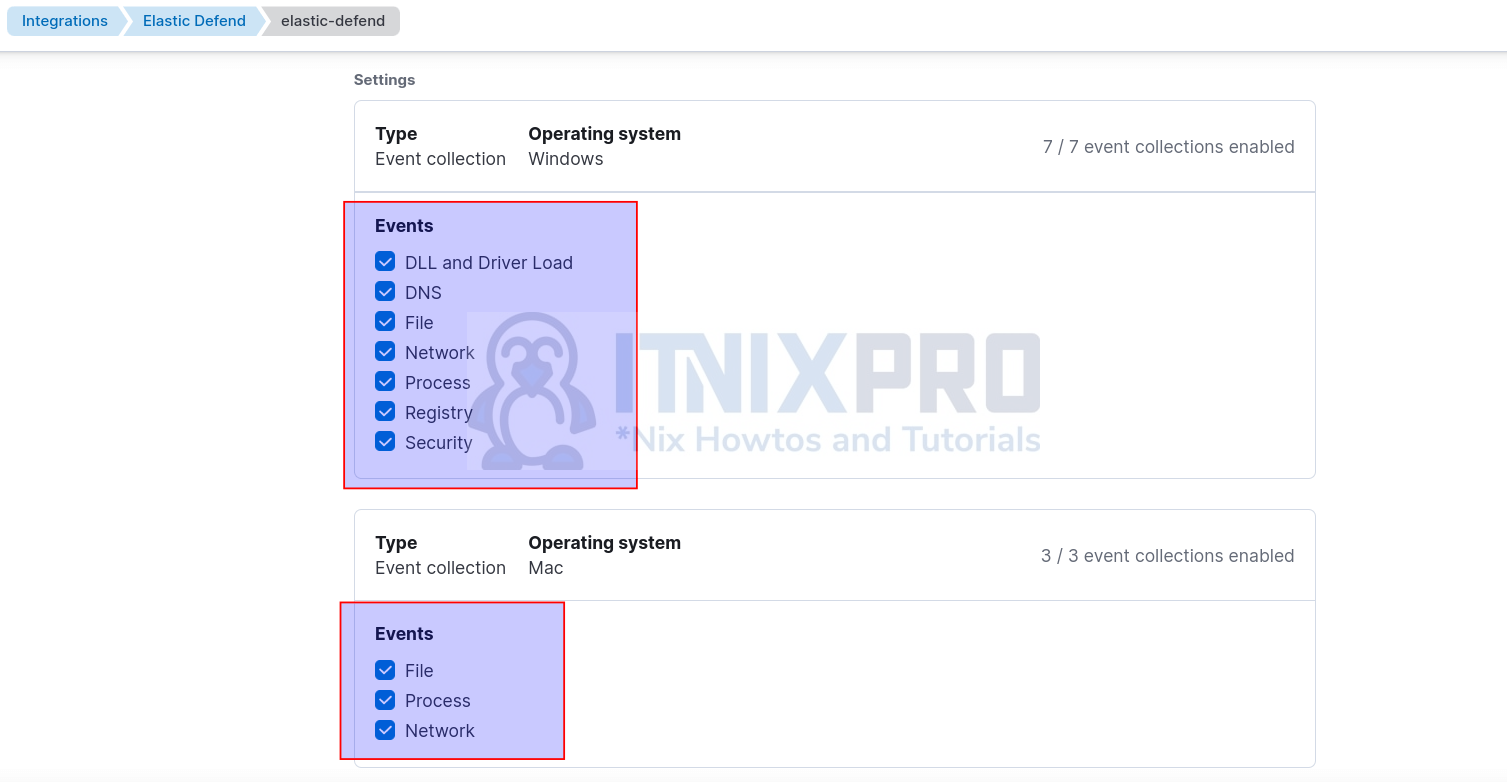
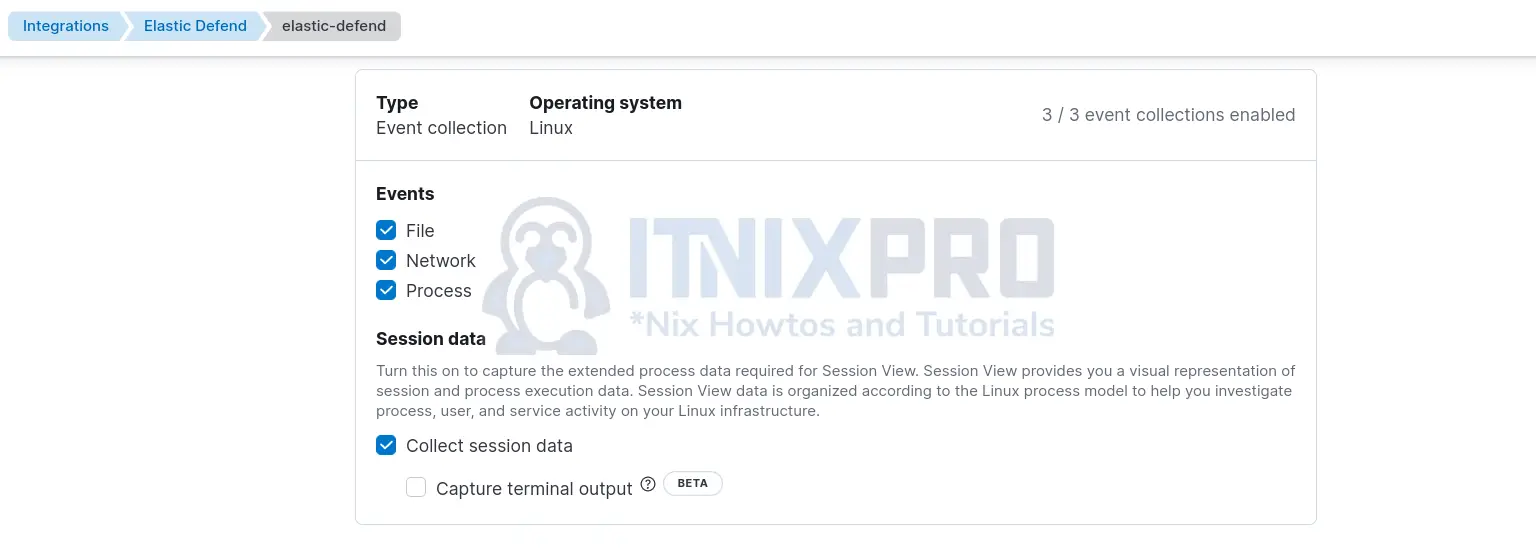
Similarly, define the types of per system event to collect from your remote end points.
- Windows and Mac systems;
- For Linux, you can include session data;
- If you want and really trust Elastic Endpoint security capabilities -:), you can register Elastic as an official Antivirus solution for Windows OS. This will also disable Windows Defender. I didn’t try this option though!
- Click Save Integration to save and apply the changes. The changes will be applied to the remote Elastic agents with this policy applied.
- In our demo, we have two agents with Elastic Defend policy applied;
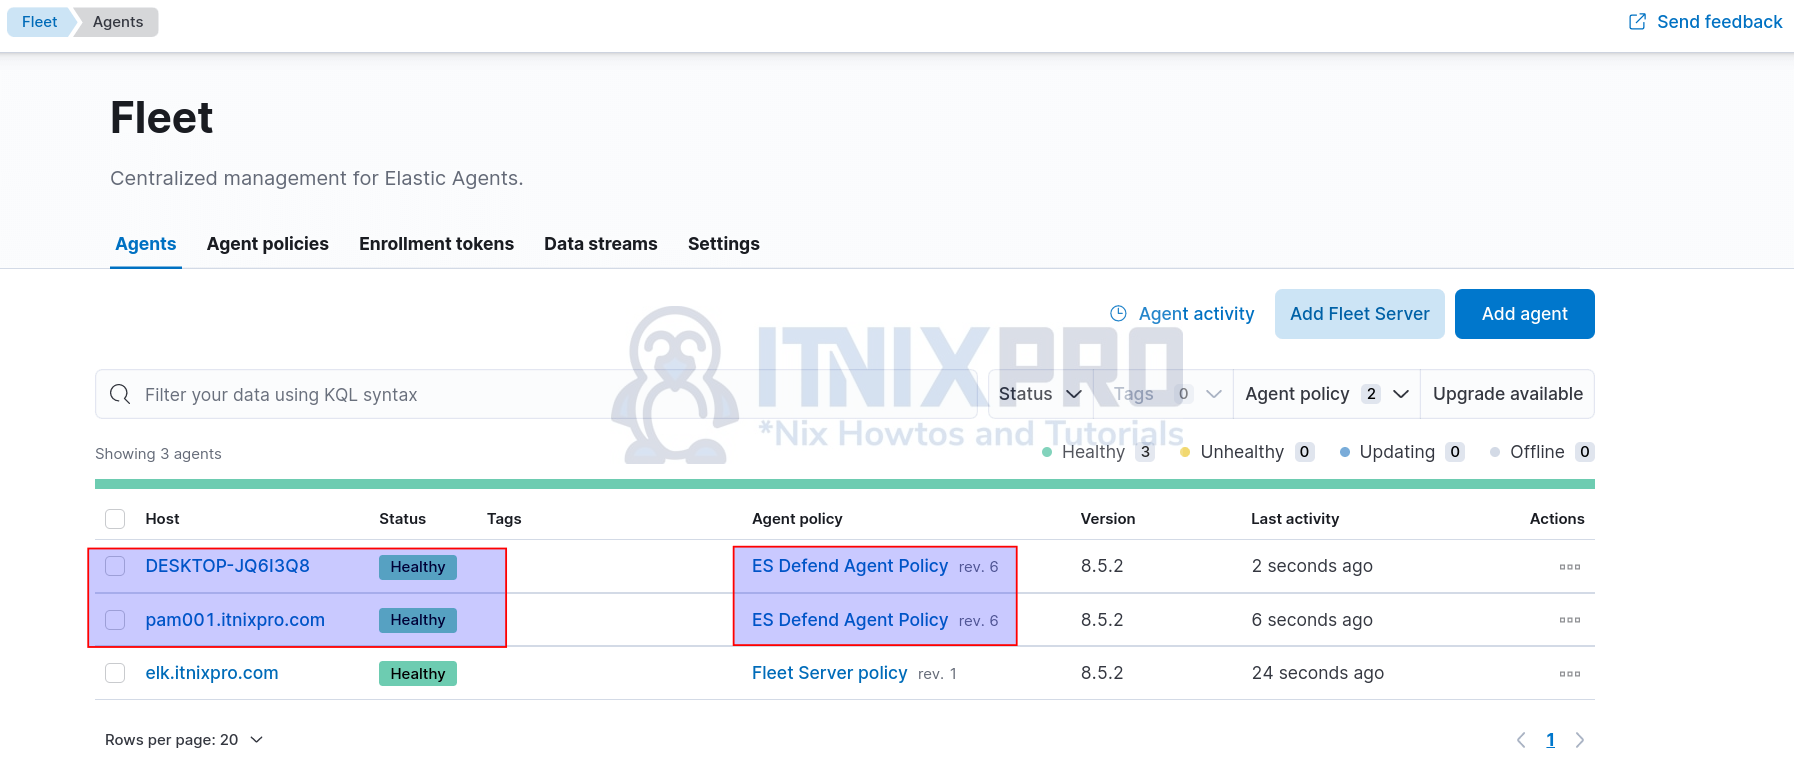
So at the moment, we have enabled Elastic Defend Malware Detection
How can we demonstrate the detection? Since we have both a Linux and a Windows systems enrolled into the Fleet server with Elastic Defend policies enabled, we can download sample malware files to these test systems just to confirm detection.
NOTE: Elastic Endpoint uses a machine learning model to detect/prevent malware. Thus, it wont be able to detect or prevent against malware in archived formats such as zip, tar, rar. Until you extract them, it may not be able to detect/prevent against them.
On Linux system with Elastic agent installed, we can use Eicar Anti-malware test file.
wget https://secure.eicar.org/eicar.com.txt -P /home/devadmin/DownloadsIf it is in a zip/rar/tar or any archive, extract them;
wget https://secure.eicar.org/eicar_com.zip -P /home/devadmin/Downloadscd ~/Downloads
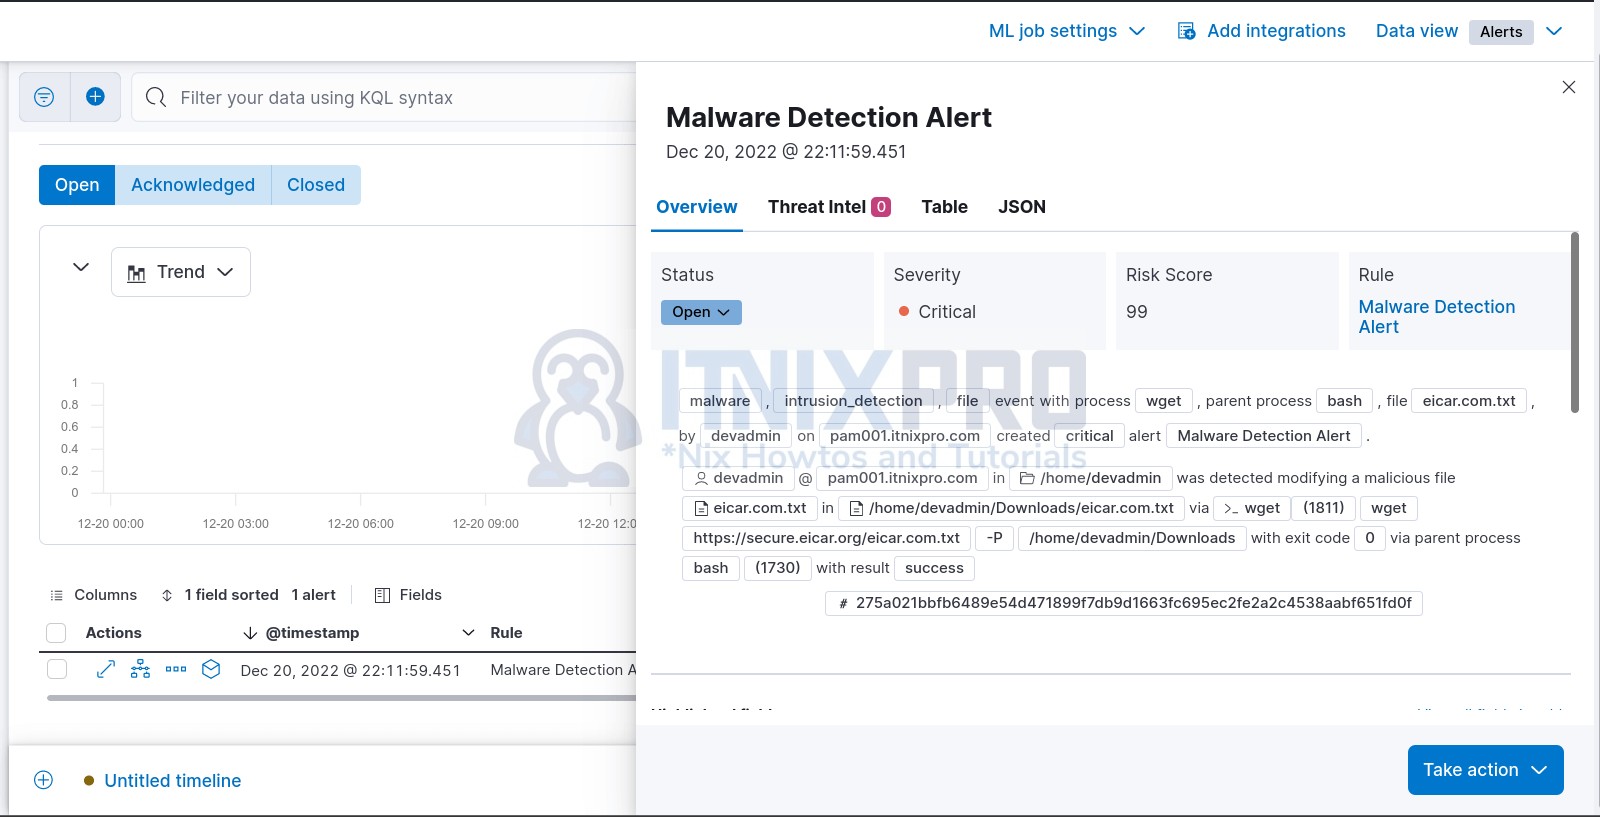
unzip eicar_com.zipYou should now see events under Security > Alerts.
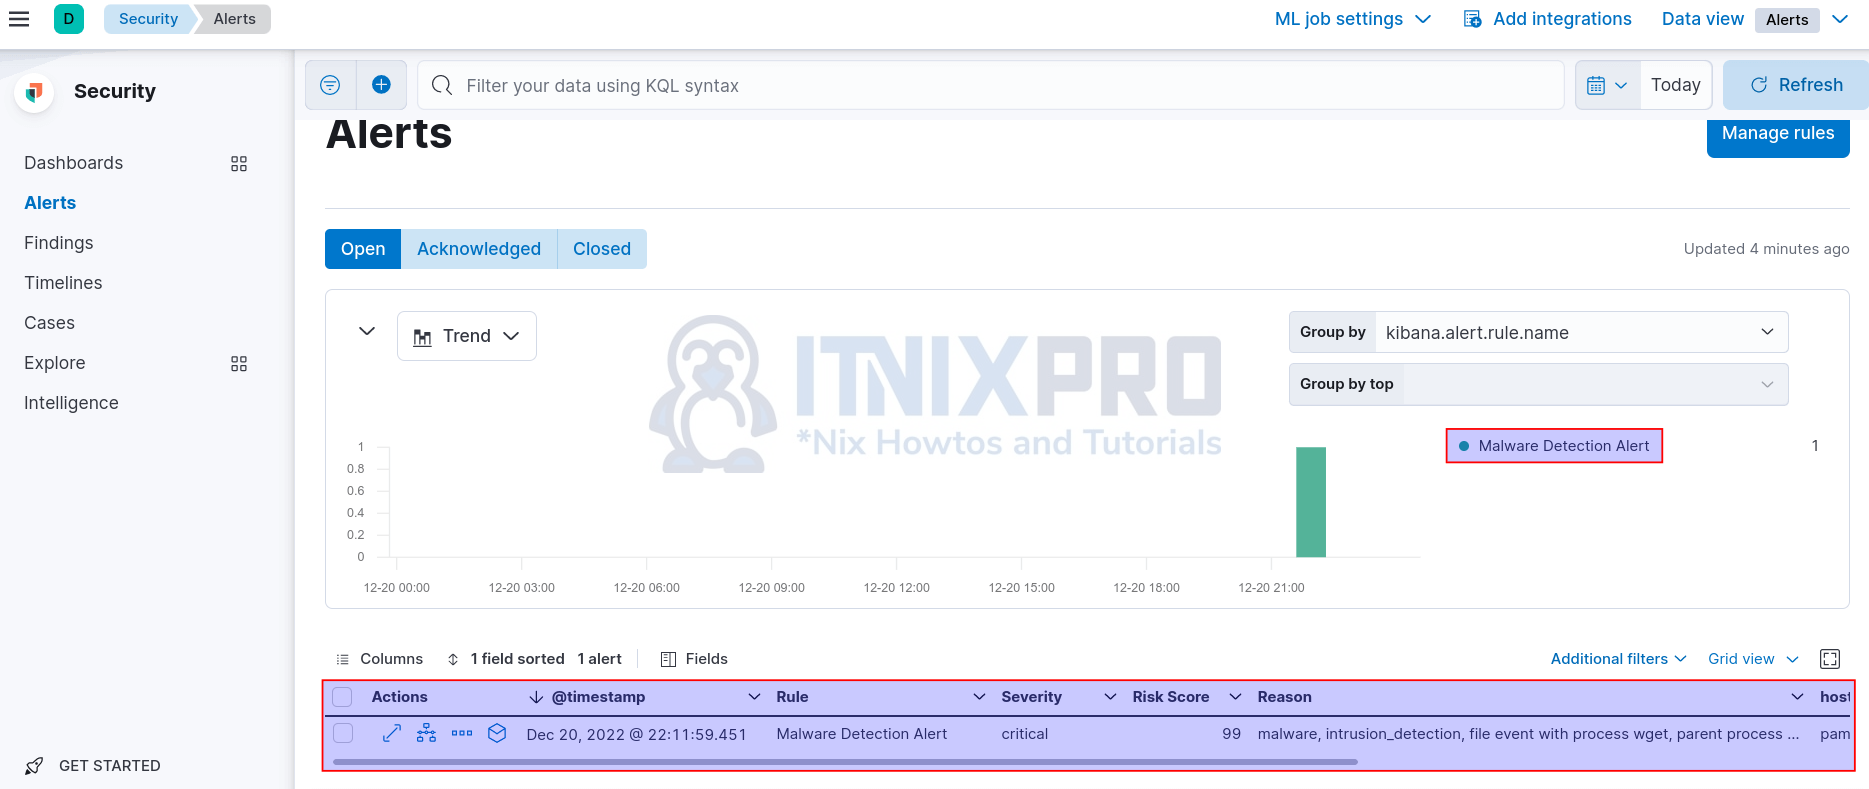
Click the arrow to expand and see more details about the alert.
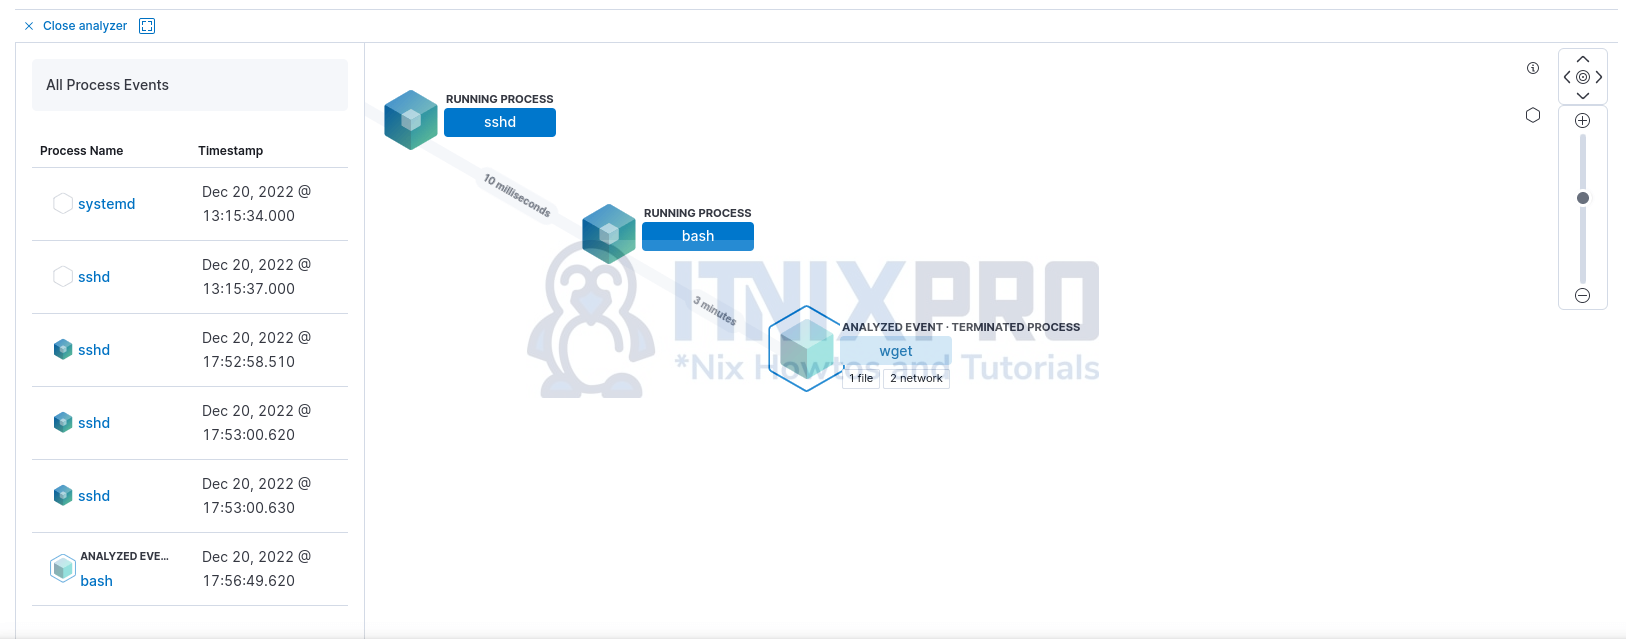
Click on the square box to analyze the alert from beginning to the end of the event.
To demonstrate malware detection on Windows systems, I will download a sample malware from MalwareBazaar for test purposes.
Of course, we will temporarily disable real time Virus and Threat detection on our test Windows 10 system.
Once the download is complete, extract the sample using 7zip.
Immediately you done extracting, Elastic Endpoint alert will pop up on your Windows system alerting you of the possible malware introduction into the system.
Similarly, the detection alerts should be on the Elastic Security.
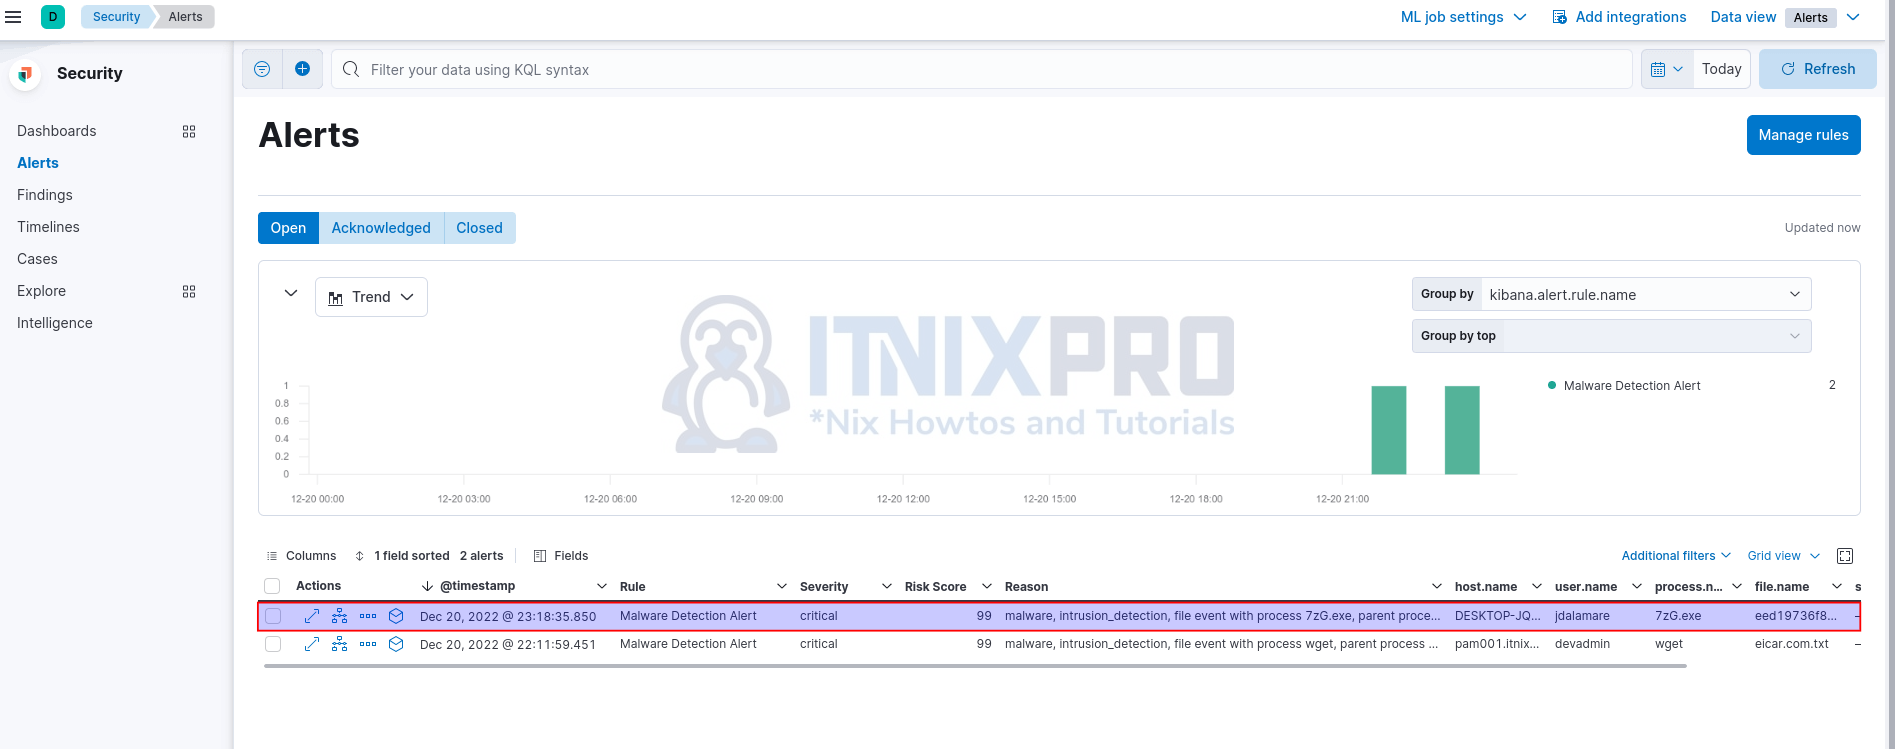
Expand to see more details;
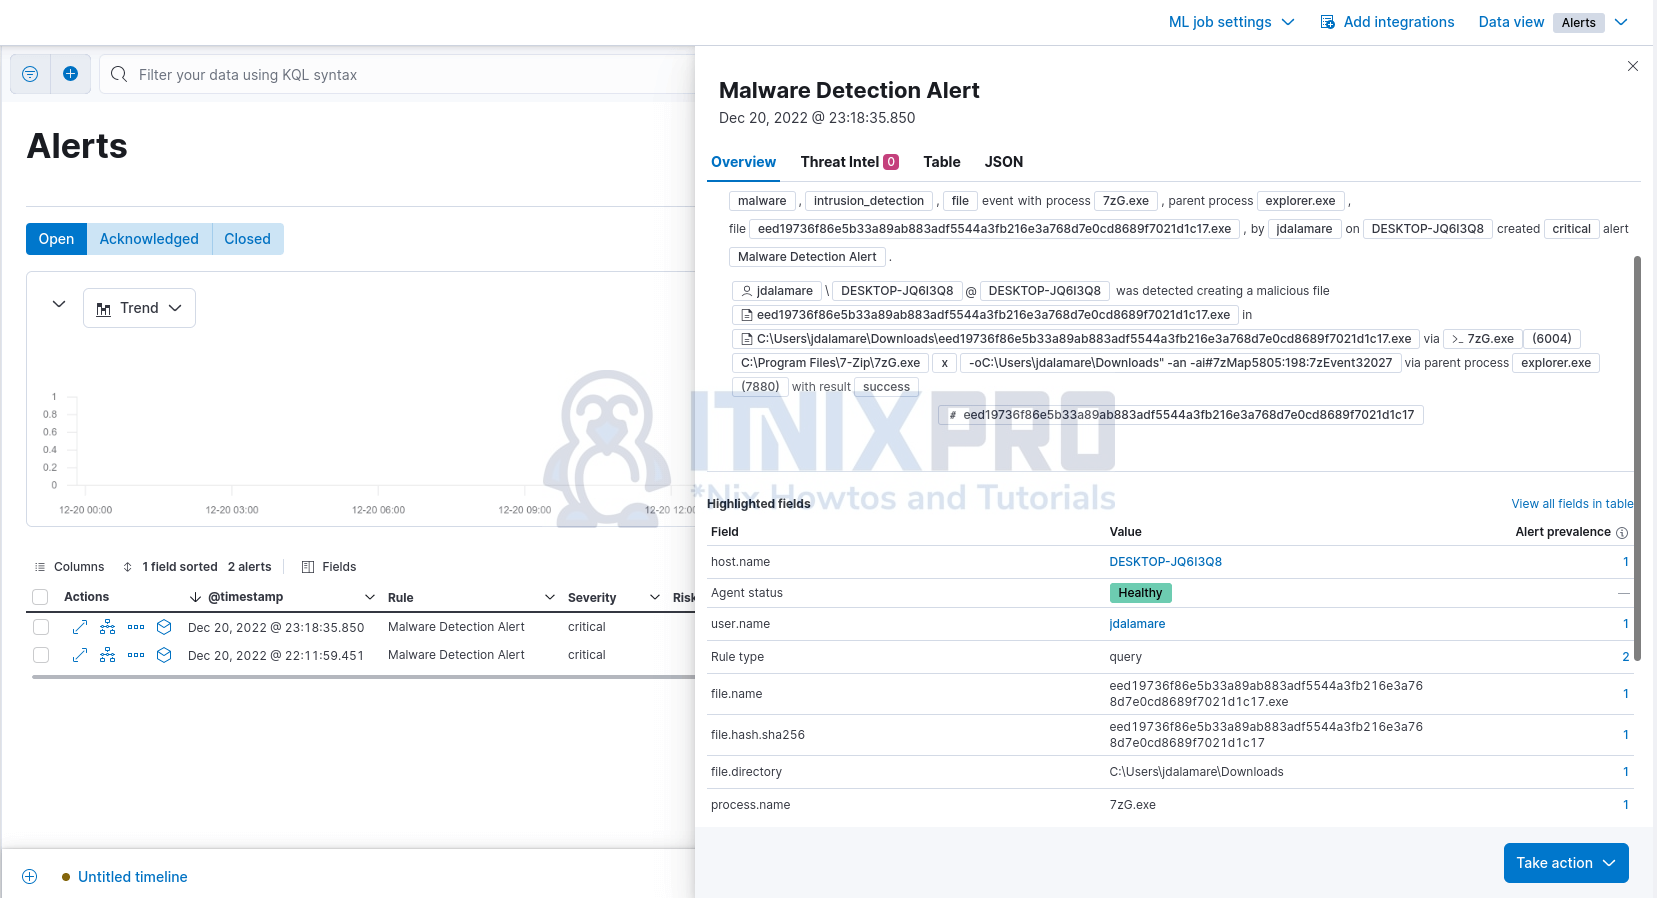
You can get the hash and check with VirusTotal.
Analyze the alert events;
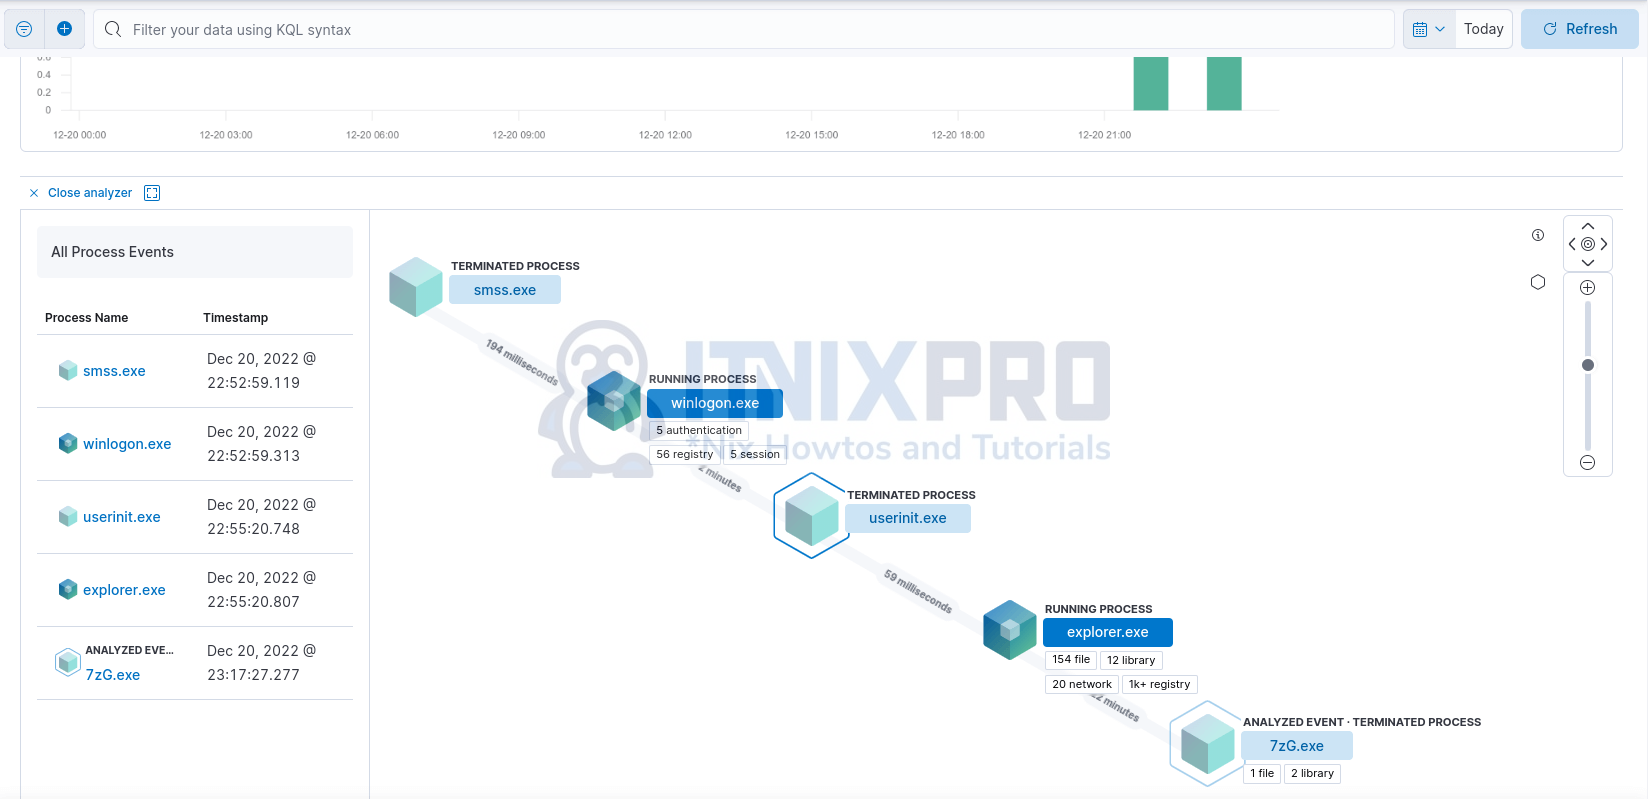
Click each step to see more details.
And that is it with Elastic Security malware detections! Good, isn’t it?
Configure Elastic Defend Malware Prevention
For malware prevention, edit the Elastic Defend integration policy and set the protection level to Prevent.
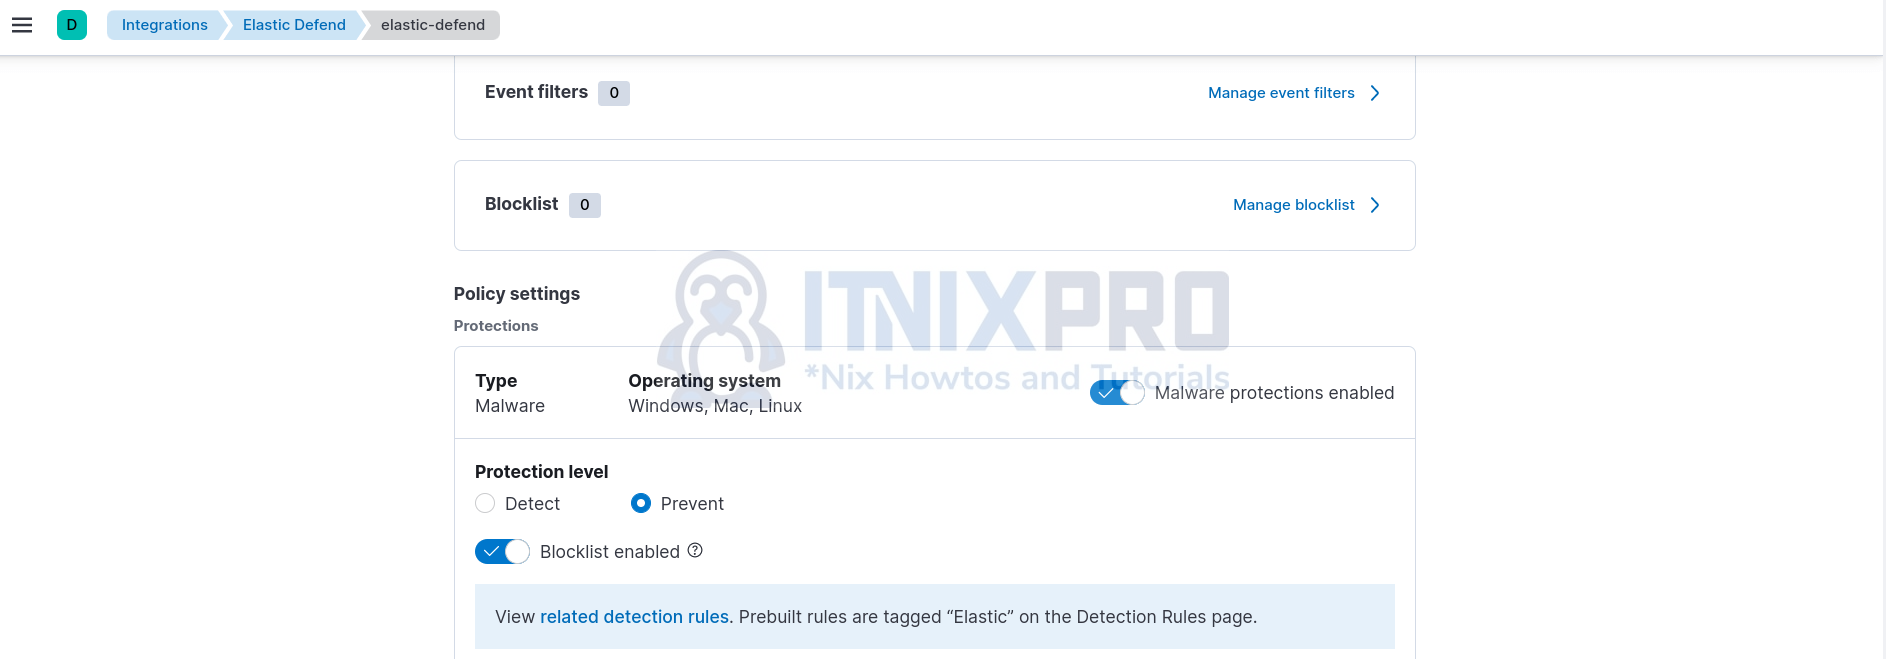
This will enforce mitigation against system attack by known malware.
For example, on Linux systems, if you download EICAR file again (you need to extract the archive), it will be deleted immediately.
Similarly, on Windows, any suspicious content will be deleted.
You will also see an alert “Malware Alert” Elastic Security prevented.
From the Alerts dashboard;
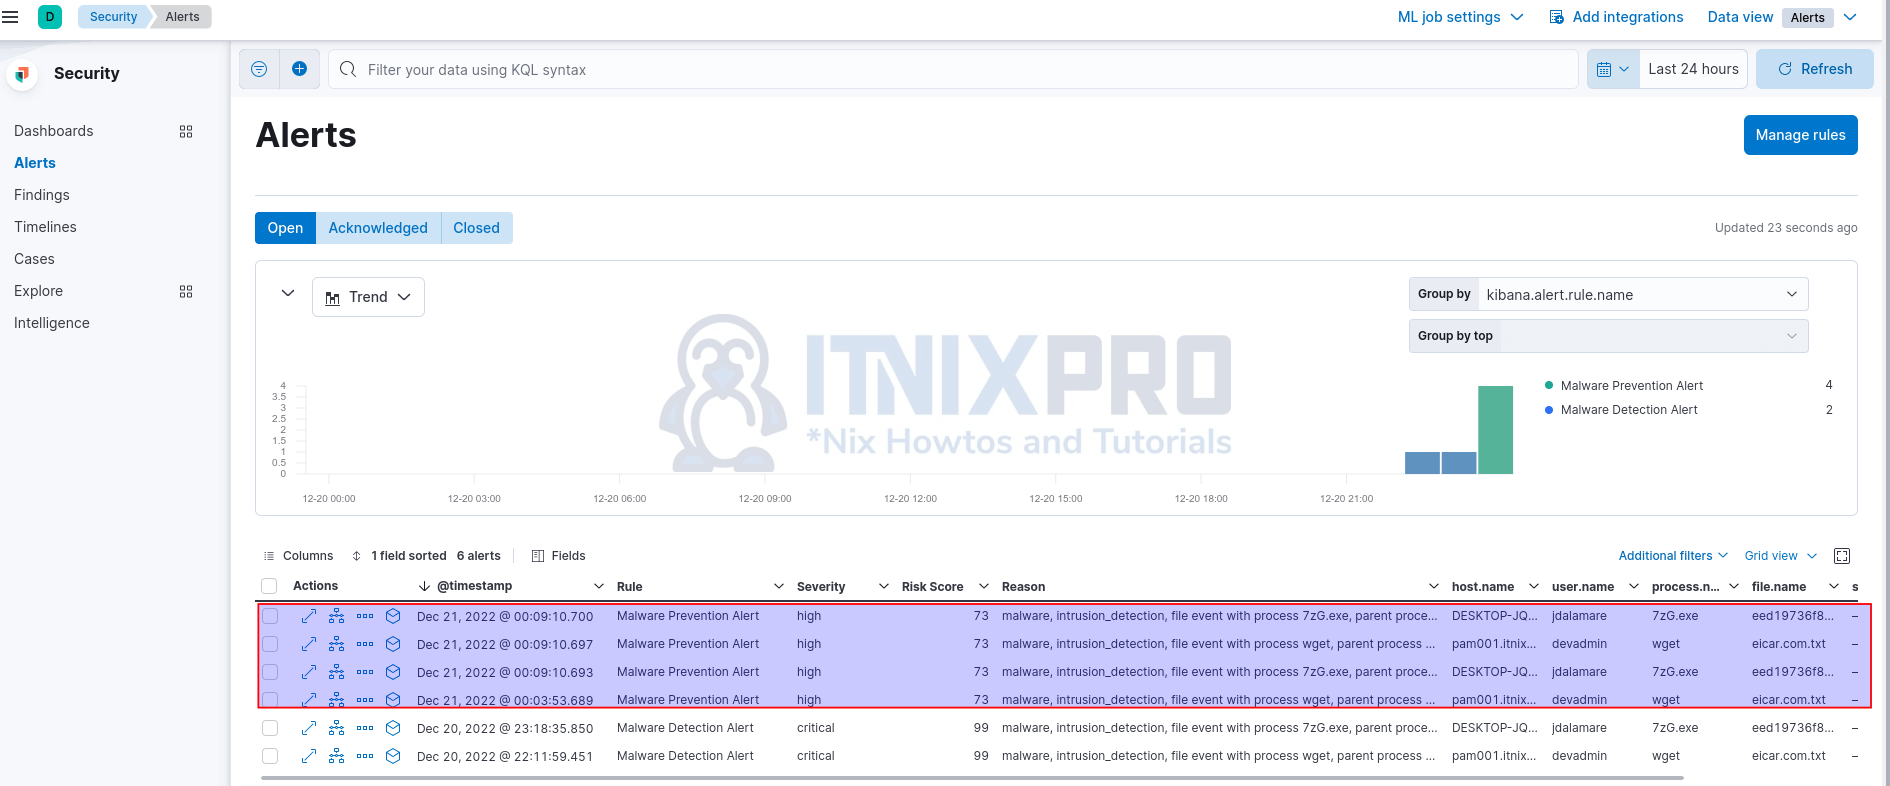
Expand to view alert details and click the square box to analyze the event.
That marks the end of our basic tutorial on how to configure Elastic Endpoint Security malware detection and prevention.

Great tutorial ! Thank you very much !