
This article will take you through how to install Hestia Control Panel on Debian 11. Hestia Control Panel is a robust, open-source web hosting control panel that can be used to manage websites, mail servers, DNS, and other web hosting functions from a single location. It’s built for speed, security, and reliability, and it can run on a server with limited resources. Hestia Control Panel provides a user-friendly web and command-line interface that makes it simple to deploy and administer web domains, mail accounts, and DNS zones.
How to Install Hestia Control Panel on Debian 11
- Update your system.
sudo apt update- Then set your host name.
sudo hostnamectl set-hostname {hostname here}- Next, open the hosts’ config file using the following command.
sudo nano /etc/hosts- Add your server domain e.g.
127.0.1.1 server.itnixpro.comSample
127.0.0.1       localhost
127.0.1.1       server.itnixpro.com

# The following lines are desirable for IPv6 capable hosts
::1     localhost ip6-localhost ip6-loopback
ff02::1 ip6-allnodes
ff02::2 ip6-allrouters
Download Hestia Control Panel Installer
- Run the command below to download the Hestia Control Panel installer script.
wget https://raw.githubusercontent.com/hestiacp/hestiacp/release/install/hst-install.sh- Grant necessary permission to the downloaded script.
sudo chmod 755 hst-install.shInstall Hestia Control Panel on Debian 11
- Next, run the following command to install it.
sudo bash hst-install.sh --forceIf you have LAMP stack already installed you will be prompted to remove conflicting packages, then the following prompts will appear during installation. Remember to copy your password before pressing any key to restart your server.
Sample output
              _   _           _   _        ____ ____
               | | | | ___  ___| |_(_) __ _ / ___|  _ \
               | |_| |/ _ \/ __| __| |/ _` | |   | |_) |
               |  _  |  __/\__ \ |_| | (_| | |___|  __/
               |_| |_|\___||___/\__|_|\__,_|\____|_|

                          Hestia Control Panel
                                  1.5.15
                            www.hestiacp.com

========================================================================

Thank you for downloading Hestia Control Panel! In a few moments,
we will begin installing the following components on your server:

   - NGINX Web / Proxy Server
   - Apache Web Server (as backend)
   - PHP-FPM Application Server
   - Bind DNS Server
   - Exim Mail Server + ClamAV + SpamAssassin
   - Dovecot POP3/IMAP Server
   - MariaDB Database Server
   - Vsftpd FTP Server
   - Firewall (iptables) + Fail2Ban Access Monitor

========================================================================


Would you like to continue with the installation? [Y/N]: y

Please use a valid emailadress (ex. [email protected]).
Please enter admin email address: [email protected]
Please enter FQDN hostname [server.itnixpro.com]:
Installation backup directory: /root/hst_install_backups/020620220430
Installation log file: /root/hst_install_backups/hst_install-020620220430.log

Adding required repositories to proceed with installation:

[ * ] NGINX
[ * ] PHP
[ * ] Apache2
[ * ] MariaDB
[ * ] Hestia Control Panel

Updating currently installed packages, please wait...|
The installer is now downloading and installing all required packages.
NOTE: This process may take 10 to 15 minutes to complete, please wait...
\

========================================================================

[ * ] Configuring system settings...
[ * ] Configuring Hestia Control Panel...
[ * ] Generating default self-signed SSL certificate...
[ * ] Adding SSL certificate to Hestia Control Panel...
[ * ] Enable SFTP jail...
[ * ] Configuring NGINX...
[ * ] Configuring Apache Web Server...
[ * ] Install  PHP 8.0...
[ * ] Configuring PHP 8.0...
[ * ] Configuring PHP...
[ * ] Configuring Vsftpd server...
[ * ] Configuring MariaDB database server...
[ * ] Installing phpMyAdmin version v5.1.4...
[ * ] Configuring Bind DNS server...
[ * ] Configuring Exim mail server...
[ * ] Configuring Dovecot POP/IMAP mail server...
[ * ] Installing ClamAV anti-virus definitions...-
[ * ] Configuring SpamAssassin...
[ * ] Configuring fail2ban access monitor...
[ * ] Install Roundcube...
[ * ] Configuring System IP...
[ * ] Installing remaining software updates...
[ * ] Configuring File Manager...
[ * ] Updating configuration files...
[ * ] Configuring PHPMailer...


====================================================================


Congratulations!

You have successfully installed Hestia Control Panel on your server.

Ready to get started? Log in using the following credentials:

    Admin URL:  https://197.232.128.95:8083
    Username:   admin
    Password:   myhX6svaXRE0J5NL

Thank you for choosing Hestia Control Panel to power your full stack web server,
we hope that you enjoy using it as much as we do!

Please feel free to contact us at any time if you have any questions,
or if you encounter any bugs or problems:

Documentation:  https://docs.hestiacp.com/
Forum:          https://forum.hestiacp.com/
Discord:        https://discord.gg/nXRUZch
GitHub:         https://www.github.com/hestiacp/hestiacp

Note: Automatic updates are enabled by default. If you would like to disable them,
please log in and navigate to Server > Updates to turn them off.

Help support the Hestia Control Panel project by donating via PayPal:
https://www.hestiacp.com/donate

--
--
Sincerely yours,
The Hestia Control Panel development team

Made with love & pride by the open-source community around the world.

[ ! ] IMPORTANT: The system will now reboot to complete the installation process.
Press any key to continue
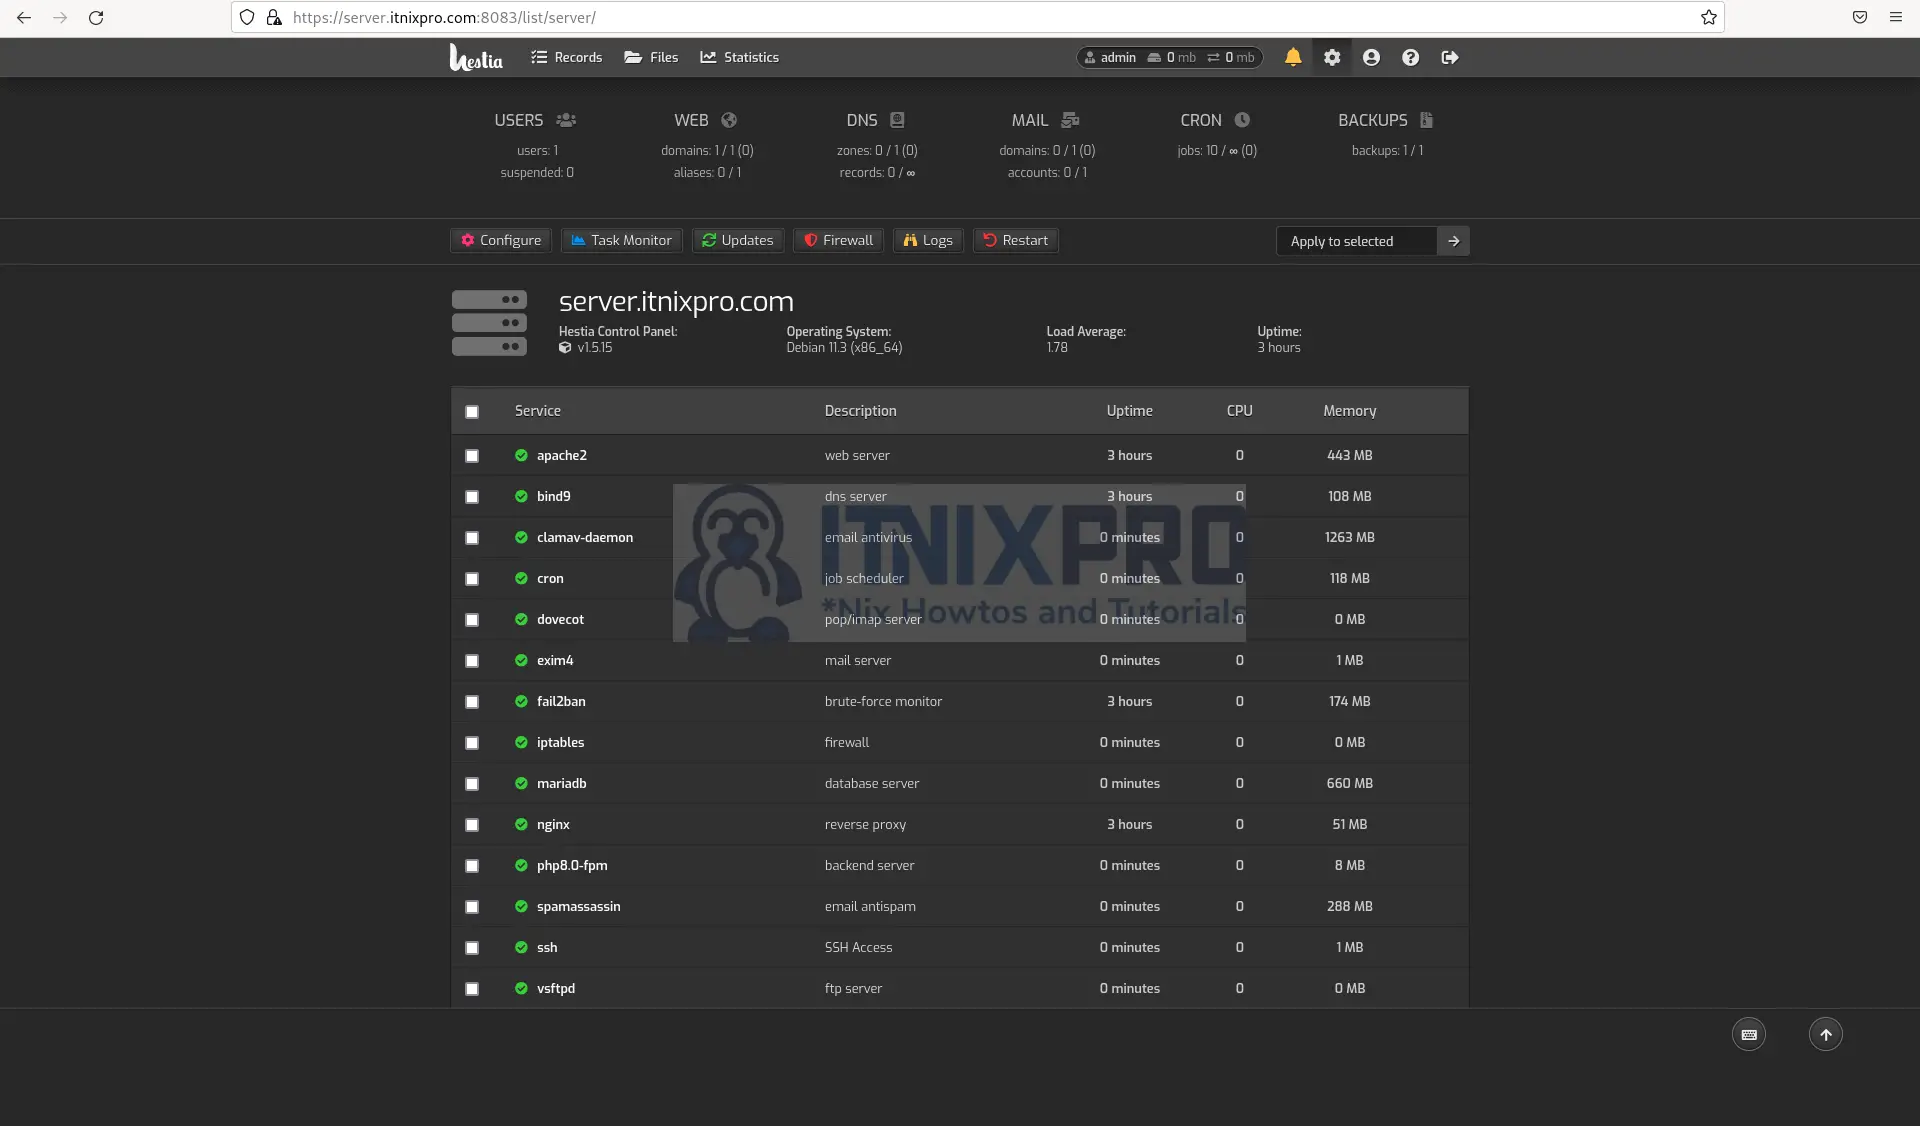
- After the system reboot, confirm Apache is running using the command below.
systemctl status apache2Sample output
● apache2.service - The Apache HTTP Server
     Loaded: loaded (/lib/systemd/system/apache2.service; enabled; ven>
     Active: active (running) since Thu 2022-06-02 04:59:48 EDT; 3h 27>
       Docs: https://httpd.apache.org/docs/2.4/
    Process: 3704 ExecStart=/usr/sbin/apachectl start (code=exited, st>
    Process: 4065 ExecReload=/usr/sbin/apachectl graceful (code=exited>
   Main PID: 3708
      Tasks: 56 (limit: 4623)
     Memory: 12.0M
        CPU: 880ms
     CGroup: /system.slice/apache2.service
             ├─3708 /usr/sbin/apache2 -k start
             ├─4069 /usr/sbin/apache2 -k start
             ├─4070 /usr/sbin/apache2 -k start
             └─4071 /usr/sbin/apache2 -k start
- If it’s not running, start it using the following command.
sudo systemctl start apache2- Then enable it to run on boot.
sudo systemctl enable apache2Access Hestia Control Panel
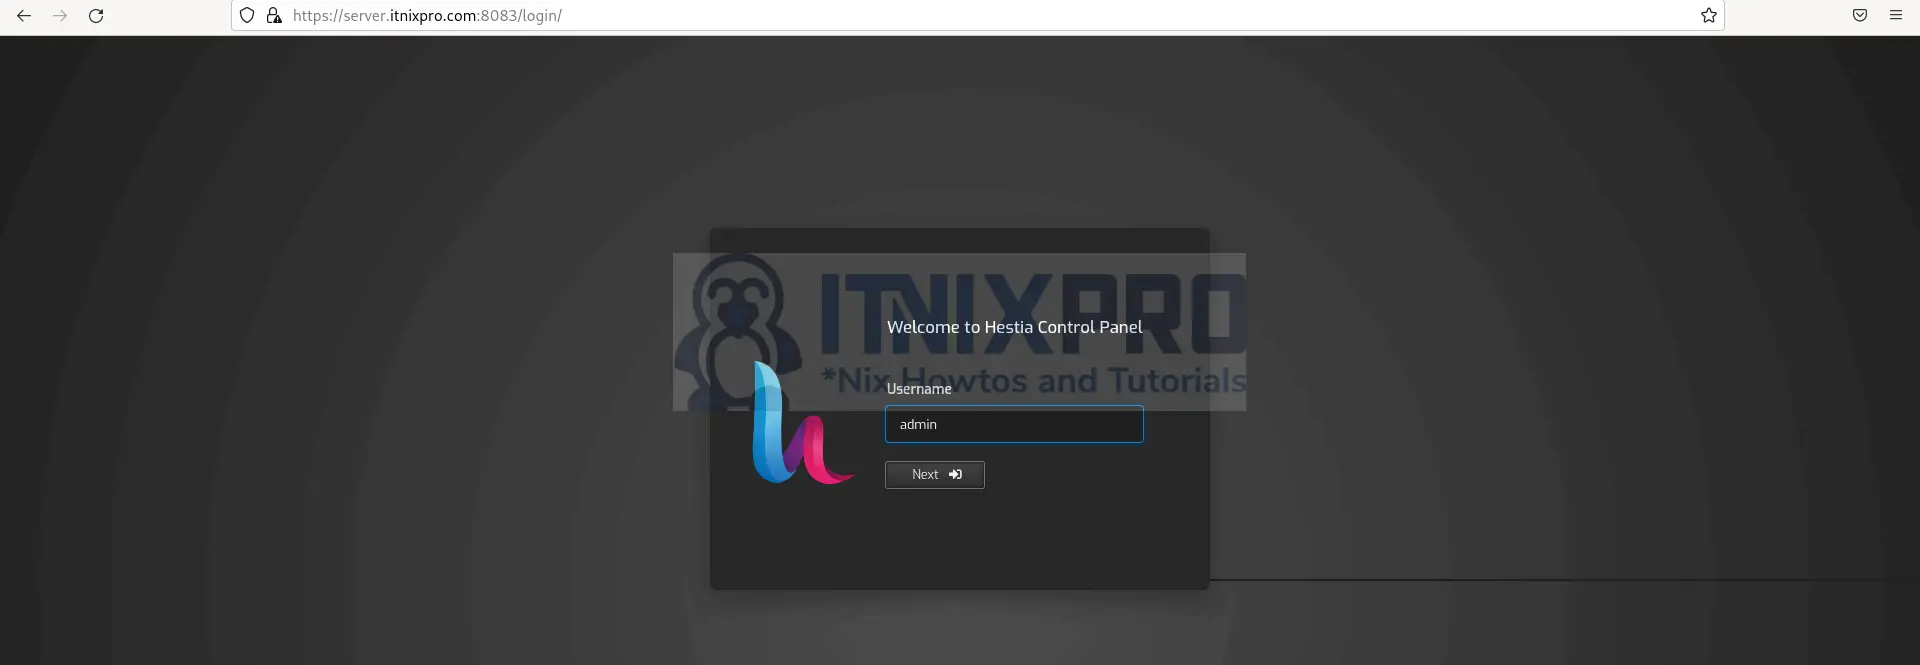
- To access Hestia Control Panel, open a web browser of your choice and enter the domain specified in your server config previously above followed by port 8083 e.g.
server.itnixpro.com:8083then enter username to continue.
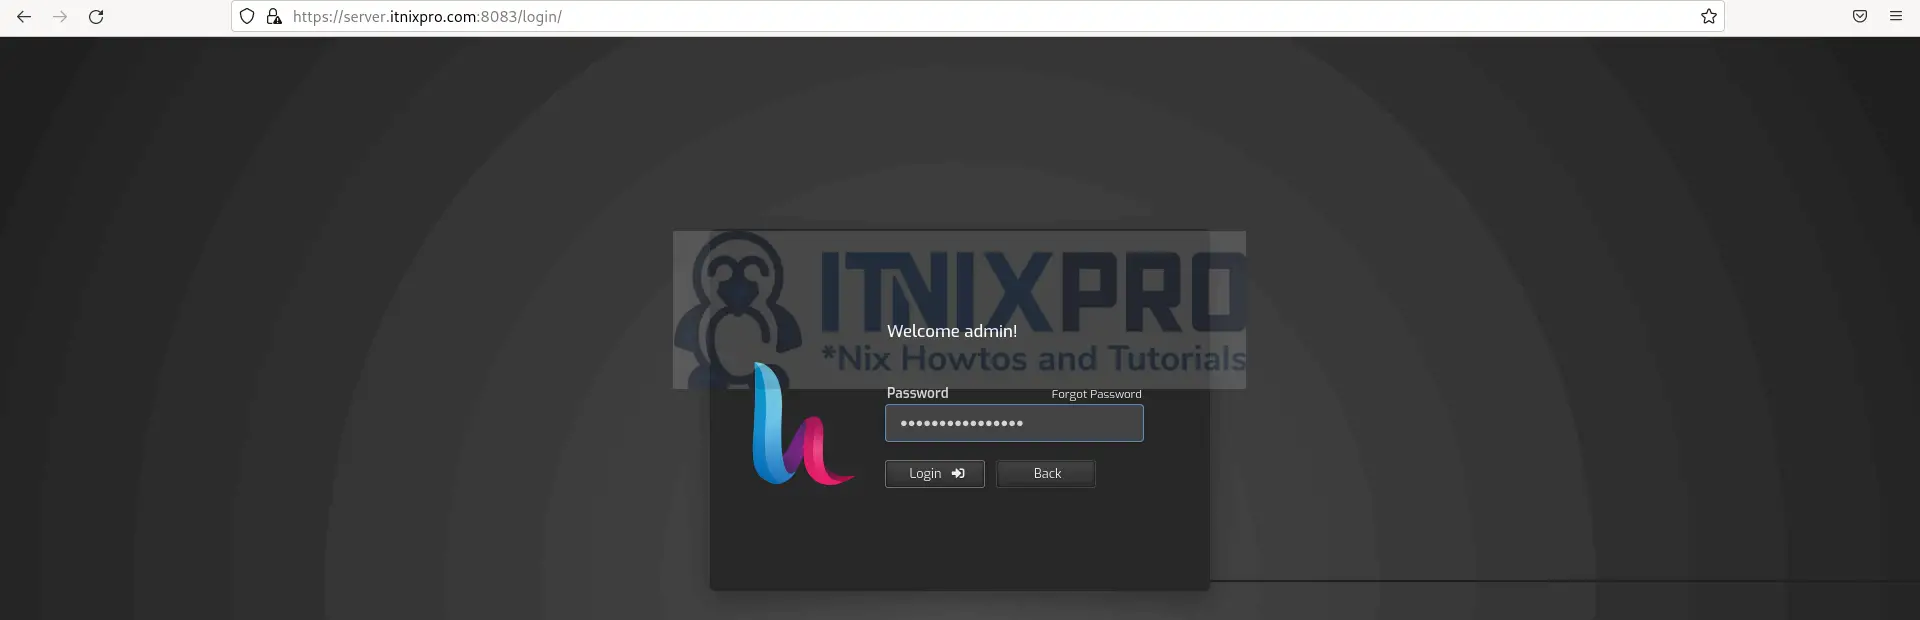
- Then enter the password generated above during the installation.
- After successful login, you will be redirected to the Hestia Control Panel dashboard.
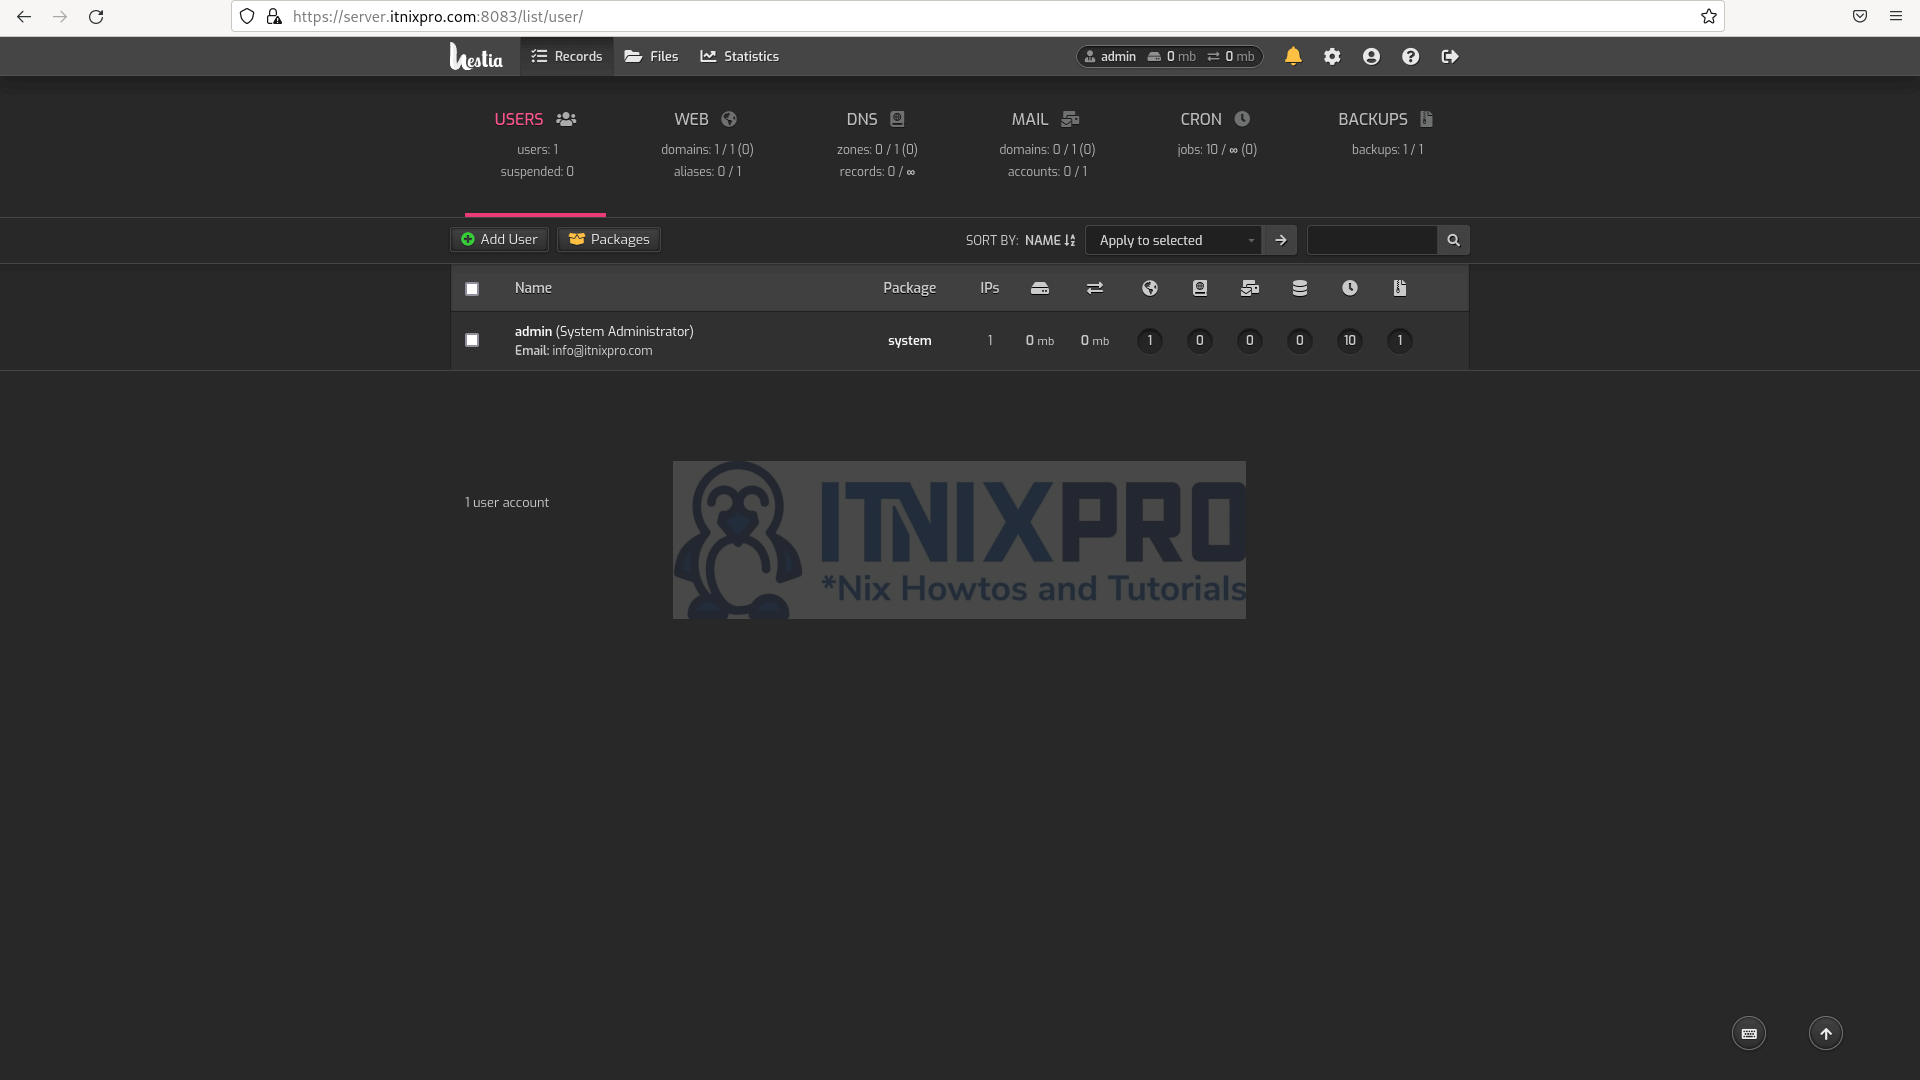
- You can now manage your server from Hestia Control Panel.
- That marks the end of our article on how to install Hestia Control Panel on Debian 11. Cheers!
Read more on Hestia Documentation