
Thus article has been created to show you how to successfully install DokuWiki in Rocky Linux. DokuWiki is a free wiki software that is used for documentation. It’s lightweight and fast because it does not use a database. DokuWiki is just one of the wiki software but its popularity comes from great speeds, ease of use and simple installation.
Features of DokuWiki
- High usability
- Access Control and Anti-Spam Measures
- Over 50 language support
- Fast with full text search and page caching
- Extensible with multiple layout templates, plugins and community support
- Easy syndication and backend integration
Make sure you meet the prerequisites below the proceed with the guide to install DokuWiki on Rocky Linux.
Install PHP
- Update system packages
sudo dnf update && sudo dnf upgrade -y- The minimum supported PHP version 5.6 but we will use PHP 7.4 because PHP 8 is not full supported. Install PHP 7.4 and required extensions.
- Check the available version. If it is PHP 7.4, proceed to install, otherwise set the repository to point to the version we need.
sudo dnf module list php- Reset the current PHP stream
sudo dnf module reset php- Enable PHP 7.4
sudo dnf module enable php:7.4- Install PHP 7.4 and required modules
sudo dnf install php php-gd php-xml php-jsonInstall Apache Web Server
- Apache2 was installed when you installed PHP. Just confirm if it is installed.
dnf info httpd Last metadata expiration check: 0:14:09 ago on Thu 09 Jun 2022 04:17:10 PM EAT.
Installed Packages
Name : httpd
Version : 2.4.37
Release : 43.module+el8.5.0+747+83fae388.3
Architecture : x86_64
Size : 4.3 M
Source : httpd-2.4.37-43.module+el8.5.0+747+83fae388.3.src.rpm
Repository : @System
From repo : appstream
Summary : Apache HTTP Server
URL : https://httpd.apache.org/
License : ASL 2.0
Description : The Apache HTTP Server is a powerful, efficient, and extensible
: web server.
- If it’s not installed, install it:
sudo dnf install httpd- Start and enable apache2 server
sudo systemctl enable --now httpdAllow Apache through Firewall
To allow external access to DokuWiki server using HTTP traffic, allow connection through port 80
firewall-cmd --permanent --add-port=80/tcp
firewall-cmd --reload
Install DokuWiki on Rocky Linux
- Download the latest version from DokuWiki download’s page. You can also download the latest version using
wgetcommand.
wget https://download.dokuwiki.org/src/dokuwiki/dokuwiki-stable.tgz- Create a directory to store DokuWiki web root files
sudo mkdir -p /var/www/html/dokuwiki- Unpack the files to the folder you have just created above
sudo tar xzf dokuwiki-stable.tgz -C /var/www/html/dokuwiki/ --strip-components=1- Allow DokuWiki to override
htaccessfile for security purpose
sudo cp /var/www/html/dokuwiki/.htaccess{.dist,}- Grant DokuWiki ownership permission to the DokuWiki files
sudo chown -R apache:apache /var/www/html/dokuwikiSecure DokuWiki with Let’s Encrypt SSL- optional
- For enhanced security, it’s recommended to secure your wiki site using Let’s Encrypt SSL certificate. You can achieve this by installing Certbot client.
sudo dnf install certbot python3-certbot-apache -y- Then run the following command to install the Let’s Encrypt SSL for your site, for instance
localhost
sudo certbot --apache -d localhostCreate Apache VirtualHost for DokuWiki
- Create a new file in
/etc/httpd/conf.ddirectory.
sudo nano /etc/httpd/conf.d/dokuwiki.conf- Copy and paste the content below and replace localhost with the your server name
<VirtualHost *>
	ServerName    localhost
	DocumentRoot  /var/www/html/dokuwiki

	<Directory ~ "/var/www/html/dokuwiki/(bin/|conf/|data/|inc/)">
	    <IfModule mod_authz_core.c>
                AllowOverride All
        	Require all denied
	    </IfModule>
	    <IfModule !mod_authz_core.c>
	        Order allow,deny
        	Deny from all
	    </IfModule>
	</Directory>

	ErrorLog   /var/log/httpd/dokuwiki_error.log
	CustomLog  /var/log/httpd/dokuwiki_access.log combined
</VirtualHost>
Configure SELinux Policies for DokuWiki – optional
If you have SELinux running, configure it to allow accesses for DokuWiki.
sudo semanage fcontext -a -t httpd_sys_rw_content_t "/var/www/html/dokuwiki/conf(/.*)?"sudo restorecon -Rv /var/www/html/dokuwiki/confsudo restorecon -Rv /var/www/html/dokuwiki/datasudo setsebool -P httpd_can_network_connect onsudo setsebool -P httpd_can_sendmail onsudo semanage fcontext -a -t httpd_sys_rw_content_t "/var/www/html/dokuwiki/lib/plugins(/.*)?"sudo restorecon -Rv /var/www/html/dokuwiki/lib/pluginssudo semanage fcontext -a -t httpd_sys_rw_content_t "/var/www/html/dokuwiki/lib/tpl(/.*)?"sudo restorecon -Rv /var/www/html/dokuwiki/lib/tplRestart apache2 server
Restart apache2 to apply the changes:
sudo systemctl restart httpdFinish DokuWiki installation
Once you open your browser, type in the URL http://your-server-name/install.php i.e. http://localhost/install.php
Type in the details to access DokuWiki and choose the ACL policy as per your preference.

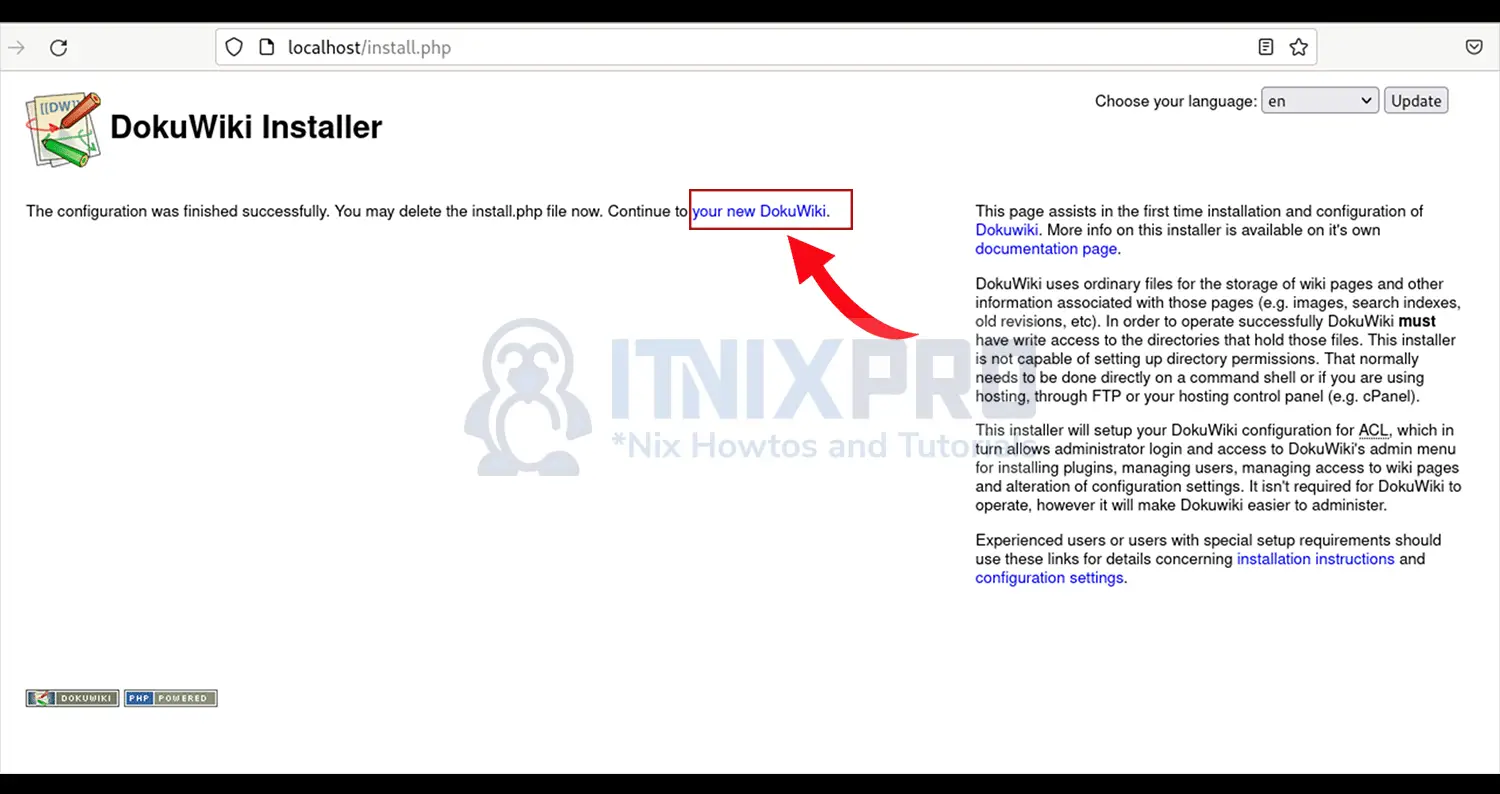
On the next page, click on your new DokuWiki.
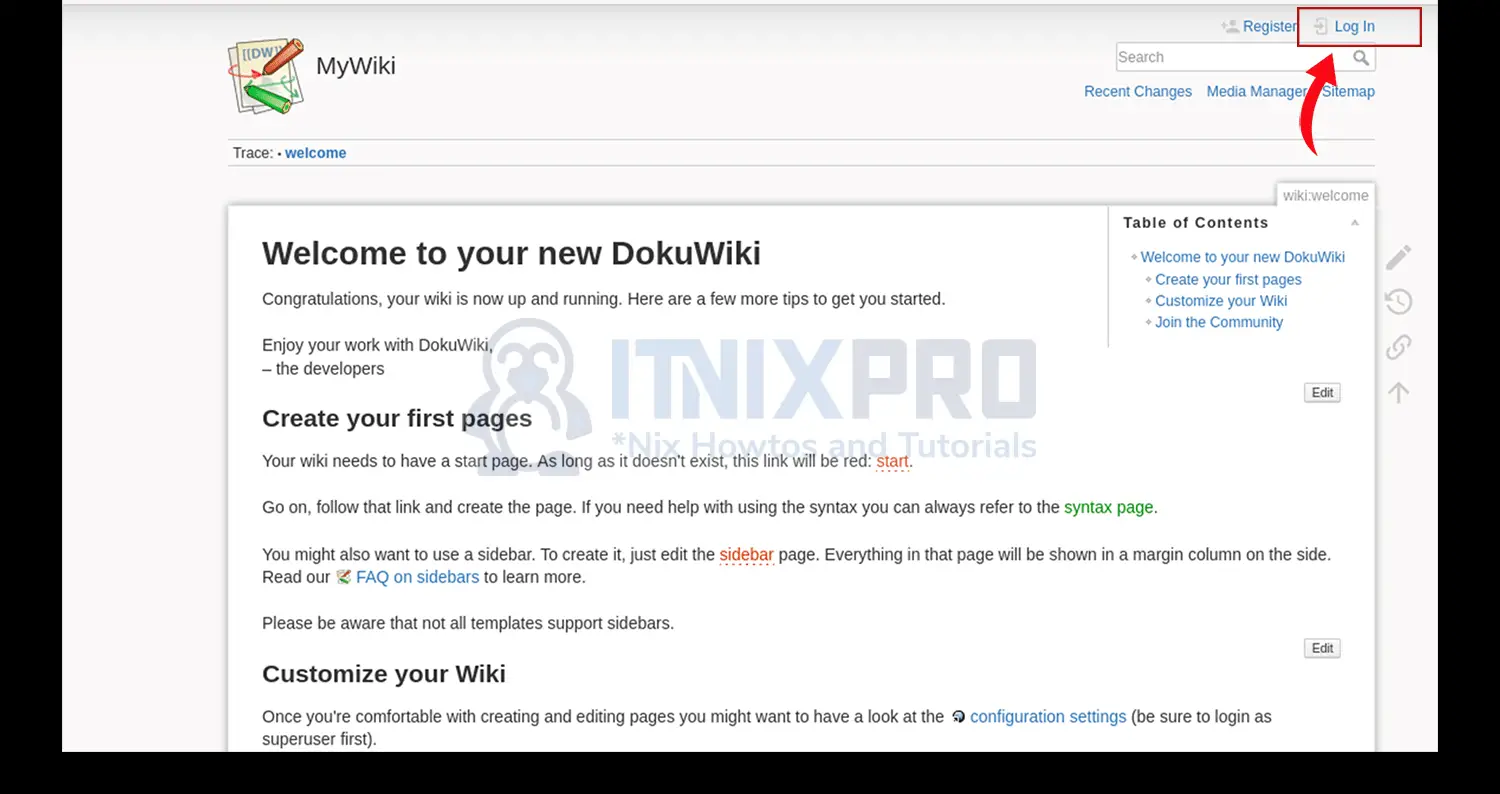
From the welcome screen, click on log in to access the admin interface.
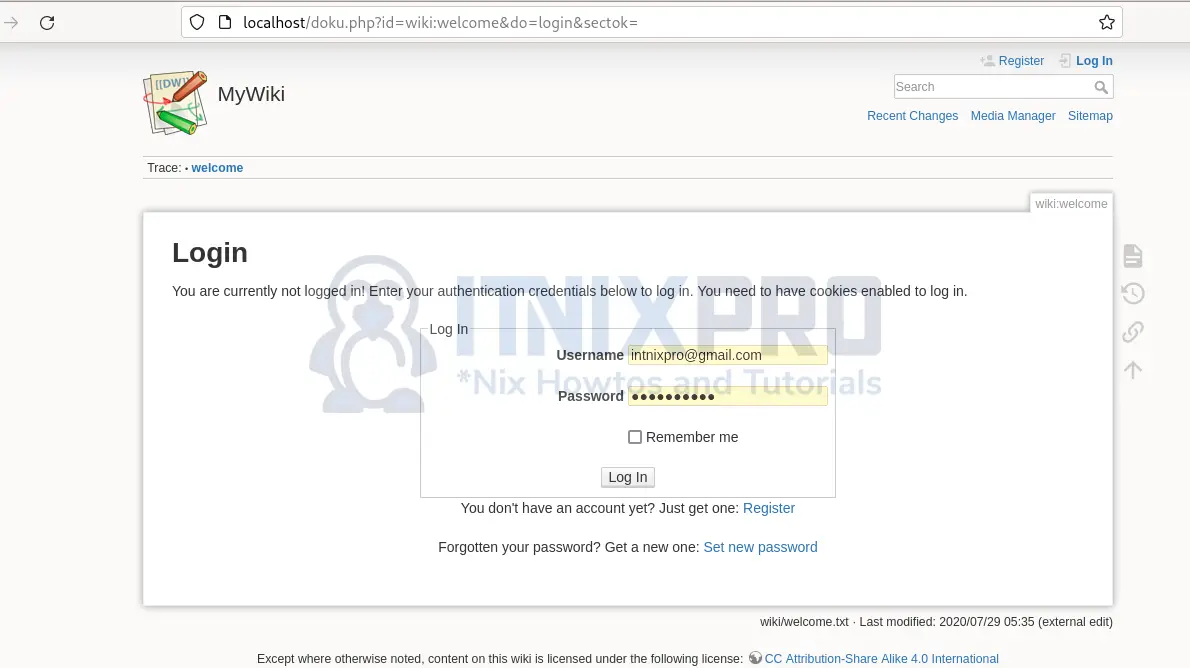
A Login page will be displayed. Enter the username and password you created.
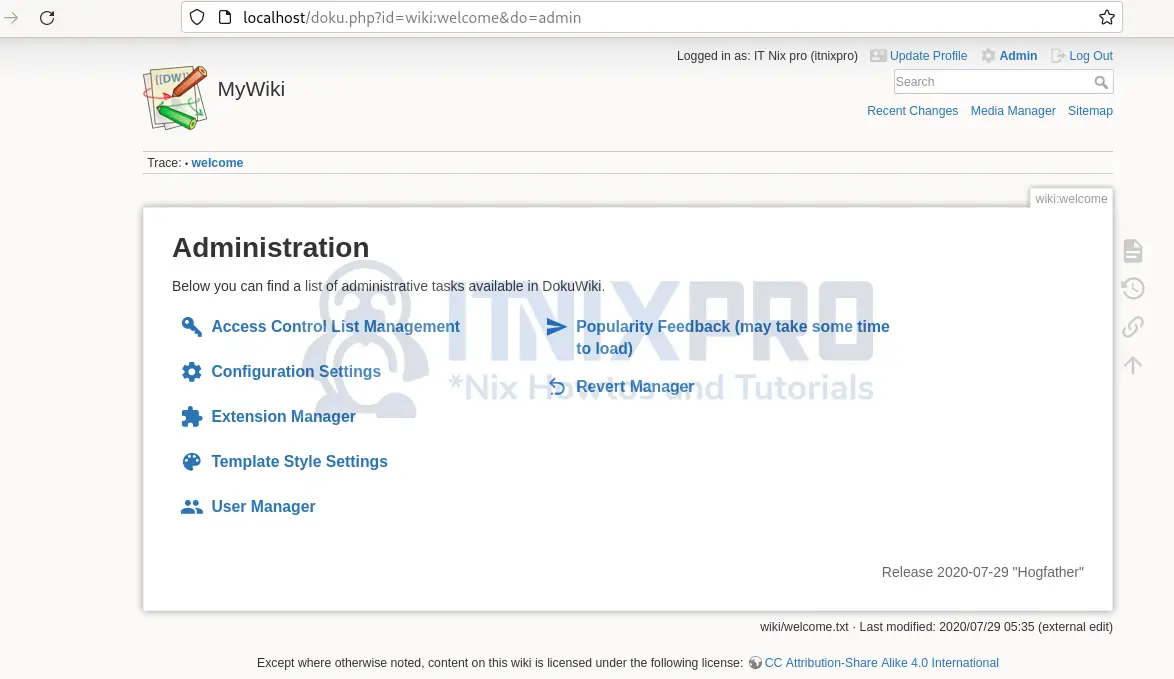
The default dashboard will load and you can click admin to open the admin page below.
Conclusion
Congrats! You have just finished to install DokuWiki in Rocky Linux. Find more on installing DokuWiki in CentOS
Other interesting articles
Install and Configure Borgmatic on Rocky Linux