
In this tutorial, you will learn how to enable authentication authorization and audit logging in Apache Solr. Solr ships with security frameworks that supports authentication, authorization and auditing of users.
Basically:
Authenticationis the process of verifying a user’s identity:Authorizationis the process of verifying what resources a user has access to.Auditingenables keeping records of each user’s activity on a system.
Enable Authentication Authorization and Audit Logging in Apache Solr
In our previous guide, we learnt how to install Apache Solr on Ubuntu 22.04.
Install Apache Solr on Ubuntu 22.04
If you noticed, when you access Solr web interface, there is no form of authentication enabled and this poses a risk if the Solr system is externally accessible.
Thus, to enable authentication authorization and audit logging in Apache Solr, depends on the kind of deployment whether you are running a SolrCloud mode or standalone mode.
In our setup, we are running Solr in Standalone mode.
Enable Solr Authentication, Authorization and Auding Plugins
To enable authentication, authorization and auditing in Standalone Solr deployment, you first need to enable the required plugins.
The plugins and relevant configurations should be defined in the security.json configuration file.
The security.json configuration file should be placed under the $SOLR_HOME/ directory.
From the Solr UI, you can see the Solr home directory path;
In our setup, $SOLR_HOME is /var/solr/data.
Below is an example format of the security.json configuration.
{
  "authentication" : {
    "class": "authentication-plugin"
  },
  "authorization": {
    "class": "authorization-plugin"
  },
  "auditlogging": {
    "class": "audit-plugin"
  }
}
Enable Authentication;
Update the configuration section;
  "authentication" : {
    "class": "authentication-plugin"
  },
First, define the authentication plugin to use. There are different authentication plugins that can be used;
- Kerberos Authentication Plugin
- Basic Authentication Plugin
- Hadoop Authentication Plugin
- JWT Authentication Plugin
In this tutorial, we will use Basic authentication plugin. Note that it’s recommended to configure Solr with SSL/TLS when Basic authentication is enabled since credentials are sent in plain text.
Authentication config now looks like;
  "authentication":{
     "blockUnknown": true,
     "class":"solr.BasicAuthPlugin",
     "credentials":{"solradmin":"rCES0NZaKmWaxzH7zSO2OBimzgi6HbJfWxGpk6SJgnk= dzNpM3FjZGoweXo1MHFvZQ=="},
     "realm":"Authenticated Users Only",
     "forwardCredentials": false
  }
Read more on basic authentication plugin page.
In the above, the username is solradmin and password hash is provided.
You can generate the user password hash from this online Solr Password hash generator tool.
Define User Roles via Authorization Plugin
Next, you need to define the roles for the users. The configuration should be placed into the same file, security.json file
Sample admin role configuration;
  "authorization": {
    "class": "solr.RuleBasedAuthorizationPlugin",
    "user-role": {
      "solradmin": "admin"
    },
    "permissions": [
      { "name": "all", "role": "admin"}
    ]
  }
Read more on Rule-based authorization and plugin page.
Enable Audit Logging
Next, enable audit logging to keep a record of user activities.
This is our sample config;
  "auditlogging":{
    "class": "solr.SolrLogAuditLoggerPlugin",
    "async": true,
    "blockAsync" : false,
    "numThreads" : 2,
    "queueSize" : 4096,
    "eventTypes": ["REJECTED", "ANONYMOUS_REJECTED", "UNAUTHORIZED", "COMPLETED", "ERROR"]
  }
Read more on AuditLogging Plugin page.
In general, this is how our security.json config file is like;
cat /var/solr/data/security.json{
"authentication":{
"blockUnknown": true,
"class":"solr.BasicAuthPlugin",
"credentials":{"solradmin":"rCES0NZaKmWaxzH7zSO2OBimzgi6HbJfWxGpk6SJgnk= dzNpM3FjZGoweXo1MHFvZQ=="},
"realm":"My Solr users",
"forwardCredentials": false
},
"authorization": {
"class": "solr.RuleBasedAuthorizationPlugin",
"user-role": {
"solradmin": "admin"
},
"permissions": [
{ "name": "all", "role": "admin"}
]
},
"auditlogging":{
"class": "solr.SolrLogAuditLoggerPlugin",
"async": true,
"blockAsync" : false,
"numThreads" : 2,
"queueSize" : 4096,
"eventTypes": ["REJECTED", "ANONYMOUS_REJECTED", "UNAUTHORIZED", "COMPLETED", "ERROR"]
}
}
Restart Solr Service
Once the configuration is done, restart Solr service.
systemctl restart solrAccess Solr Web Interface and Login
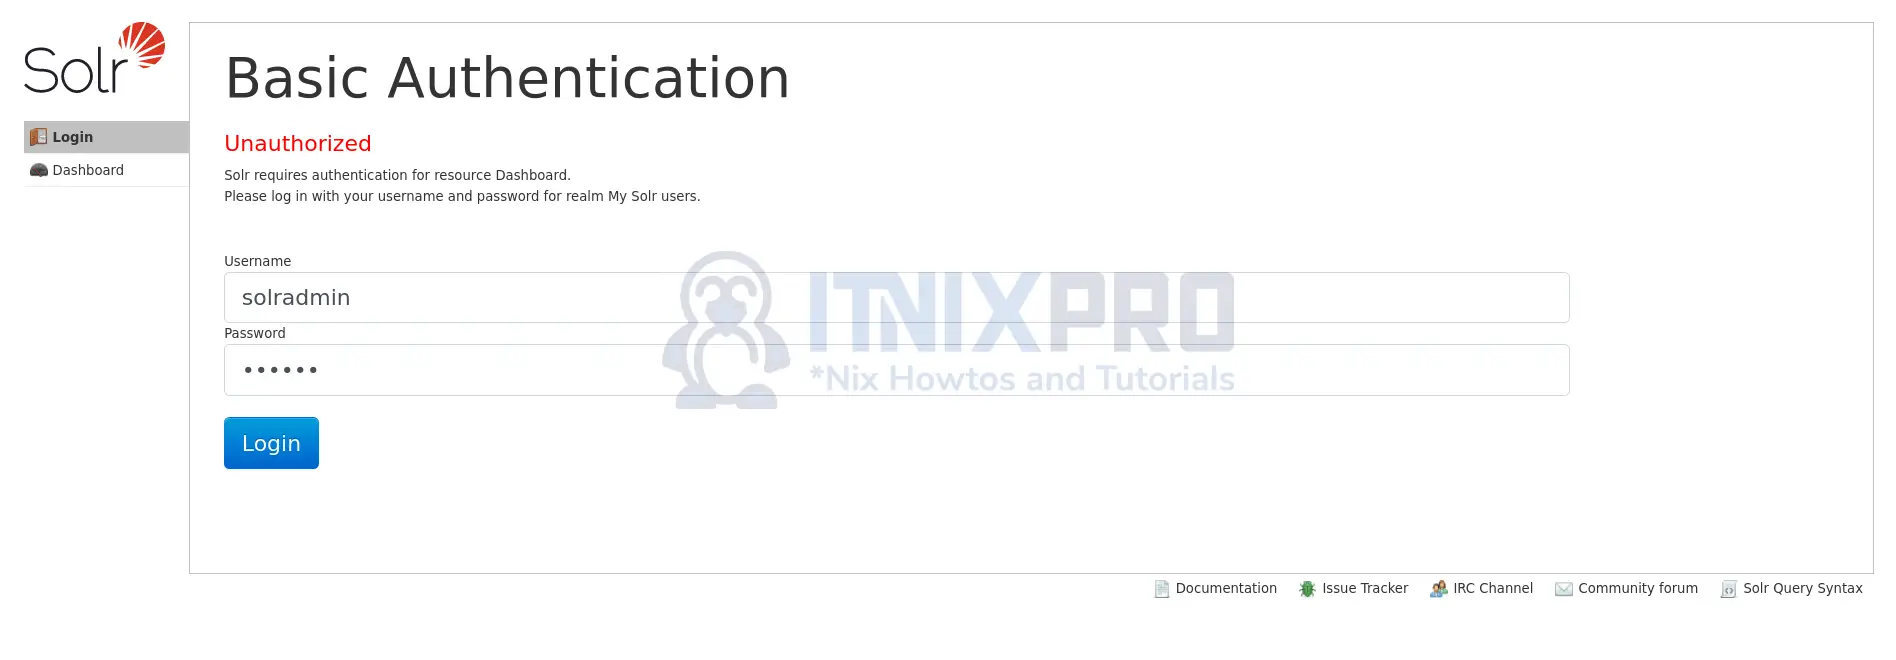
Now, if you access Solr web interface, you will be prompted to authenticate.
You can also tail the logs as you login;
tail -f /var/solr/logs/solr.log2021-12-23 12:57:58.655 INFO (qtp838812606-22) [ ] o.a.s.s.HttpSolrCall [admin] webapp=null path=/admin/cores params={indexInfo=false&wt=json&_=1640258616973} status=0 QTime=0
2021-12-23 12:57:58.656 INFO (audit-10-thread-1) [ ] o.a.s.s.SolrLogAuditLoggerPlugin type="COMPLETED" message="Completed" method="GET" status="200" requestType="ADMIN" username="solradmin" resource="/admin/cores" queryString="_=1640258616973&indexInfo=false&wt=json" collections=[]
2021-12-23 12:57:58.662 INFO (qtp838812606-20) [ ] o.a.s.s.HttpSolrCall [admin] webapp=null path=/admin/info/system params={wt=json&_=1640258616974} status=0 QTime=4
2021-12-23 12:57:58.664 INFO (audit-10-thread-1) [ ] o.a.s.s.SolrLogAuditLoggerPlugin type="COMPLETED" message="Completed" method="GET" status="200" requestType="ADMIN" username="solradmin" resource="/admin/info/system" queryString="_=1640258616974&wt=json" collections=[]
2021-12-23 12:57:58.687 INFO (qtp838812606-17) [ ] o.a.s.s.HttpSolrCall [admin] webapp=null path=/admin/info/system params={wt=json&_=1640258616974} status=0 QTime=3
2021-12-23 12:57:58.690 INFO (audit-10-thread-1) [ ] o.a.s.s.SolrLogAuditLoggerPlugin type="COMPLETED" message="Completed" method="GET" status="200" requestType="ADMIN" username="solradmin" resource="/admin/info/system" queryString="_=1640258616974&wt=json" collections=[]
2021-12-23 12:57:58.718 INFO (qtp838812606-21) [ ] o.a.s.s.HttpSolrCall [admin] webapp=null path=/cluster/security/authorization params={wt=json&_=1640264278644} status=0 QTime=1
2021-12-23 12:57:58.730 INFO (audit-10-thread-1) [ ] o.a.s.s.SolrLogAuditLoggerPlugin type="COMPLETED" message="Completed" method="GET" status="200" requestType="ADMIN" username="solradmin" resource="/api/cluster/security/authorization" queryString="_=1640264278644&wt=json" collections=[]
2021-12-23 12:57:58.737 INFO (qtp838812606-15) [ ] o.a.s.s.HttpSolrCall [admin] webapp=null path=/cluster/security/authentication params={wt=json&_=1640264278644} status=0 QTime=0
2021-12-23 12:57:58.738 INFO (audit-10-thread-1) [ ] o.a.s.s.SolrLogAuditLoggerPlugin type="COMPLETED" message="Completed" method="GET" status="200" requestType="ADMIN" username="solradmin" resource="/api/cluster/security/authentication" queryString="_=1640264278644&wt=json" collections=[]
Upon successful login, you get to the Solr dashboard.
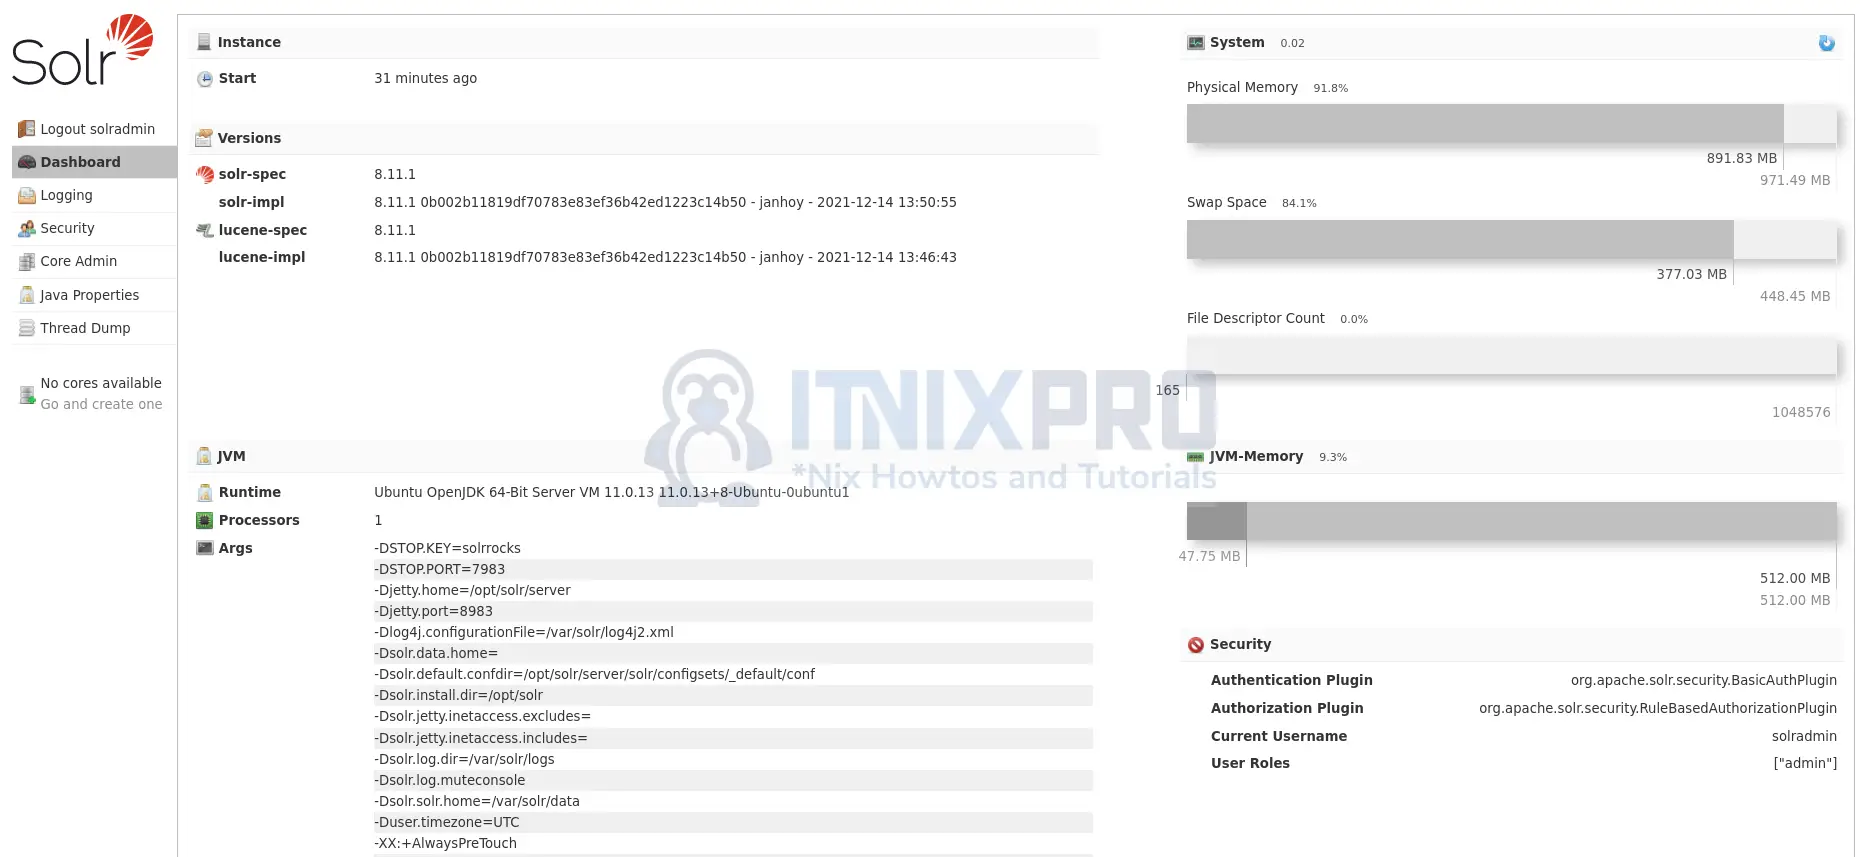
Security settings

And that is it on how to enable authentication authorization and audit logging in Apache Solr.