
This tutorial is going to teach you how to install Nextcloud on Ubuntu 22.04. Nextcloud is a client-server application that allows you to create and use file hosting services. It is enterprise-ready and comes with a variety of support options. Anyone can install and run it on their own private server devices because it is free and open-source software.
Nextcloud is a self-hosted, feature-rich cloud storage solution designed for companies who want to combine safe file management with efficiency. It provides document editing, teleconferencing, mail, and calendar management capabilities.
Everything may be synchronized between your devices, and you can also share files with others. You can even establish numerous accounts for friends and relatives. They’ll be able to log on and store data on the server, just like any other cloud storage.
Requirements required to Install Nextcloud on Ubuntu 22.04 are as follows; Apache/Nginx web server, PHP and MySQL/MariaDB Database server.
How to Install Nextcloud on Ubuntu 22.04
Follow the instructions below to get started installing and configuring Nextcloud on Ubuntu 22.04;
- Install Apache web server on Ubuntu 22.04
- Install PHP on Ubuntu 22.04
- Install PHP and Apache Web Server at once
- Install MariaDB on Ubuntu 22.04
- Install Nextcloud on Ubuntu 22.04
Install Apache web server on Ubuntu 22.04
- Nexcloud will be accessed using a web browser while running on the server. Run the command below to install Apache Web Server.
sudo apt update

sudo apt install apache2
Sample Output
Reading package lists... Done
Building dependency tree
Reading state information... Done
The following packages were automatically installed and are no longer required:
  gconf-service gconf-service-backend gconf2-common libappindicator1 libc++1
  libc++1-10 libc++abi1-10 libdbusmenu-gtk4 libegl1-mesa libgconf-2-4
  libxcb-xtest0
Use 'sudo apt autoremove' to remove them.
The following additional packages will be installed:
  apache2-bin apache2-data apache2-utils libapr1 libaprutil1
  libaprutil1-dbd-sqlite3 libaprutil1-ldap liblua5.2-0
Suggested packages:
  apache2-doc apache2-suexec-pristine | apache2-suexec-custom
The following NEW packages will be installed:
  apache2 apache2-bin apache2-data apache2-utils libapr1 libaprutil1
  libaprutil1-dbd-sqlite3 libaprutil1-ldap liblua5.2-0
0 upgraded, 9 newly installed, 0 to remove and 10 not upgraded.
Need to get 1,819 kB of archives.
After this operation, 7,945 kB of additional disk space will be used.
Do you want to continue? [Y/n] y
Get:1 http://us.archive.ubuntu.com/ubuntu focal/main amd64 libapr1 amd64 1.6.5-1ubuntu1 [91.4 kB]
- Then run the command below to confirm if Apache server is running
sudo systemctl status apache2Output
apache2.service - The Apache HTTP Server
     Loaded: loaded (/lib/systemd/system/apache2.service; enabled; vendor preset: enabled)
     Active: active (running) since Mon 2022-01-31 10:22:28 EAT; 1min 31s ago
       Docs: https://httpd.apache.org/docs/2.4/
   Main PID: 9117 (apache2)
      Tasks: 55 (limit: 9424)
     Memory: 4.8M
     CGroup: /system.slice/apache2.service
             ├─9117 /usr/sbin/apache2 -k start
             ├─9118 /usr/sbin/apache2 -k start
             └─9119 /usr/sbin/apache2 -k start

Jan 31 10:22:28 ubuntu systemd[1]: Starting The Apache HTTP Server...
Jan 31 10:22:28 ubuntu apachectl[9116]: AH00558: apache2: Could not reliably determine the server's fully qualified domain nam>
Jan 31 10:22:28 ubuntu systemd[1]: Started The Apache HTTP Server.
lines 1-15/15 (END)
- The output above shows Apache is running
Install PHP on Ubuntu 22.04
- Run the command below to install PHP
sudo apt install php libapache2-mod-php php-imagick php-common php-mysql php-gd php-json php-curl php-zip php-xml php-mbstring php-bz2 php-intl php-bcmath php-gmp php-dom unzipSample Output
Reading package lists... Done
Building dependency tree
Reading state information... Done
Note, selecting 'php7.4-xml' instead of 'php-dom'
unzip is already the newest version (6.0-25ubuntu1).
unzip set to manually installed.
The following packages were automatically installed and are no longer required:
  gconf-service gconf-service-backend gconf2-common libappindicator1 libc++1 libc++1-10 libc++abi1-10 libdbusmenu-gtk4
  libegl1-mesa libgconf-2-4 libxcb-xtest0
Use 'sudo apt autoremove' to remove them.
The following additional packages will be installed:
  libapache2-mod-php7.4 libonig5 libzip5 php7.4 php7.4-bcmath php7.4-bz2 php7.4-cli php7.4-common php7.4-curl php7.4-gd
  php7.4-gmp php7.4-intl php7.4-json php7.4-mbstring php7.4-mysql php7.4-opcache php7.4-readline php7.4-zip ttf-dejavu-core
Suggested packages:
  php-pear
The following NEW packages will be installed:
  libapache2-mod-php libapache2-mod-php7.4 libonig5 libzip5 php php-bcmath php-bz2 php-common php-curl php-gd php-gmp
  php-imagick php-intl php-json php-mbstring php-mysql php-xml php-zip php7.4 php7.4-bcmath php7.4-bz2 php7.4-cli
  php7.4-common php7.4-curl php7.4-gd php7.4-gmp php7.4-intl php7.4-json php7.4-mbstring php7.4-mysql php7.4-opcache
  php7.4-readline php7.4-xml php7.4-zip ttf-dejavu-core
0 upgraded, 35 newly installed, 0 to remove and 10 not upgraded.
Need to get 5,202 kB of archives.
After this operation, 22.6 MB of additional disk space will be used.
Do you want to continue? [Y/n] y
Get:1 http://us.archive.ubuntu.com/ubuntu focal/main amd64 php-common all 2:75 [11.9 kB]
Get:2 http://us.archive.ubuntu.com/ubuntu focal-updates/main amd64 php7.4-common amd64 7.4.3-4ubuntu2.8 [981 kB]
- In case you want to check which version of PHP is installed on your Ubuntu 22.04 run the command below.
php -v- To make the modifications take effect, reload Apache using the command below.
sudo systemctl reload apache2Or
sudo systemctl restart apache2Install PHP and Apache Web Server at once
- Alternatively you can use the command below to install Apache and PHP together at once.
sudo apt install -y php-cli php-fpm php-json php-intl php-imagick php-pdo php-mysql php-zip php-gd php-mbstring php-curl php-xml php-pear php-bcmath apache2 libapache2-mod-phpInstall MariaDB on Ubuntu 22.04
- Nextcloud can use any SQL database e.g. MySQL, MariaDB, PostgreSQL, or SQLite database to store its data. In this guide, we will use MariaDB. Run the command below to install it.
sudo apt install mariadb-serverSample Output
Reading package lists... Done
Building dependency tree
Reading state information... Done
The following packages were automatically installed and are no longer required:
  gconf-service gconf-service-backend gconf2-common libappindicator1 libc++1 libc++1-10 libc++abi1-10 libdbusmenu-gtk4
  libegl1-mesa libgconf-2-4 libxcb-xtest0
Use 'sudo apt autoremove' to remove them.
The following additional packages will be installed:
  galera-3 gawk libaio1 libconfig-inifiles-perl libdbd-mysql-perl libdbi-perl libhtml-template-perl libreadline5 libsigsegv2
  libsnappy1v5 libterm-readkey-perl mariadb-client-10.3 mariadb-client-core-10.3 mariadb-common mariadb-server-10.3
  mariadb-server-core-10.3 socat
Suggested packages:
  gawk-doc libclone-perl libmldbm-perl libnet-daemon-perl libsql-statement-perl libipc-sharedcache-perl mailx mariadb-test
  tinyca
The following NEW packages will be installed:
  galera-3 gawk libaio1 libconfig-inifiles-perl libdbd-mysql-perl libdbi-perl libhtml-template-perl libreadline5 libsigsegv2
  libsnappy1v5 libterm-readkey-perl mariadb-client-10.3 mariadb-client-core-10.3 mariadb-common mariadb-server
  mariadb-server-10.3 mariadb-server-core-10.3 socat
0 upgraded, 18 newly installed, 0 to remove and 10 not upgraded.
Need to get 20.0 MB of archives.
After this operation, 167 MB of additional disk space will be used.
Do you want to continue? [Y/n] y
Get:1 http://us.archive.ubuntu.com/ubuntu focal/main amd64 libsigsegv2 amd64 2.12-2 [13.9 kB]
- Run the command below to confirm password for your MariaDB i.e root password or to change it.
sudo mysql_secure_installation- Answer the questions asked according to your preference as shown below.
NOTE: RUNNING ALL PARTS OF THIS SCRIPT IS RECOMMENDED FOR ALL MariaDB
      SERVERS IN PRODUCTION USE!  PLEASE READ EACH STEP CAREFULLY!

In order to log into MariaDB to secure it, we'll need the current
password for the root user.  If you've just installed MariaDB, and
you haven't set the root password yet, the password will be blank,
so you should just press enter here.

Enter current password for root (enter for none):
OK, successfully used password, moving on...

Setting the root password ensures that nobody can log into the MariaDB
root user without the proper authorisation.

You already have a root password set, so you can safely answer 'n'.

Change the root password? [Y/n] n
 ... skipping.

By default, a MariaDB installation has an anonymous user, allowing anyone
to log into MariaDB without having to have a user account created for
them.  This is intended only for testing, and to make the installation
go a bit smoother.  You should remove them before moving into a
production environment.

Remove anonymous users? [Y/n] y
 ... Success!

Normally, root should only be allowed to connect from 'localhost'.  This
ensures that someone cannot guess at the root password from the network.

Disallow root login remotely? [Y/n] y
 ... Success!

By default, MariaDB comes with a database named 'test' that anyone can
access.  This is also intended only for testing, and should be removed
before moving into a production environment.

Remove test database and access to it? [Y/n] y
 - Dropping test database...
 ... Success!
 - Removing privileges on test database...
 ... Success!

Reloading the privilege tables will ensure that all changes made so far
will take effect immediately.

Reload privilege tables now? [Y/n] y
 ... Success!

Cleaning up...

All done!  If you've completed all of the above steps, your MariaDB
installation should now be secure.

Thanks for using MariaDB!
- After that, set up a database for NextCloud.
sudo mysql -u root -pOutput
Welcome to the MariaDB monitor.  Commands end with ; or \g.
Your MariaDB connection id is 55
Server version: 10.3.32-MariaDB-0ubuntu0.22.04 Ubuntu 22.04

Copyright (c) 2000, 2018, Oracle, MariaDB Corporation Ab and others.

Type 'help;' or '\h' for help. Type '\c' to clear the current input statement.

MariaDB [(none)]>
- Use the command below within MariaDB
CREATE DATABASE nextcloud;Sample
Welcome to the MariaDB monitor.  Commands end with ; or \g.
Your MariaDB connection id is 55
Server version: 10.3.32-MariaDB-0ubuntu0.22.04 Ubuntu 22.04

Copyright (c) 2000, 2018, Oracle, MariaDB Corporation Ab and others.

Type 'help;' or '\h' for help. Type '\c' to clear the current input statement.

MariaDB [(none)]> CREATE DATABASE nextcloud;
Query OK, 1 row affected (0.000 sec)

MariaDB [(none)]>
- You can confirm created database by typing;
SHOW DATABSES; Sample
Welcome to the MariaDB monitor.  Commands end with ; or \g.
Your MariaDB connection id is 57
Server version: 10.3.32-MariaDB-0ubuntu0.22.04 Ubuntu 22.04

Copyright (c) 2000, 2018, Oracle, MariaDB Corporation Ab and others.

Type 'help;' or '\h' for help. Type '\c' to clear the current input statement.

MariaDB [(none)]> SHOW DATABASES;
+--------------------+
| Database           |
+--------------------+
| information_schema |
| mysql              |
| nextcloud          |
| performance_schema |
+--------------------+
4 rows in set (0.001 sec)

MariaDB [(none)]>
Install Nextcloud on Ubuntu 22.04
- Navigate to NextCloud site to check the most recent version of it and then run the command below with the latest version number, for my case is version 23.
wget https://download.nextcloud.com/server/releases/latest-23.zip- Then Install the unzip program in case you don’t have it
sudo apt install unzip- Run the command below to unzip the downloaded Nextcloud package
unzip latest-23.zip- Place the generated folder in the
/srvdirectory using the command below
sudo mv nextcloud/ /srv- Change the www directory datauser’s permissions using the command below
sudo chown -R www-data:www-data /srv/nextcloud/- Next configure your Apache server as shown below. Run the command
sudo nano /etc/apache2/conf-enabled/nextcloud.conf- Then copy and paste the following content into the file.
<VirtualHost *:80>
     ServerAdmin [email protected]
     DocumentRoot /srv/nextcloud/
     ServerName example.com
     ServerAlias www.example.com
     ErrorLog /var/log/apache2/nextcloud-error.log
     CustomLog /var/log/apache2/nextcloud-access.log combined

    <Directory /srv/nextcloud/>
	Options +FollowSymlinks
	AllowOverride All
        Require all granted
 	SetEnv HOME /srv/nextcloud
 	SetEnv HTTP_HOME /srv/nextcloud
 	<IfModule mod_dav.c>
  	  Dav off
        </IfModule>
    </Directory>
</VirtualHost>
- Enable appropriate Apache modules as shown below.
sudo a2enmod rewrite dir mime env headers- Then restart the Apache service
sudo systemctl restart apache2- To complete the configuration, go to http://example.com
- To create an admin account, enter your Username and Password.
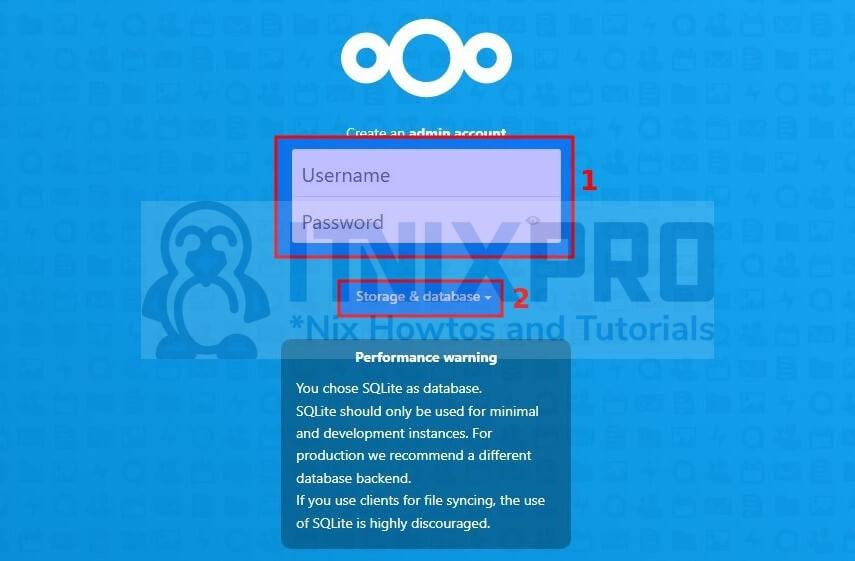
- Specify the location of the data folder. It’s /srv/nextcloud/data in our case then provide database connection information, such as the database user, password, and name.
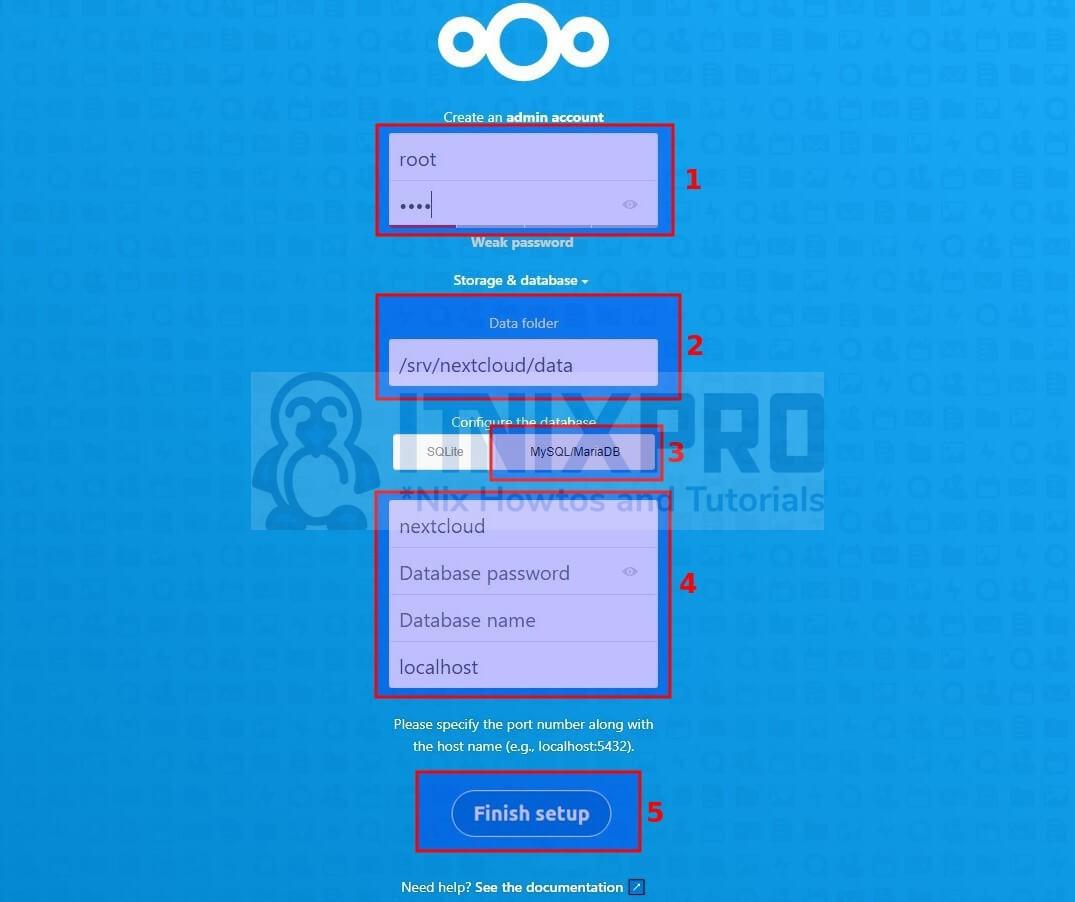
- To finish installing Nextcloud on Ubuntu 22.04, click the Finish setup option.
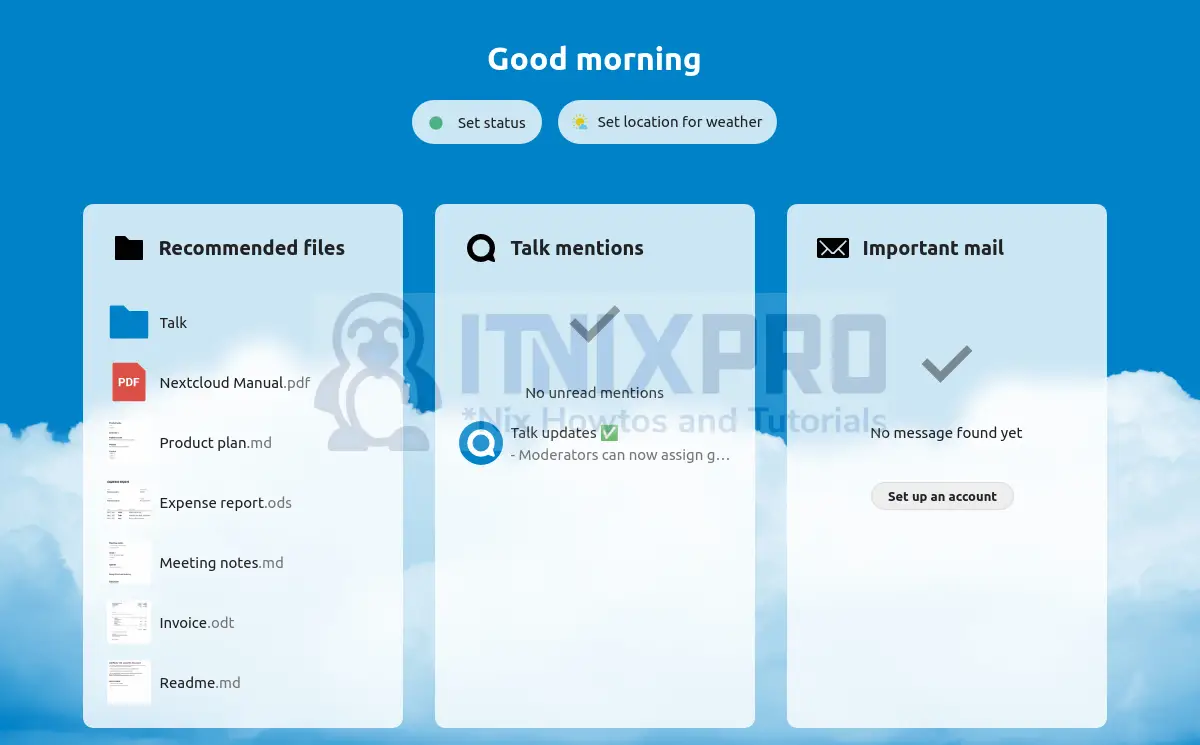
- Congratulations you have reached the end of the article. You have learned how to install Nextcloud on Ubuntu 22.04.
Other Tutorials
How to Install VMware workstation player on Ubuntu 22.04