
This article is going to take you through on How to Backup Linux systems using Veeam Agent. Veeam Agent is a backup and recovery software solution which can be used to do different types of backups.
How to Backup Linux systems using Veeam Agent
Install Veeam Agent on Linux
- Start by installing cifs client package which is a requirement to run Veeam Agent.
sudo apt install cifs-utils dkms squashfs-tools xorriso linux-headers-$(uname -r)- Next, install Veeam Agent public repository on Linux
- Linux do not ship with Veeam packages on the default repositories. As such you need to download and install the public Veeam agent repositories on the specific Linux distribution you are running.
- Therefore, navigate to Veeam Agent for Linux FREE download’s page.
- Then click DOWNLOAD NOW.
- You will be prompted to create a free account in order to be able to access the download links.
- Thus, enter your account details and submit the registration. After that, check your mail inbox on the link to finalize the account setup.
- You can now download the Veeam agent repository installer for your specific Linux distribution.
- In this example we will use Ubuntu for demonstration so I will go a head and download deb package.
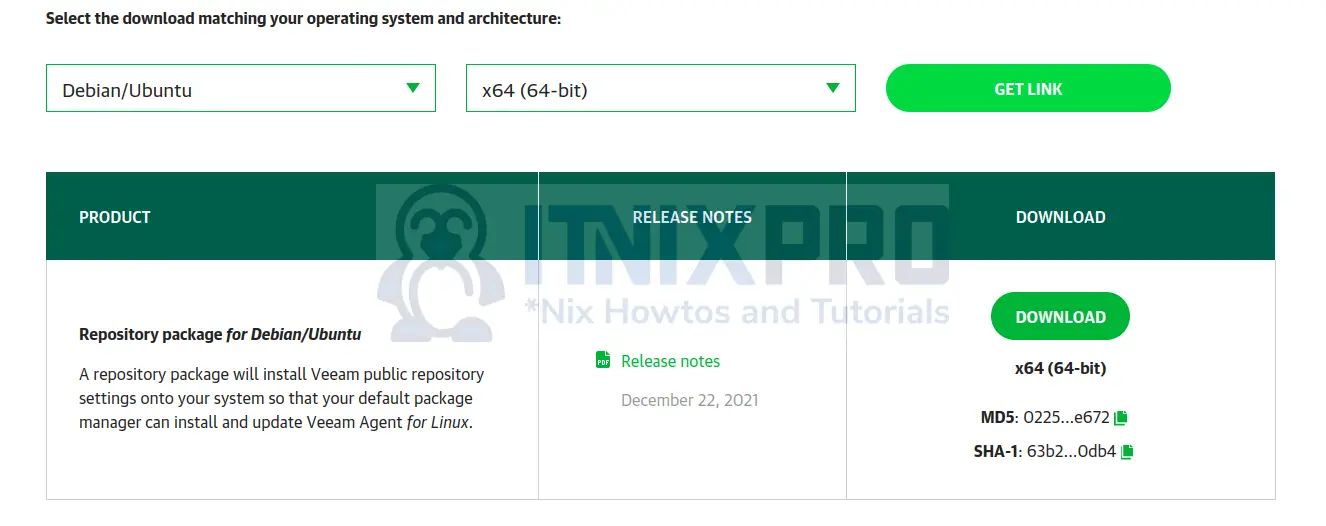
- Click the download button, accept end user license and download the package.
- Once the download is complete, open terminal at location where Veeam agent repository package is downloaded to and install it.
sudo dpkg -i ./veeam-release*sudo apt update- After that install Veeam Agent on Ubuntu/Debian using the following command.
sudo apt install veeamSample output
Reading package lists... Done
Building dependency tree
Reading state information... Done
The following additional packages will be installed:
  binutils binutils-common binutils-x86-64-linux-gnu
  build-essential dctrl-tools dkms dmeventd dpkg-dev
  fakeroot g++ g++-9 gcc gcc-9
  libalgorithm-diff-perl libalgorithm-diff-xs-perl
  libalgorithm-merge-perl libasan5 libatomic1
  libbinutils libc-dev-bin libc6-dev libcrypt-dev
  libctf-nobfd0 libctf0 libdevmapper-event1.02.1
  libfakeroot libgcc-9-dev libitm1 liblsan0
  liblvm2cmd2.03 libquadmath0 libstdc++-9-dev
  libtsan0 libubsan1 linux-libc-dev lvm2 make
  manpages-dev thin-provisioning-tools veeamsnap
Suggested packages:
  binutils-doc debtags menu debian-keyring
  g++-multilib g++-9-multilib gcc-9-doc gcc-multilib
  autoconf automake libtool flex bison gcc-doc
  gcc-9-multilib gcc-9-locales glibc-doc
  libstdc++-9-doc make-doc
The following NEW packages will be installed:
  binutils binutils-common binutils-x86-64-linux-gnu
  build-essential dctrl-tools dkms dmeventd dpkg-dev
  fakeroot g++ g++-9 gcc gcc-9
  libalgorithm-diff-perl libalgorithm-diff-xs-perl
  libalgorithm-merge-perl libasan5 libatomic1
  libbinutils libc-dev-bin libc6-dev libcrypt-dev
  libctf-nobfd0 libctf0 libdevmapper-event1.02.1
  libfakeroot libgcc-9-dev libitm1 liblsan0
  liblvm2cmd2.03 libquadmath0 libstdc++-9-dev
  libtsan0 libubsan1 linux-libc-dev lvm2 make
  manpages-dev thin-provisioning-tools veeam
  veeamsnap
0 upgraded, 41 newly installed, 0 to remove and 17 not upgraded.
Need to get 88.4 MB of archives.
After this operation, 231 MB of additional disk space will be used.
Do you want to continue? [Y/n] y
Get:1 http://us.archive.ubuntu.com/ubuntu focal-updates/main amd64 binutils-common amd64 2.34-6ubuntu1.3 [207 kB]
Backup Linux systems using Veeam Agent
- Launch Veeam using the command below.
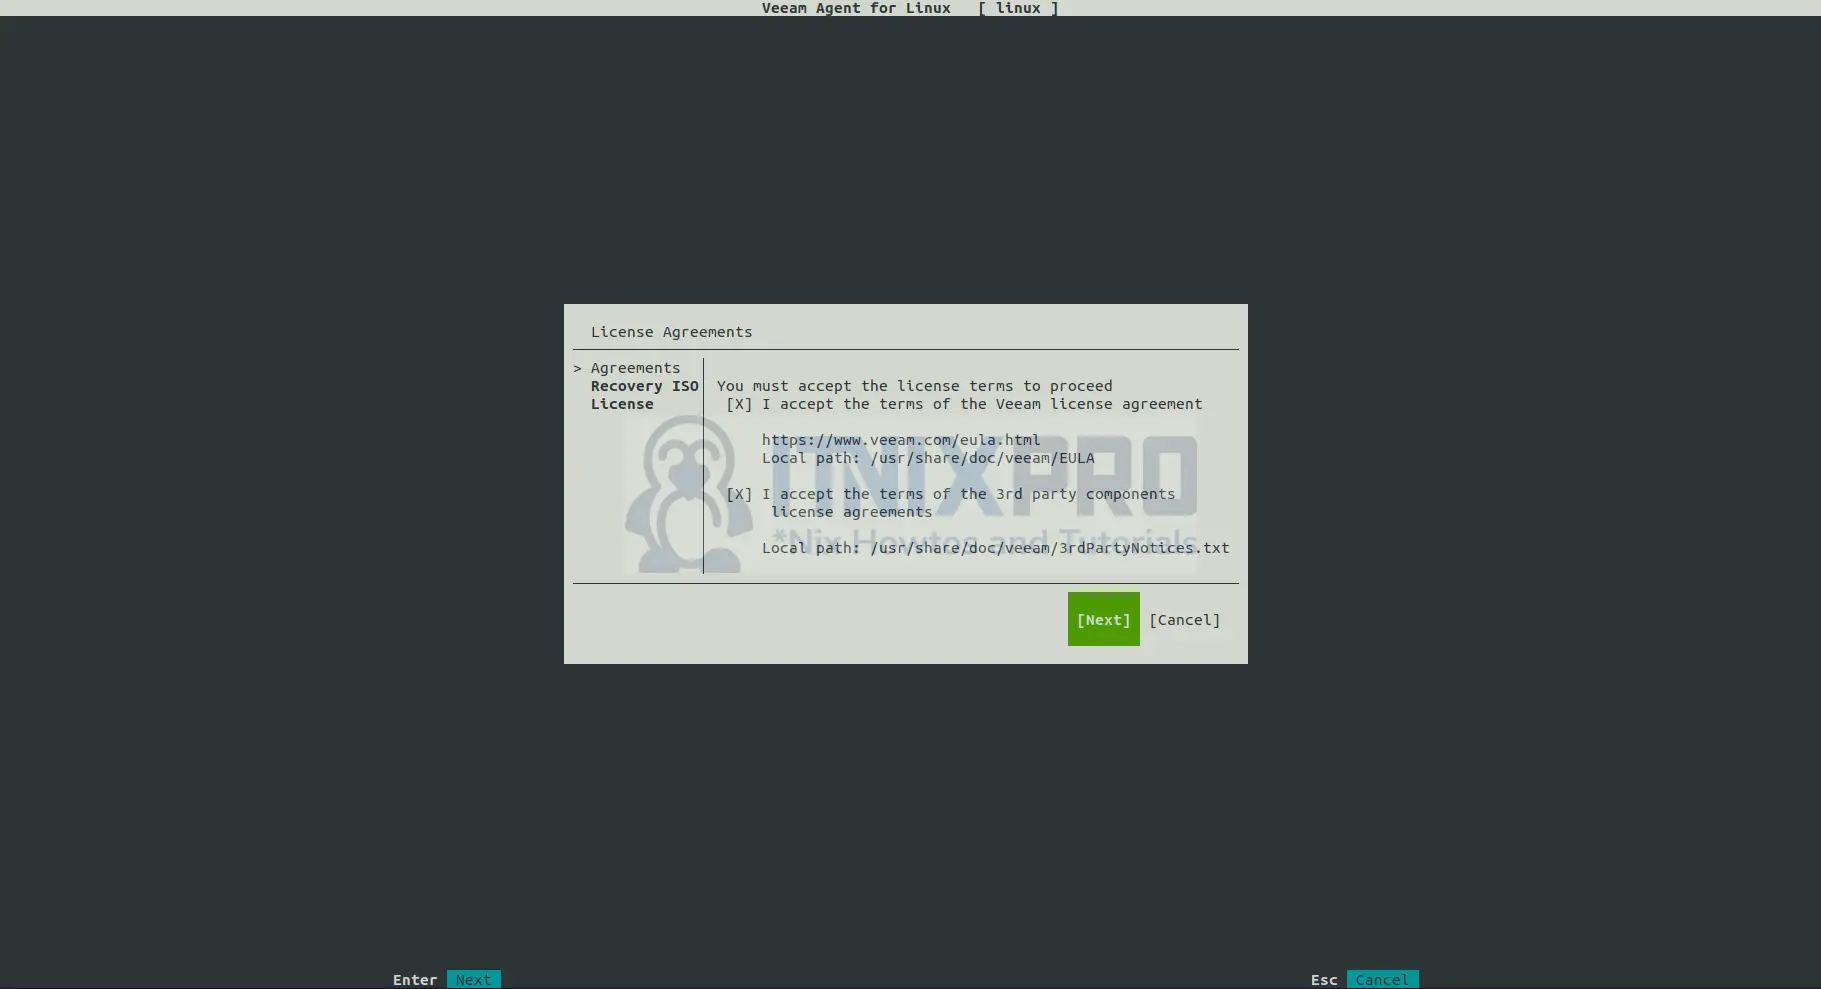
sudo veeam- Accept license agreements by pressing space bar then press enter to continue.
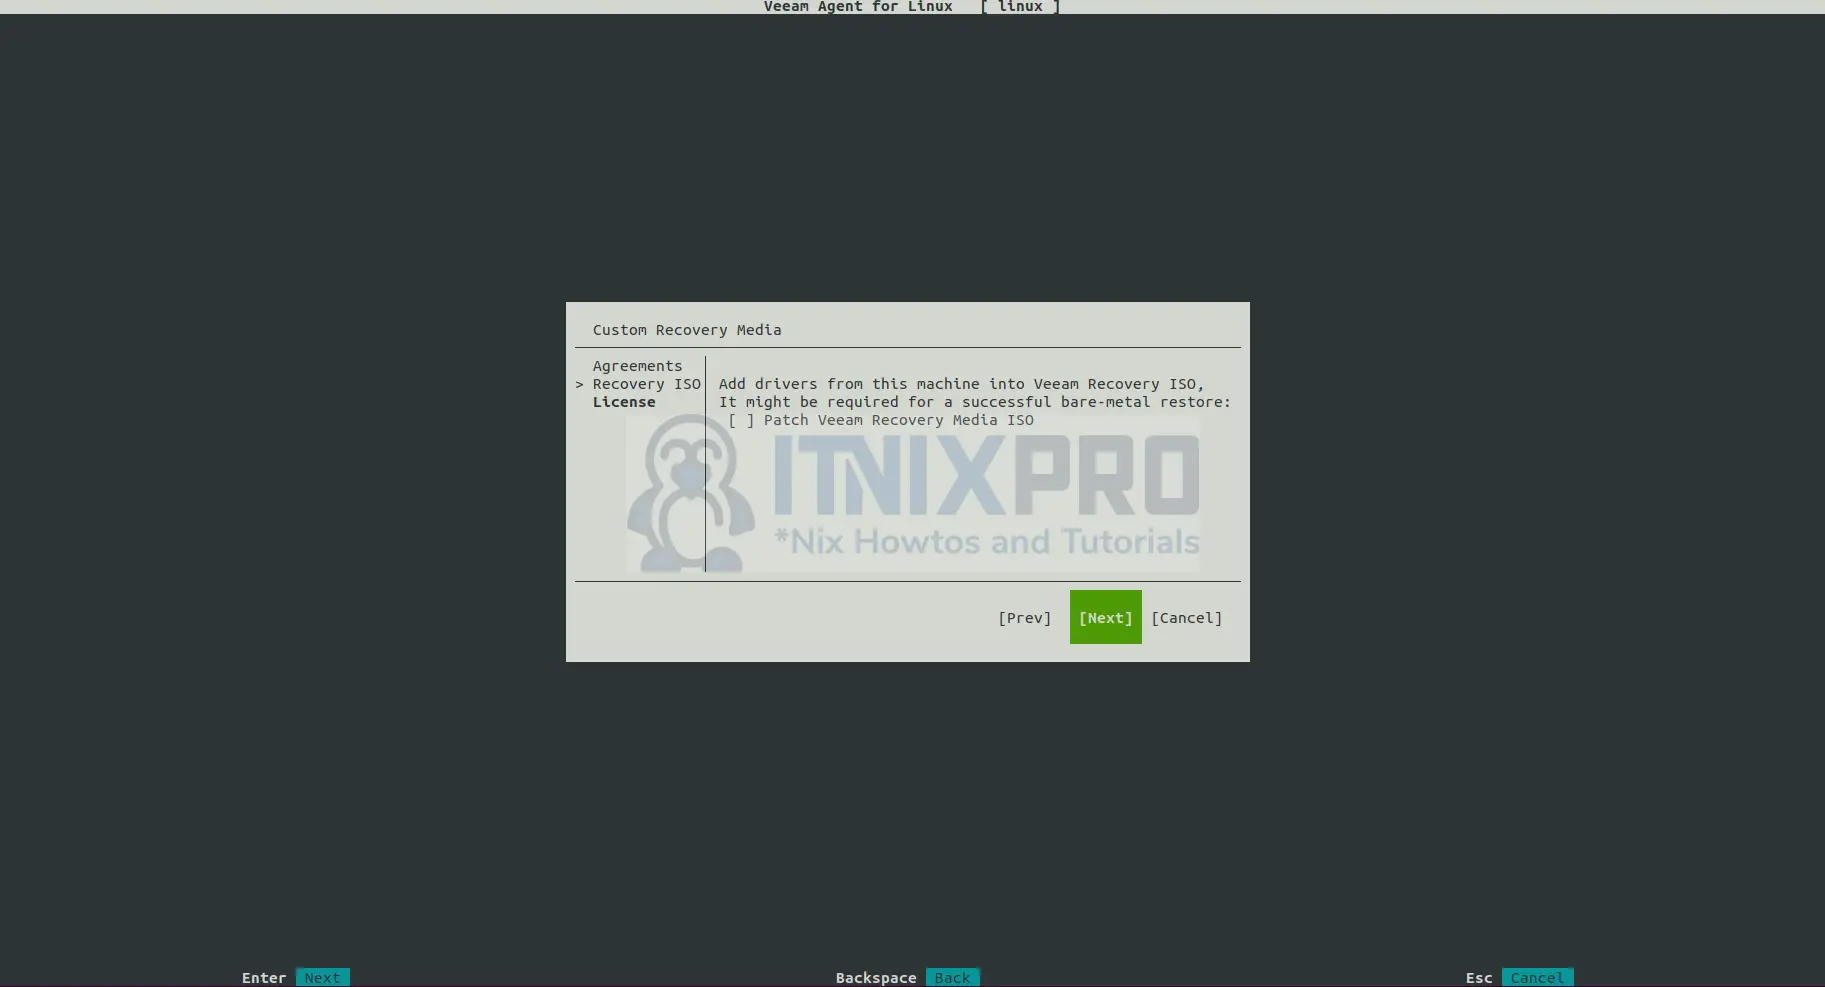
- I will skip the custom recovery media by selecting next.
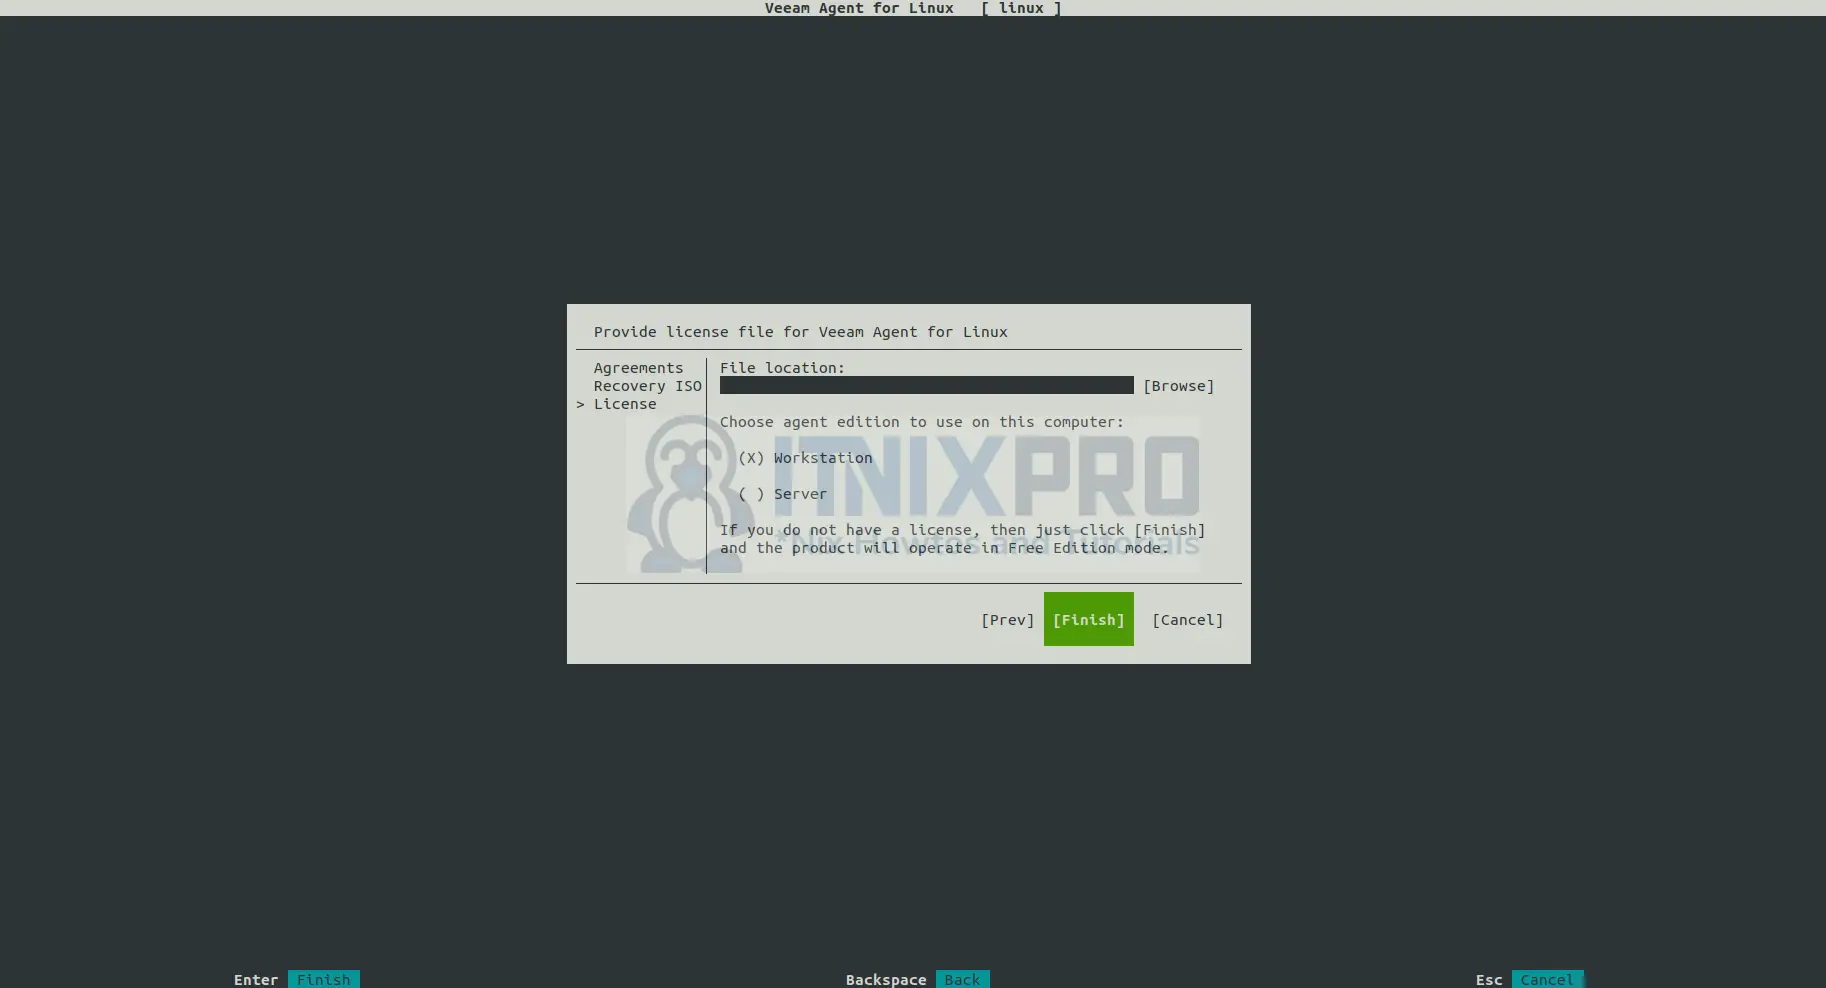
- If your have license browse to install it else select finish to continue.
- Next, press C to configure Veeam agent backup job.

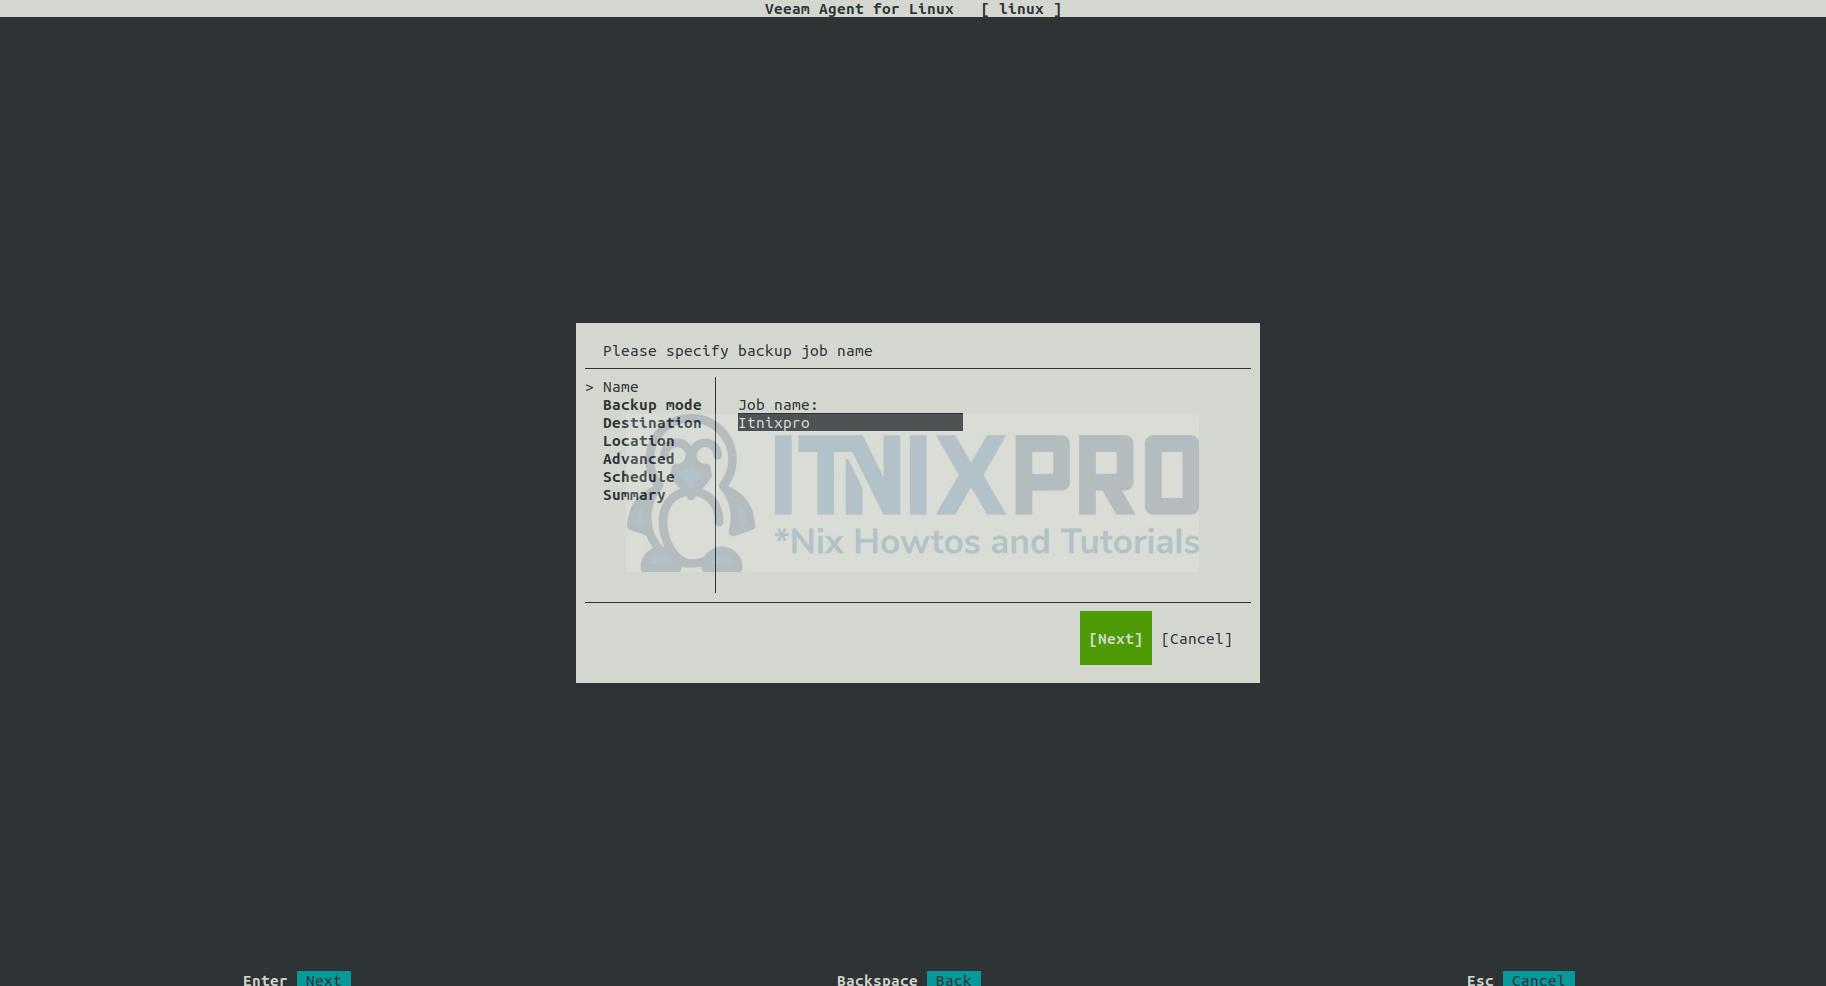
- Next enter the name of your backup.
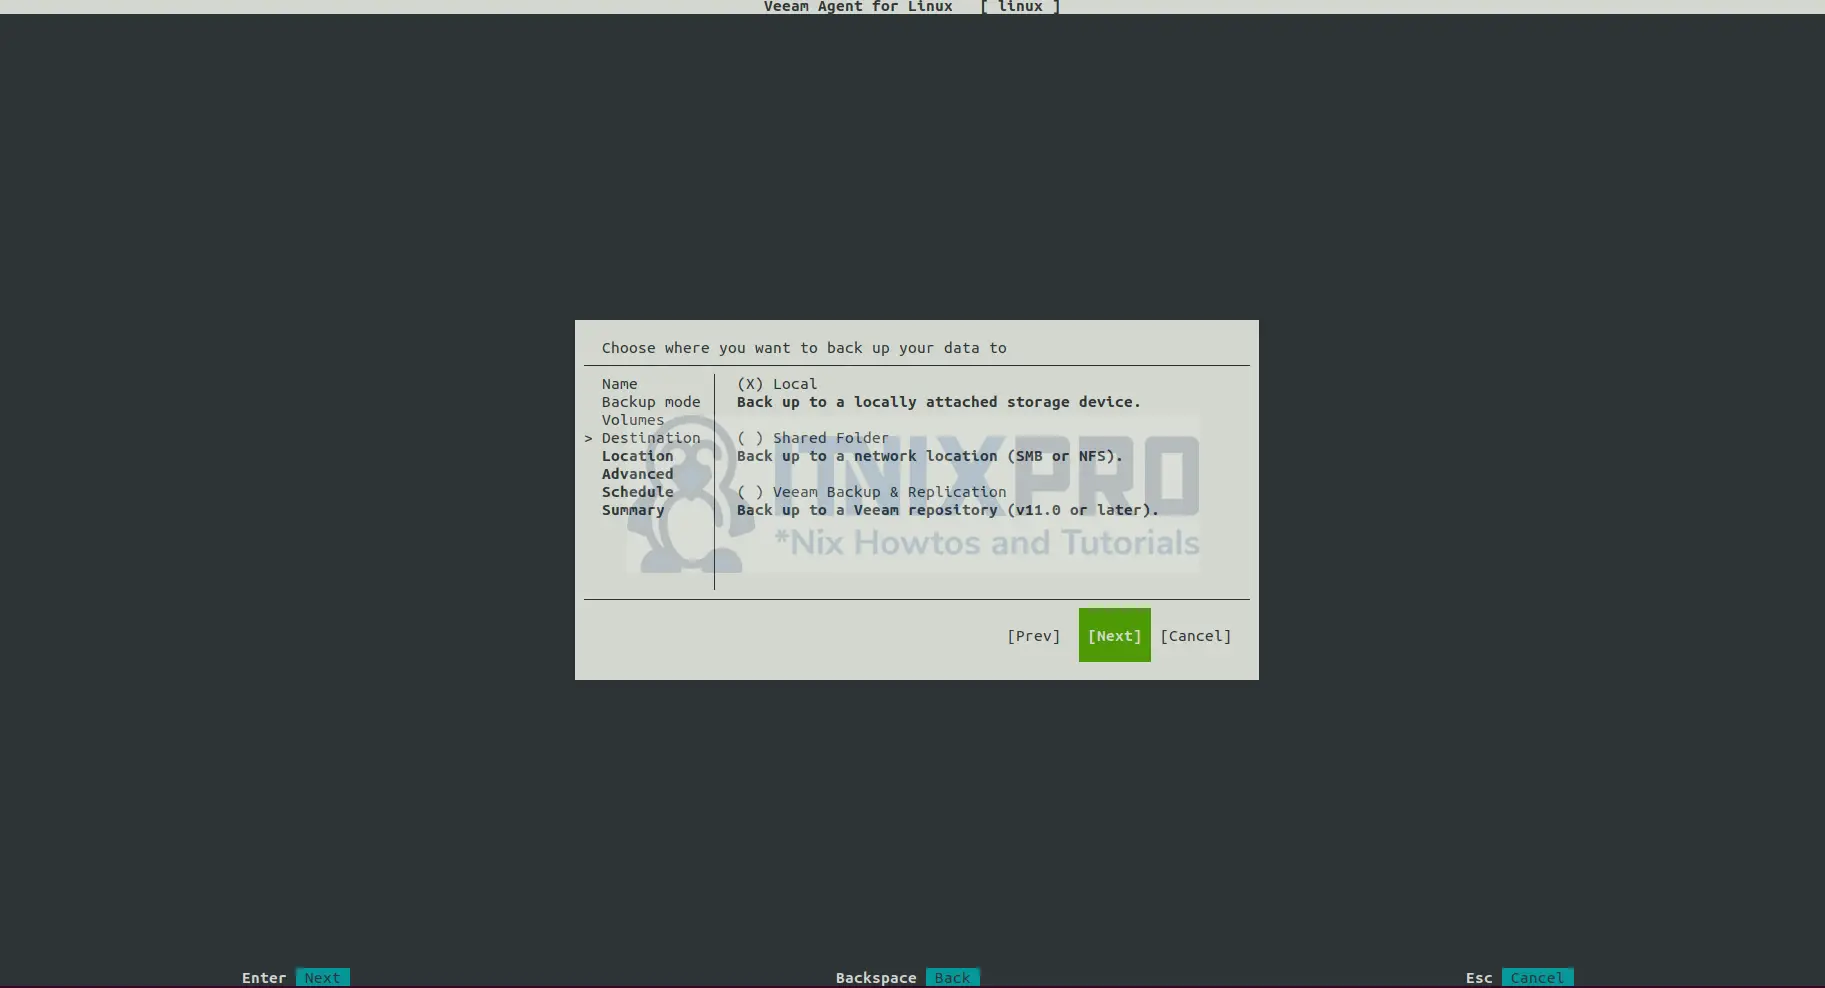
- Then choose what you want to backup according to your preference.

- You will be required to select volume to backup. Note, Local backs up in the same device while using Share folder, you will be able to back up to a different machine. We use Shared Folder in this example.
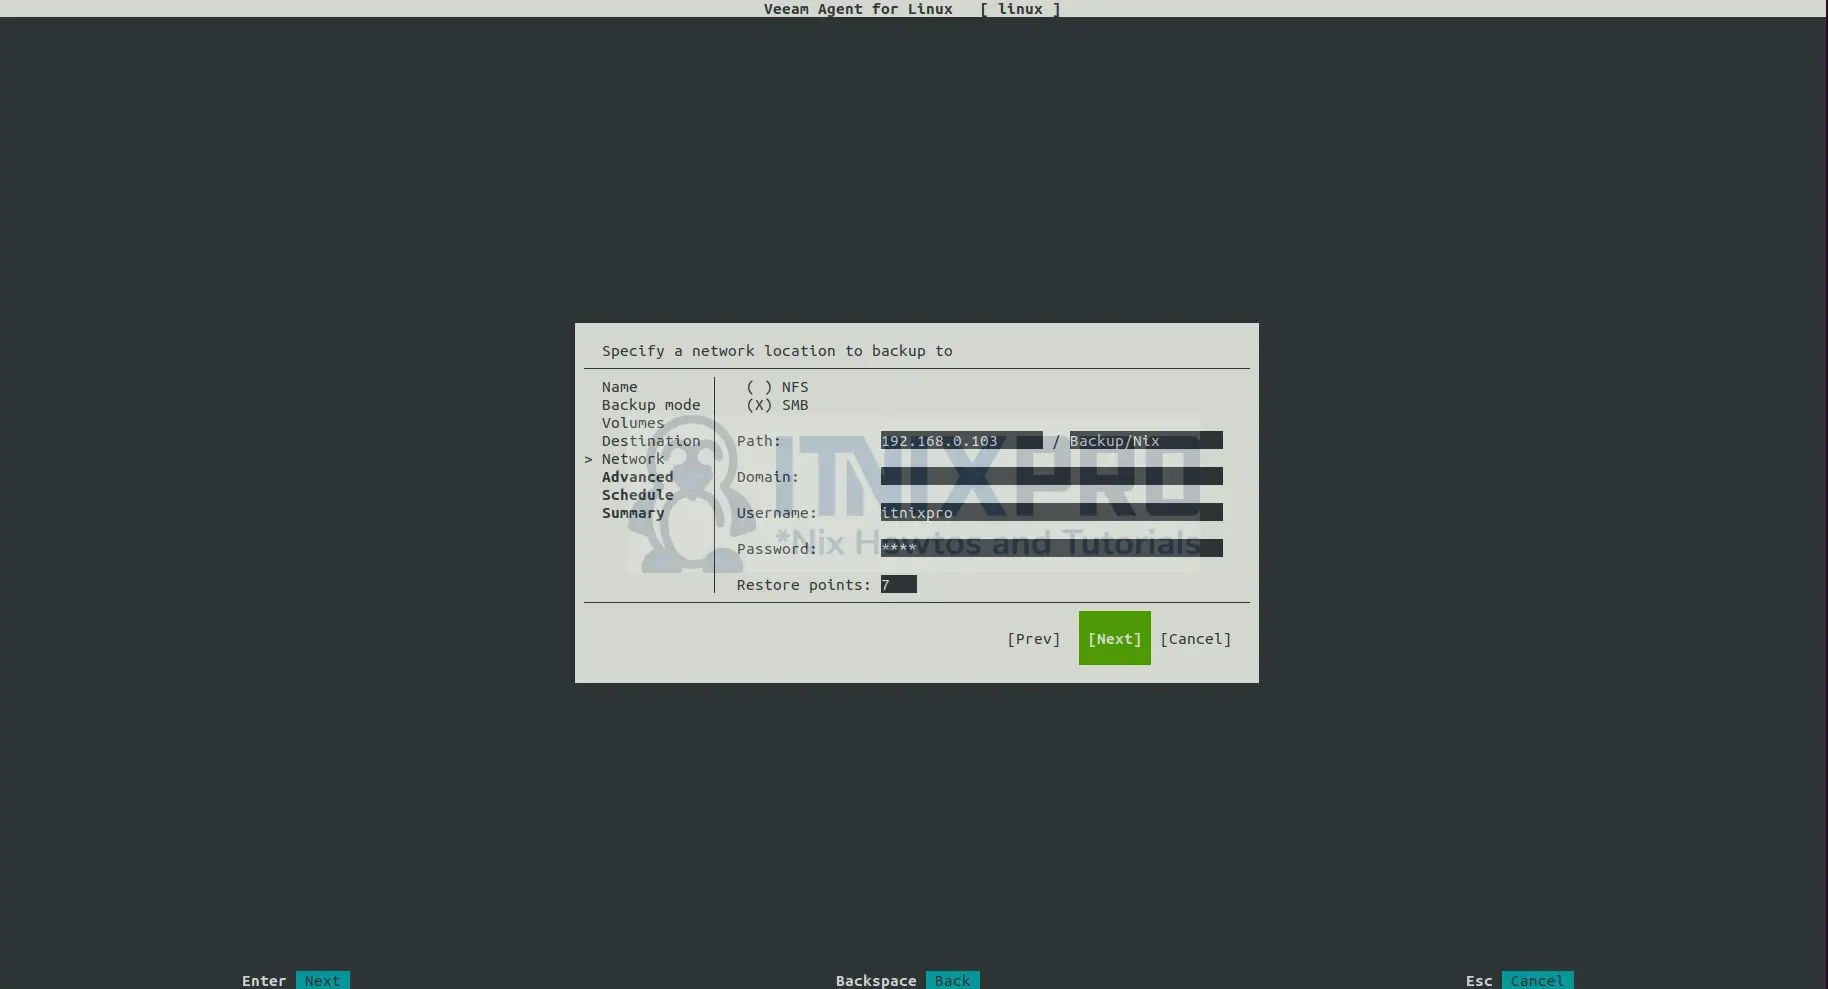
- Select SMB and then enter path of the remote machine which my backup will be stored i.e. IP address and folder name. After that, enter the username and password of the remote machine. Note, you can enter your domain if you have one.
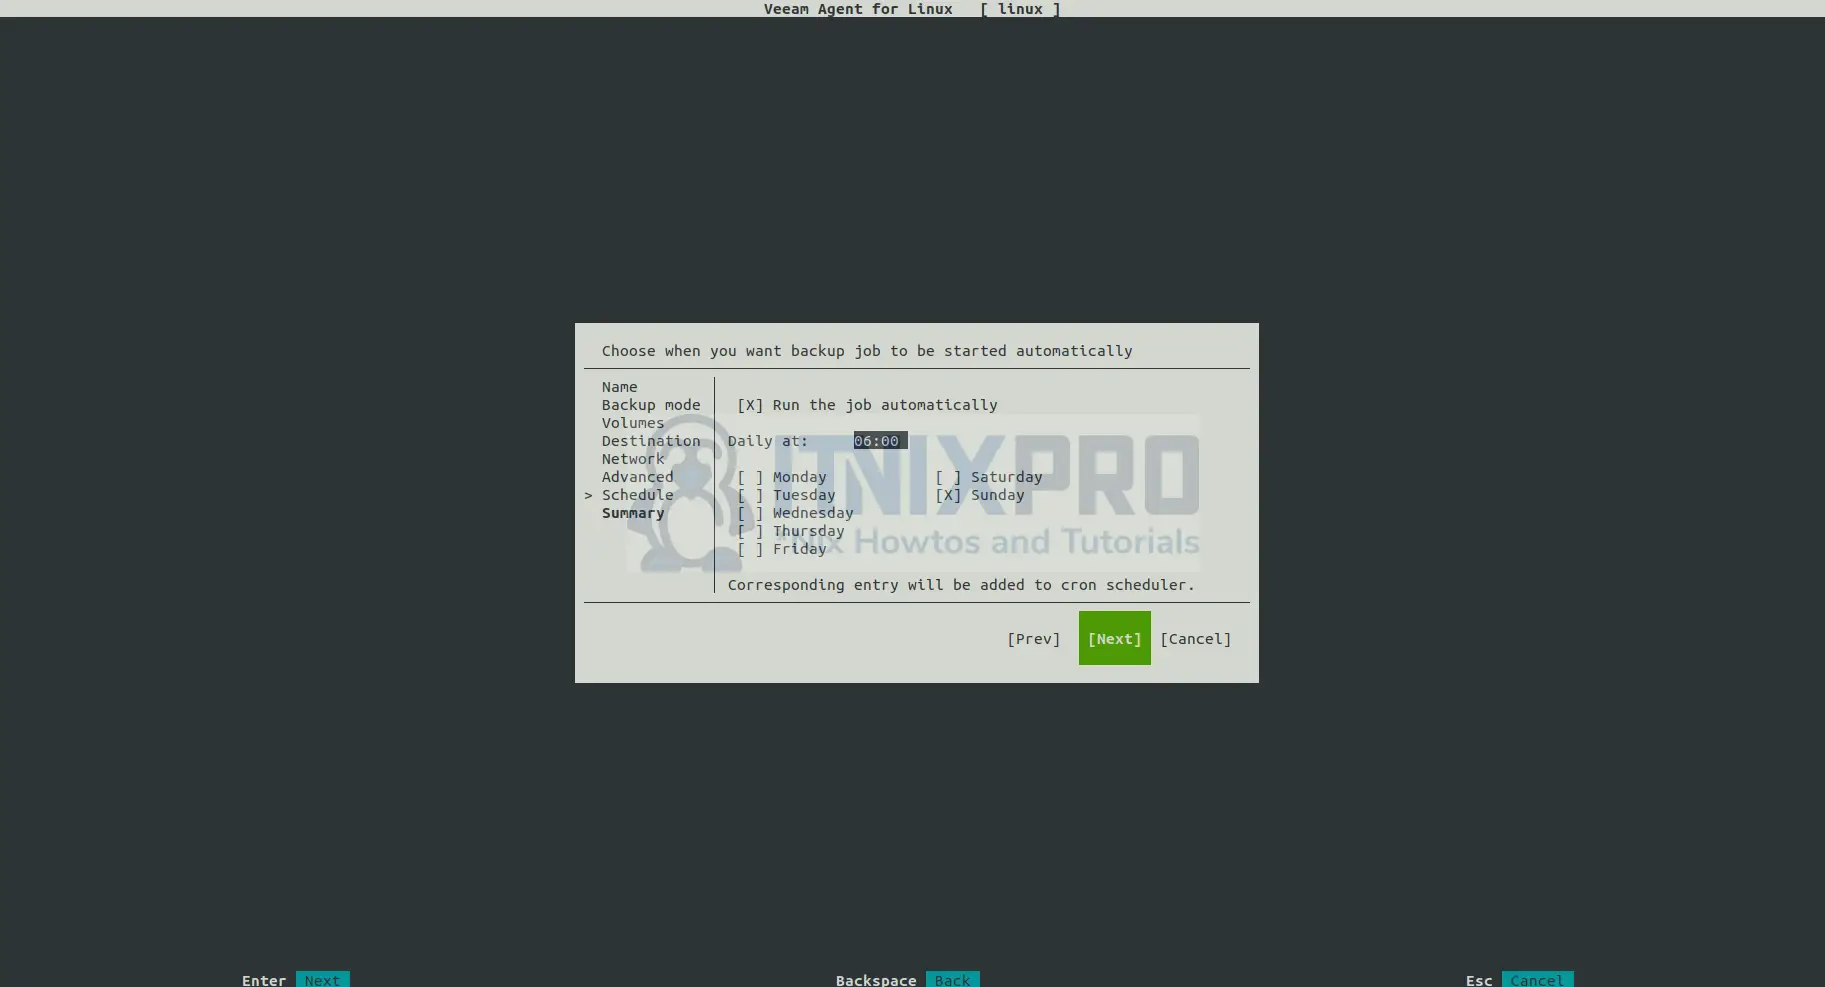
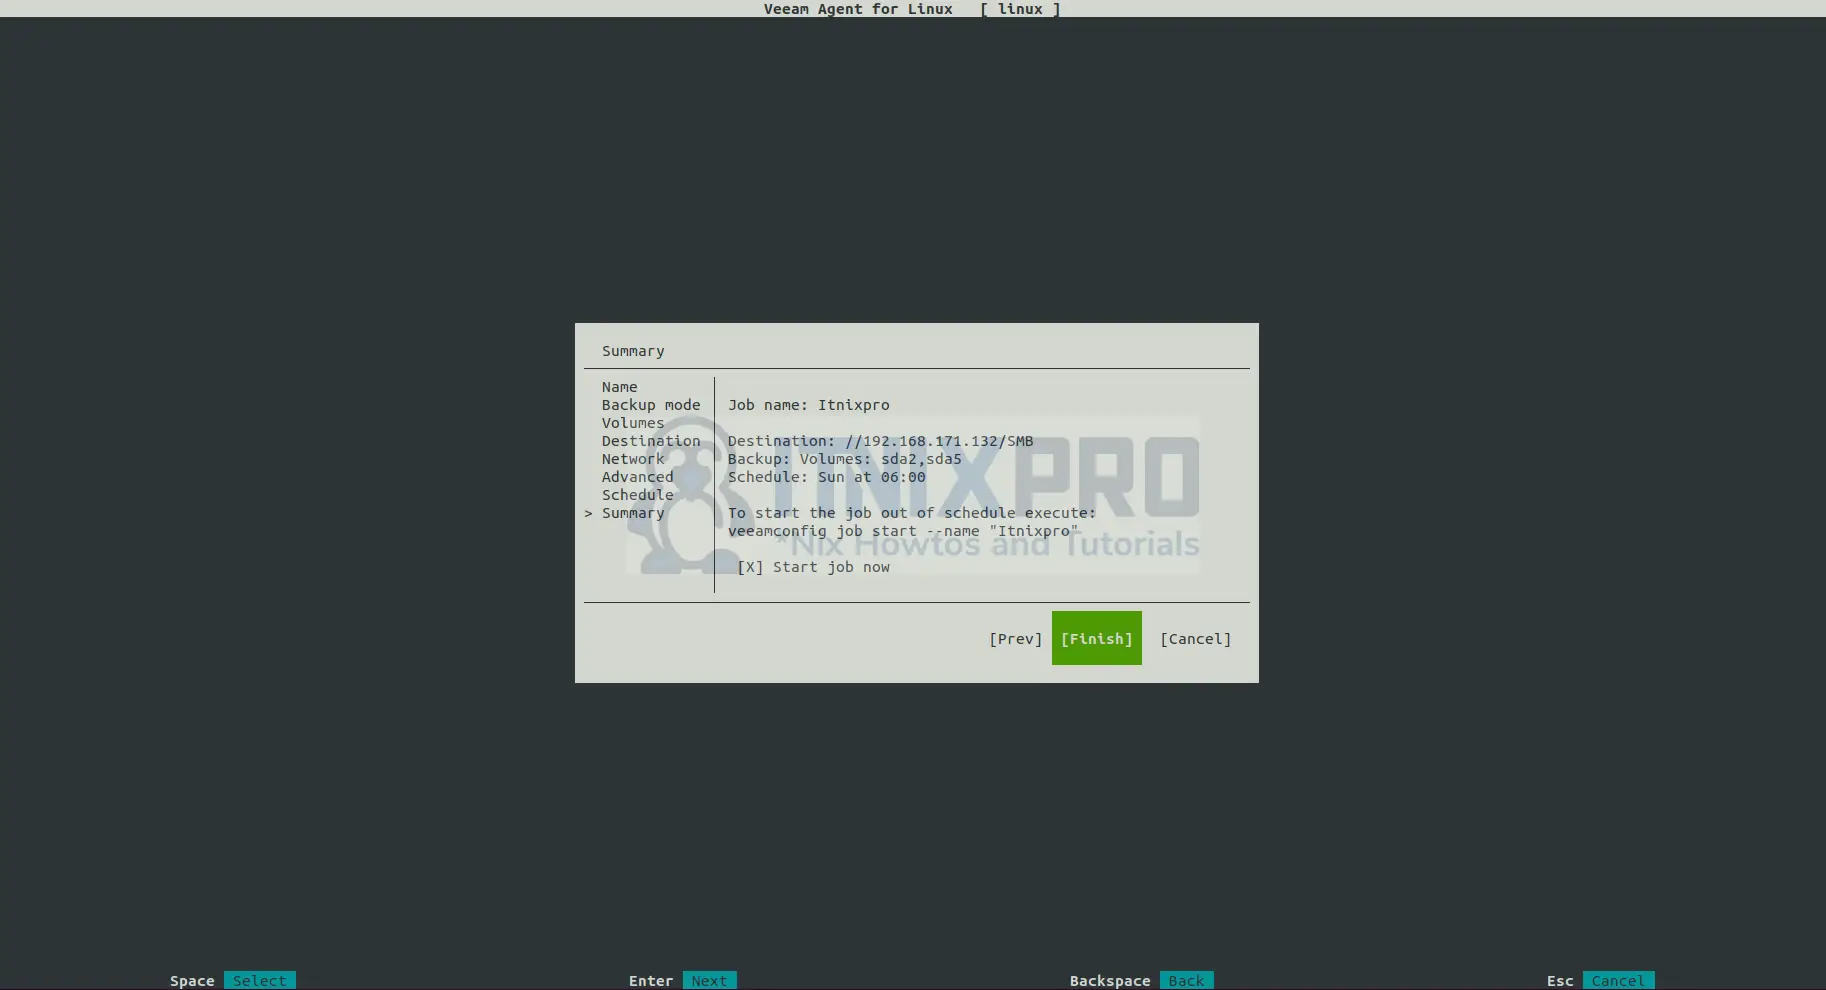
- Next, setup your backup schedule.
- Finish the backup configurations.
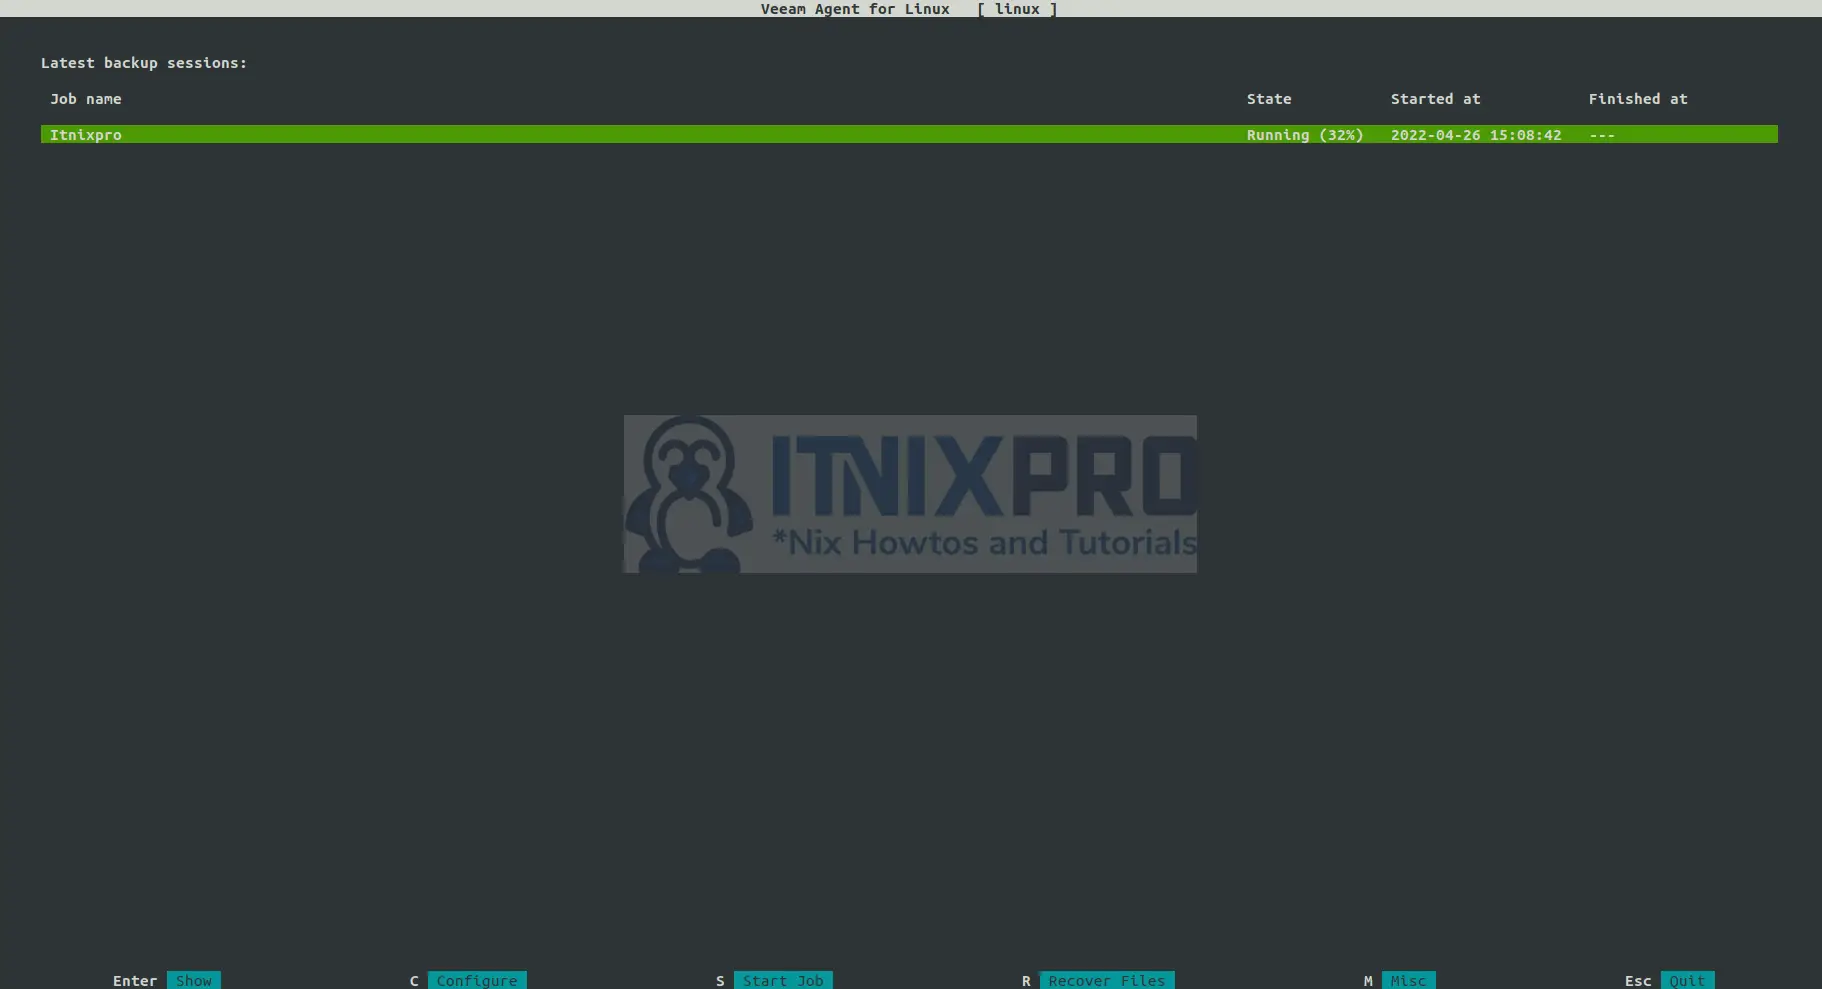
- Backup job will start.
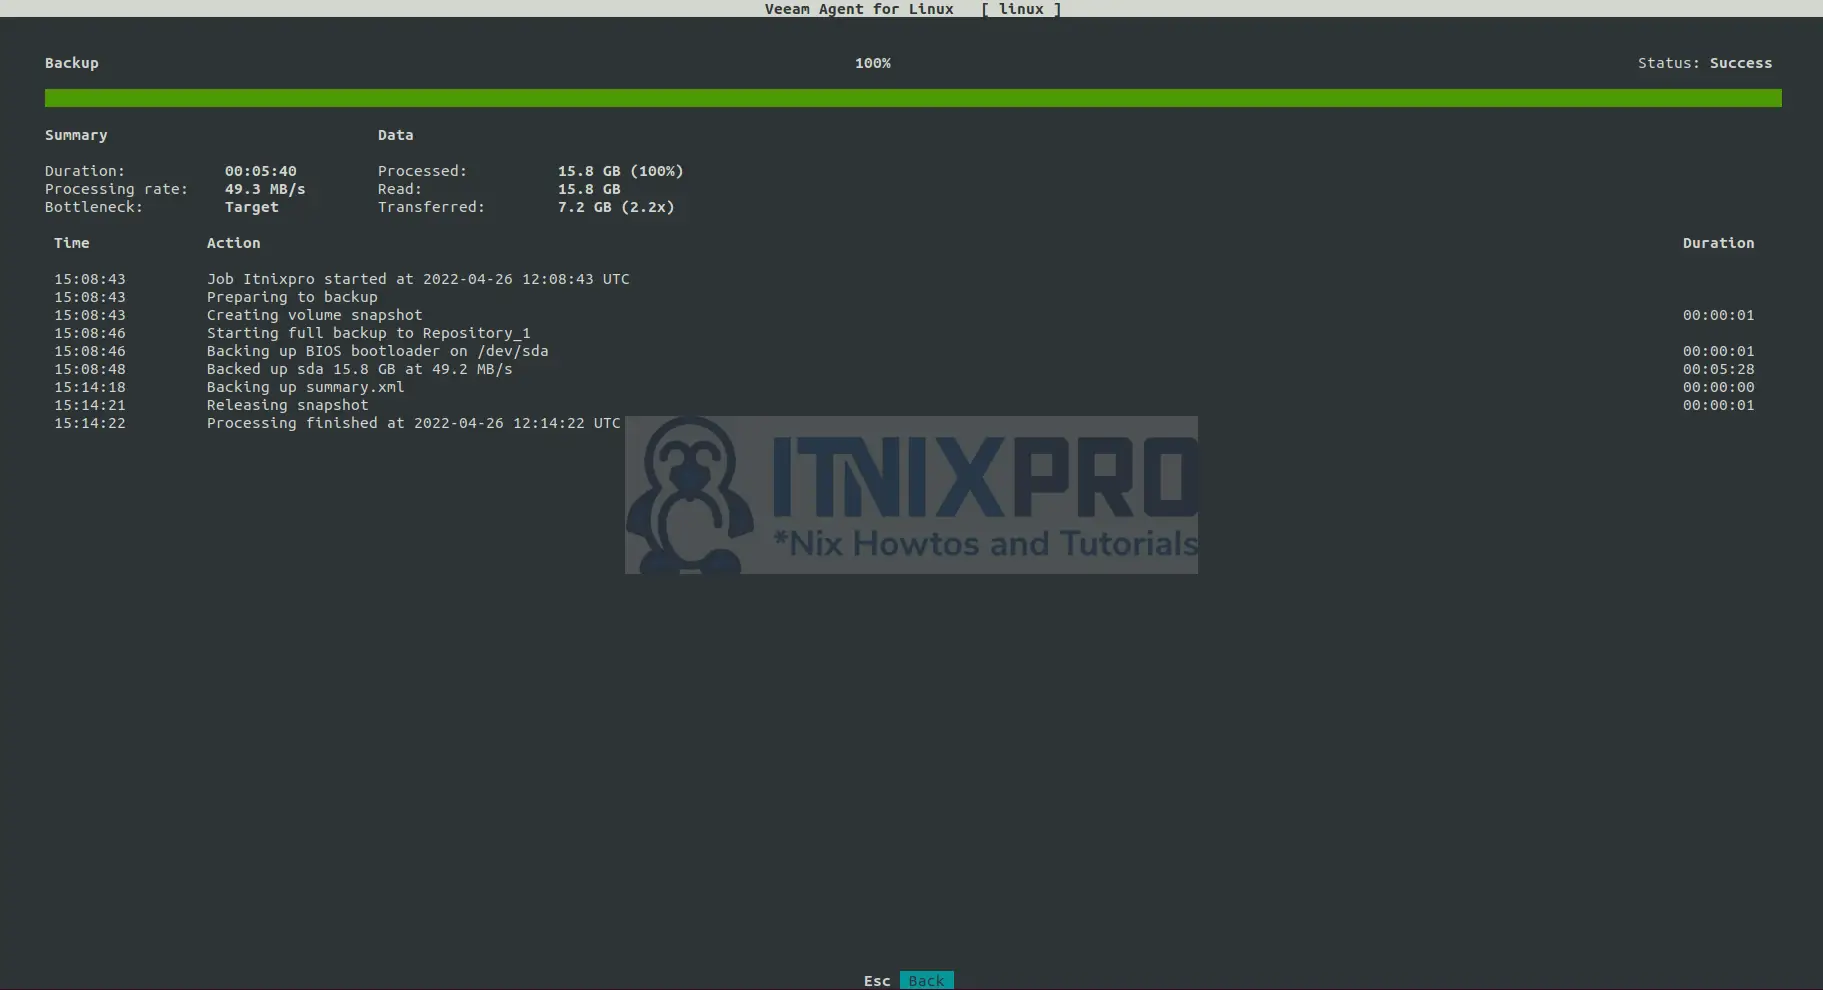
- When the backup completes you will get success status.
- You can now check your backup folder location. You will get the backed up data on the Samba shared directory
ls /Backup/ubuntu22\ itnixpro/itnixpro_2022-05-02T115404.vbk itnixpro.vbm- You have reached the end of our article! Congrats. You have learned how data is backed up on Linux systems using Veeam Agent.
Read more on the Veeam Documentation
Other Tutorials
Backup Linux systems using BackupPC