This is a tested and working article to help Debian users install Nginx Web Server on Rocky Linux. Nginx is a powerful and open-source web server that optimizes content and application delivery, focusing on security and facilitating scalability of applications.
Install Nginx Web Server on Rocky Linux
Nginx web server installation has been made easy because of the web servers popularity. You just need to run few commands.
First update system packages to avoid dependency problems:
sudo dnf updateInstall Nginx web server on Rocky Linux:
sudo dnf install nginxCheck the status of Nginx web server:
sudo systemctl status nginxOutput:
[itnixpro@localhost ~]$ sudo systemctl status nginx
● nginx.service - The nginx HTTP and reverse proxy server
   Loaded: loaded (/usr/lib/systemd/system/nginx.service; disabled; vendor pres>
   Active: active (running) since Sun 2022-05-01 12:14:26 EAT; 2s ago
  Process: 4103 ExecStart=/usr/sbin/nginx (code=exited, status=0/SUCCESS)
  Process: 4101 ExecStartPre=/usr/sbin/nginx -t (code=exited, status=0/SUCCESS)
  Process: 4100 ExecStartPre=/usr/bin/rm -f /run/nginx.pid (code=exited, status>
 Main PID: 4105 (nginx)
    Tasks: 2 (limit: 17712)
   Memory: 6.3M
   CGroup: /system.slice/nginx.service
           ├─4105 nginx: master process /usr/sbin/nginx
           └─4106 nginx: worker process

May 01 12:14:25 localhost.localdomain systemd[1]: Starting The nginx HTTP and r>
May 01 12:14:26 localhost.localdomain nginx[4101]: nginx: the configuration fil>
May 01 12:14:26 localhost.localdomain nginx[4101]: nginx: configuration file /e>
May 01 12:14:26 localhost.localdomain systemd[1]: nginx.service: Failed to pars>
May 01 12:14:26 localhost.localdomain systemd[1]: Started The nginx HTTP and re>
lines 1-18/18 (END)
You need to make sure there is not other web server running at the same port with Nginx. Alternatively, you can just stop other web servers and restart Nginx using the command.
sudo systemctl restart nginxAllow connection through firewall
Enable connection through ports 80 (HTTP) and 443 (HTTPS when using SSL).
sudo firewall-cmd --permanent --add-service=httpsudo firewall-cmd --permanent --add-service=httpsRestart the firewall to apply changes.
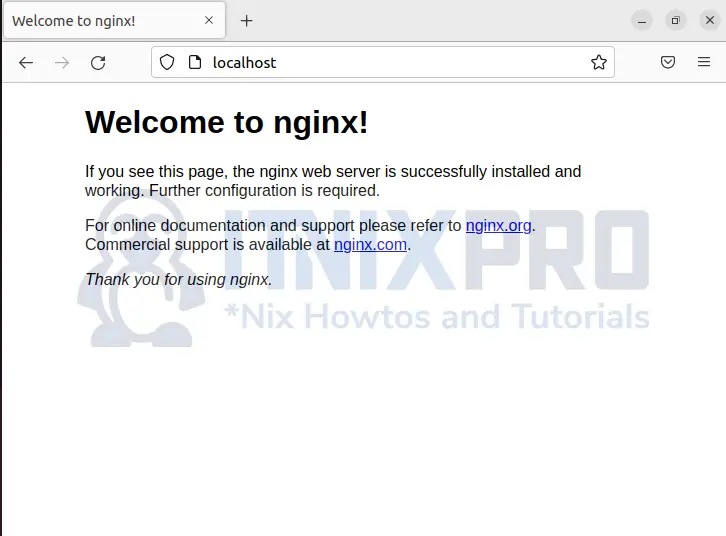
sudo systemctl reload firewalldConfirm if Nginx is running without errors by typing in your browser localhost.
That is it! You have managed to install Nginx Web Server on Rocky Linux.
Managing Nginx process
Similarly to how you restarted the Nginx web server, use the same command to perform functions like start, stop, restart, reload, enable and disable.
sudo systemctl start|stop|restart|reload|enable|disable nginxNext, let’s see how you can serve you site using Nginx server.
Settings up server blocks with Nginx web server (Optional)
Since you have been able to install Nginx Web Server on Rocky Linux, you can set up server blocks to enable hosting multiple sites from the Nginx web server. Configure a different directory to serve clients who does not match the sites you have.
Create a directory with your domain name i.e. example.com under /var/www
sudo mkdir -p /var/www/example.com/htmlCreate a simple HTML file for testing:
sudo nano /var/www/example.com/html/index.htmlPaste the content below, save and close the file.
<html>
    <head>
        <title>Welcome to itnixpro.com!</title>
    </head>
    <body>
        <p>It works!  Thank you for visiting <b>Itnixpro.com</b>!</p>
    </body>
</html>
Then create a server block telling Nginx to serve your sites with correct directives.
sudo nano /etc/nginx/sites-available/example.comAdd the content below, save and close the file:
# Virtual Host configuration for example.com
#
# You can move that to a different file under sites-available/ and symlink that
# to sites-enabled/ to enable it.
#
server {
        listen 80;
        listen [::]:80;

        root /var/www/example.com/html;
        index index.html index.htm index.nginx-debian.html;

        # replace example.com with you domain
        server_name example.com www.example.com;

        location / {
                try_files $uri $uri/ =404;
        }
}
Next, enable your Nginx site configuration.
sudo ln -s /etc/nginx/sites-available/example.com /etc/nginx/sites-enabled/Ensure the syntax does not yield errors by executing the command:
sudo nginx -tFinally, restart Nginx web server:
sudo systemctl restart nginxNow open your browser enter your url: http://your_domain, in my case http://example.com. Your site will displays:

Note: You will not be able to open the domain if your browser redirects HTTP requests to HTTPS. For Firefox browser, go to about:config, toggle network.stricttransportsecurity.preloadlist and browser.fixup.fallback-to-https to false then restart your browser.
This is just a workaround to do tests.
Uninstall Nginx from Rocky Linux
Just type the command:
sudo dnf remove nginxThat is the end of how to install Nginx Web Server on Rocky Linux and run a static files. Become a master of Nginx web server by learning and practicing using Nginx documentation.
More similar interesting tutorials
Install and Configure DHCP client on Rocky Linux

