
This article is going to take you through on how to Install ELK stack 8 on rocky Linux. The ELK stack consists of Elasticsearch, Logstash, and Kibana. For application and infrastructure monitoring, rapid troubleshooting, security analytics, and more, the ELK stack allows you to collect logs from all of your systems and apps, analyze them and visualize the results.
The ELK stack acronym meaning;
- Elasticsearch – It’s a distributed search and analytics engine used to analyze logs.
- Logstash – Its server-side data processing pipeline that collects data from a variety of sources e.g. Elasticsearch, transform it and send it to your desired destination e.g. Kibana
- Kibana – It’s a data visualization and exploration tool that supports histograms, line graphs, pie charts, heat maps, and other features.
- And of course, the Beats, ELK stack data shippers.
How to Install ELK Stack 8 on Rocky Linux
Install ELK Stack Repository on Rocky Linux
- Start by importing GPG signing key using the command below,
sudo rpm --import https://artifacts.elastic.co/GPG-KEY-elasticsearch- Next, create repo file for Elasticsearch. By copying and then paste the following command on terminal;
cat > /etc/yum.repos.d/elasticsearch.repo << 'EOL'
[elasticsearch-8.x]
name=Elasticsearch repository for  8.x packages
baseurl=https://artifacts.elastic.co/packages/8.x/yum
gpgcheck=1
gpgkey=https://artifacts.elastic.co/GPG-KEY-elasticsearch
enabled=1
autorefresh=1
type=rpm-md
EOL
Install ELK Stack 8 on Rocky Linux
- Once the repos are in place, then begin the installation by installing Elasticsearch 8 on Rocky Linux using the command below.
sudo dnf install elasticsearchSample installation command output;
Elasticsearch repository for  8.x packages                                                                                                  2.1 MB/s | 5.4 MB     00:02
Last metadata expiration check: 0:00:02 ago on Mon 11 Apr 2022 05:32:12 PM EAT.
Dependencies resolved.
============================================================================================================================================================================
 Package                                    Architecture                        Version                                Repository                                      Size
============================================================================================================================================================================
Installing:
 elasticsearch                              x86_64                              8.1.2-1                                elasticsearch-8.x                              492 M

Transaction Summary
============================================================================================================================================================================
Install  1 Package

Total download size: 492 M
Installed size: 1.0 G
Is this ok [y/N]: y
Downloading Packages:
elasticsearch-8.1.2-x86_64.rpm                                                                                                              2.3 MB/s | 492 MB     03:36
----------------------------------------------------------------------------------------------------------------------------------------------------------------------------
Total                                                                                                                                       2.3 MB/s | 492 MB     03:36
Running transaction check
Transaction check succeeded.
Running transaction test
Transaction test succeeded.
Running transaction
  Preparing        :                                                                                                                                                    1/1
  Running scriptlet: elasticsearch-8.1.2-1.x86_64                                                                                                                       1/1
Creating elasticsearch group... OK
Creating elasticsearch user... OK

  Installing       : elasticsearch-8.1.2-1.x86_64                                                                                                                       1/1
  Running scriptlet: elasticsearch-8.1.2-1.x86_64                                                                                                                       1/1
--------------------------- Security autoconfiguration information ------------------------------

Authentication and authorization are enabled.
TLS for the transport and HTTP layers is enabled and configured.

The generated password for the elastic built-in superuser is : HyrdwFO1kSp0ZhHHyAXb

If this node should join an existing cluster, you can reconfigure this with
'/usr/share/elasticsearch/bin/elasticsearch-reconfigure-node --enrollment-token '
after creating an enrollment token on your existing cluster.

You can complete the following actions at any time:

Reset the password of the elastic built-in superuser with
'/usr/share/elasticsearch/bin/elasticsearch-reset-password -u elastic'.

Generate an enrollment token for Kibana instances with
 '/usr/share/elasticsearch/bin/elasticsearch-create-enrollment-token -s kibana'.

Generate an enrollment token for Elasticsearch nodes with
'/usr/share/elasticsearch/bin/elasticsearch-create-enrollment-token -s node'.

-------------------------------------------------------------------------------------------------
### NOT starting on installation, please execute the following statements to configure elasticsearch service to start automatically using systemd
 sudo systemctl daemon-reload
 sudo systemctl enable elasticsearch.service
### You can start elasticsearch service by executing
 sudo systemctl start elasticsearch.service

[/usr/lib/tmpfiles.d/elasticsearch.conf:1] Line references path below legacy directory /var/run/, updating /var/run/elasticsearch → /run/elasticsearch; please update the tmpfiles.d/ drop-in file accordingly.

  Verifying        : elasticsearch-8.1.2-1.x86_64                                                                                                                       1/1

Installed:
  elasticsearch-8.1.2-1.x86_64

Complete!
Configure Elasticsearch on Rocky Linux
Elasticsearch should just work out of the box with the default settings.
- One thing to note, however, is that beginning ELK Stack 8, security is enabled by default. See the installation command output;
                                                                                                                     1/1
--------------------------- Security autoconfiguration information ------------------------------

Authentication and authorization are enabled.
TLS for the transport and HTTP layers is enabled and configured.

The generated password for the elastic built-in superuser is : HyrdwFO1kSp0ZhHHyAXb

If this node should join an existing cluster, you can reconfigure this with
'/usr/share/elasticsearch/bin/elasticsearch-reconfigure-node --enrollment-token '
after creating an enrollment token on your existing cluster.

You can complete the following actions at any time:

Reset the password of the elastic built-in superuser with
'/usr/share/elasticsearch/bin/elasticsearch-reset-password -u elastic'.

Generate an enrollment token for Kibana instances with
 '/usr/share/elasticsearch/bin/elasticsearch-create-enrollment-token -s kibana'.

Generate an enrollment token for Elasticsearch nodes with
'/usr/share/elasticsearch/bin/elasticsearch-create-enrollment-token -s node'.

-------------------------------------------------------------------------------------------------
- By default, it is configured to listen on localhost.
- If you want to access Elasticsearch remotely, then you need to configure it to listen on an IP address. Thus uncomment network host in the Elasticsearch configuration file. To open the config file run the command below.
sudo nano /etc/elasticsearch/elasticsearch.yml- Search for the line below
#network.host: 192.168.0.1Then remove the # symbol to uncomment and replace the IP address accordingly.
- Define Whether to run Elasticsearch as a Cluster or Single Node
If you are a running multiple Elasticsearch nodes, you need to define using the parameter below;
#discovery.seed_hosts: ["host1", "host2"]
...
...
#cluster.initial_master_nodes: ["node-1", "node-2"]
..
In our setup, we are just running a single node Elasticsearch. With ELK 8, by default, Elasticsearch is configured in such a way that it is possible to run a single node cluster.
Example setting;
# Create a new cluster with the current node only
# Additional nodes can still join the cluster later
cluster.initial_master_nodes: ["rocky8"]- Start and enable Elasticsearch to run on system boot.
sudo systemctl enable elasticsearch.service --now- If it was already running, restart it by executing the command below;
sudo systemctl restart elasticsearch- Then confirm its running.
systemctl status elasticsearchSample output
● elasticsearch.service - Elasticsearch
   Loaded: loaded (/usr/lib/systemd/system/elasticsearch.service; enabled; vendor preset: disabled)
   Active: active (running) since Mon 2022-04-11 17:53:30 EAT; 9s ago
     Docs: https://www.elastic.co
 Main PID: 2562 (java)
    Tasks: 71 (limit: 11388)
   Memory: 1.2G
   CGroup: /system.slice/elasticsearch.service
           ├─2562 /usr/share/elasticsearch/jdk/bin/java -Xshare:auto -Des.networkaddress.cache.ttl=60 -Des.networkaddress.cache.negative.ttl=10 -Djava.security.manager=all>
           └─2847 /usr/share/elasticsearch/modules/x-pack-ml/platform/linux-x86_64/bin/controller

Apr 11 17:52:50 rocky8 systemd[1]: Starting Elasticsearch...
Apr 11 17:53:30 rocky8 systemd[1]: Started Elasticsearch.
You can check other Important system configuration
Install Kibana on Rocky Linux
- Run the command below to install Kibana.
sudo dnf install kibanaSample output
Dependencies resolved.
    ===================================================================
     Package     Arch        Version      Repository              Size
    ===================================================================
    Installing:
     kibana      x86_64      8.1.1-1      elasticsearch-8.x      264 M

    Transaction Summary
    ===================================================================
    Install  1 Package

    Total download size: 264 M
    Installed size: 690 M
    Downloading Packages:
    kibana-8.1.1-x86_64.rpm            2.2 MB/s | 264 MB     02:01
    -------------------------------------------------------------------
    Total                              2.2 MB/s | 264 MB     02:01
    Running transaction check
    Transaction check succeeded.
    Running transaction test
    Transaction test succeeded.
    Running transaction
      Preparing        :                                           1/1
      Running scriptlet: kibana-8.1.1-1.x86_64                     1/1
      Installing       : kibana-8.1.1-1.x86_64                     1/1
      Running scriptlet: kibana-8.1.1-1.x86_64                     1/1
    Creating kibana group... OK
    Creating kibana user... OK

    Created Kibana keystore in /etc/kibana/kibana.keystore

    [/usr/lib/tmpfiles.d/elasticsearch.conf:1] Line references path below legacy directory /var/run/, updating /var/run/elasticsearch → /run/elasticsearch; please update the tmpfiles.d/ drop-in file accordingly.

      Verifying        : kibana-8.1.1-1.x86_64                     1/1

    Installed:
      kibana-8.1.1-1.x86_64

    Complete!
- After installing Kibana, open its configuration file and uncomment server port, server host and Elasticsearch host.Run the command below to open the config file.
sudo nano /etc/kibana/kibana.yml- Search and edit the lines below by removing the # symbol.
server.port: 5601
server.host: "192.168.58.43"
elasticsearch.hosts: ["http://localhost:9200"]
If Elasticsearch is listening on an IP address, ensure that you update the same accordingly.
- Next generate enrollment token for Kibana (refer to Elasticsearch installation command output above);
/usr/share/elasticsearch/bin/elasticsearch-create-enrollment-token -s kibanaSuch a long key is generated;
eyJ2ZXIiOiI4LjEuMiIsImFkciI6WyIxOTIuMTY4LjU4LjQzOjkyMDAiLCIxMC4wLjIuMTU6OTIwMCJdLCJmZ3IiOiJhODNkZDFlZTRjODI5MjNkNDM3ZTRjNTU5Yzk5YWE2NGEzNGFlM2I3YzEwODg2NTE2ZjUyMWQ0MmJiMWIzMjFkIiwia2V5Ijoib2FFa0dZQUJhWUJuUmIxZlZkZXc6eU9fbW9lb3NRMUtzaU9UNXBHQWMxUSJ9This token will be required to complete Kibana configuration. Keep it save.
- Generate other required Kibana encryption keys;
/usr/share/kibana/bin/kibana-encryption-keys generateSample output;
...
xpack.encryptedSavedObjects.encryptionKey: e2c695bd5e9a60173ca9c616e64520b5
xpack.reporting.encryptionKey: 6f0e064406453f6e22c2aa20c0ad59ea
xpack.security.encryptionKey: 7a1572df6e79951f8b3fc2ed244a2492
Put the three lines above into Kibana configuration file.
- Start and enable Kibana to run on system boot
sudo systemctl enable --now kibana- Kibana should be running, check status using the command below after a short while;
systemctl status kibanaSample output
● kibana.service - Kibana
   Loaded: loaded (/usr/lib/systemd/system/kibana.service; enabled; vendor preset: disabled)
   Active: active (running) since Mon 2022-04-11 18:08:25 EAT; 23s ago
     Docs: https://www.elastic.co
 Main PID: 3363 (node)
    Tasks: 11 (limit: 11388)
   Memory: 229.6M
   CGroup: /system.slice/kibana.service
           └─3363 /usr/share/kibana/bin/../node/bin/node /usr/share/kibana/bin/../src/cli/dist

Apr 11 18:08:25 rocky8 systemd[1]: Started Kibana.
Apr 11 18:08:46 rocky8 kibana[3363]: [2022-04-11T18:08:46.771+03:00][INFO ][plugins-service] Plugin "metricsEntities" is disabled.
Apr 11 18:08:46 rocky8 kibana[3363]: [2022-04-11T18:08:46.846+03:00][INFO ][http.server.Preboot] http server running at http://192.168.58.43:5601
Apr 11 18:08:46 rocky8 kibana[3363]: [2022-04-11T18:08:46.881+03:00][INFO ][plugins-system.preboot] Setting up [1] plugins: [interactiveSetup]
Apr 11 18:08:46 rocky8 kibana[3363]: [2022-04-11T18:08:46.883+03:00][INFO ][preboot] "interactiveSetup" plugin is holding setup: Validating Elasticsearch connection config>
Apr 11 18:08:47 rocky8 kibana[3363]: [2022-04-11T18:08:46.915+03:00][INFO ][root] Holding setup until preboot stage is completed.
Apr 11 18:08:47 rocky8 kibana[3363]: i Kibana has not been configured.
Apr 11 18:08:47 rocky8 kibana[3363]: Go to http://192.168.58.43:5601/?code=532595 to get started.
Pay attention to the last lines;
Apr 11 18:08:47 rocky8 kibana[3363]: i Kibana has not been configured.
Apr 11 18:08:47 rocky8 kibana[3363]: Go to http://192.168.58.43:5601/?code=532595 to get started.
You need to finalize Kibana configuration from web UI
Access ELK Stack Dashboard through Kibana
- If you are using firewall, allow Kibana port using the following commands.
sudo firewall-cmd --permanent --add-port=5601/tcp
sudo firewall-cmd --reload- On your web browser, enter the sever IP that was set during configuration e.g.
server-IP:5601orlocalhost:5601 - Enter the Kibana enrollment token generated above to configure Kibana.
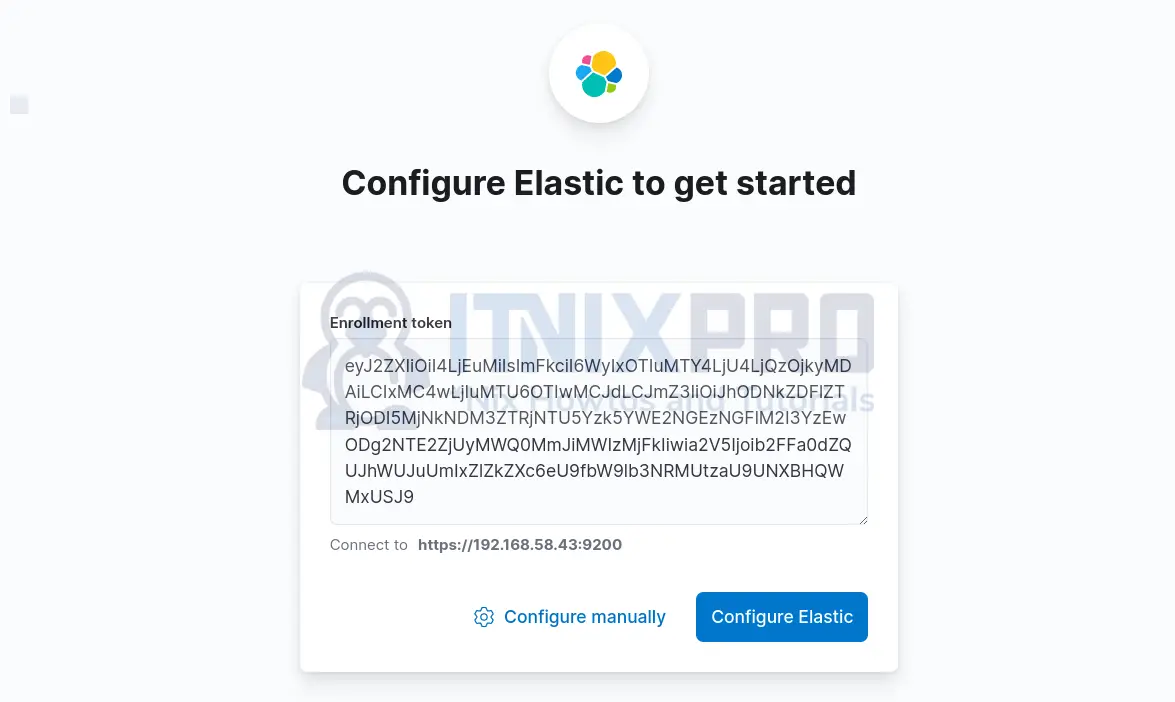
- Next, click Configure Elastic to continue.
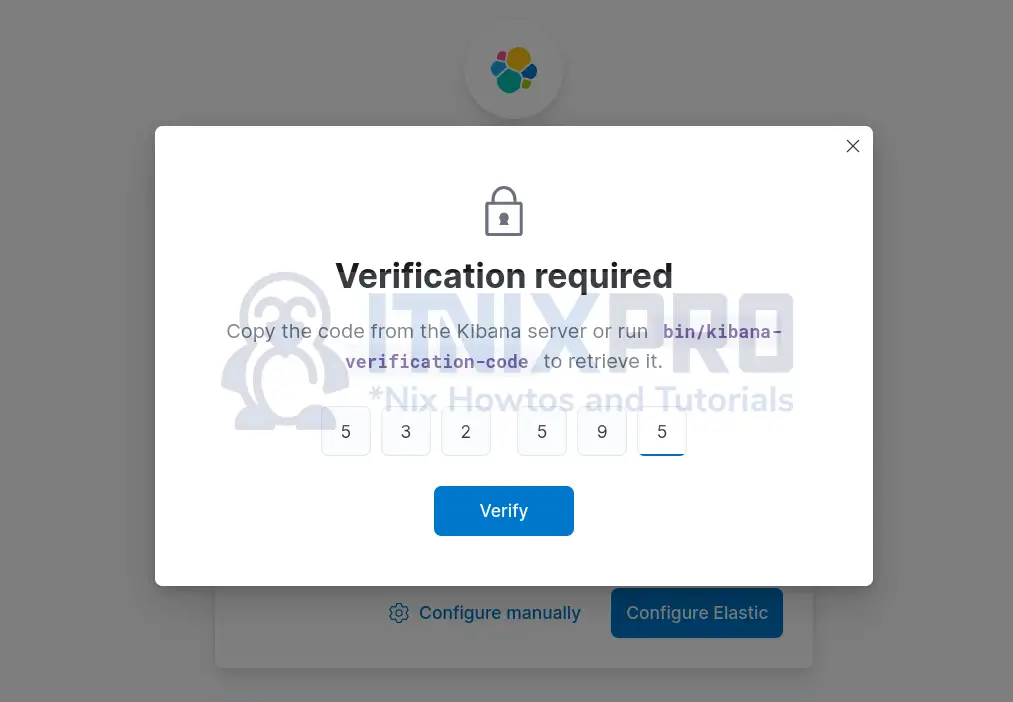
- Generate Verification code using the command below;
/usr/share/kibana/bin/kibana-verification-codeSample output;
Your verification code is: 532 595- Paste the code;
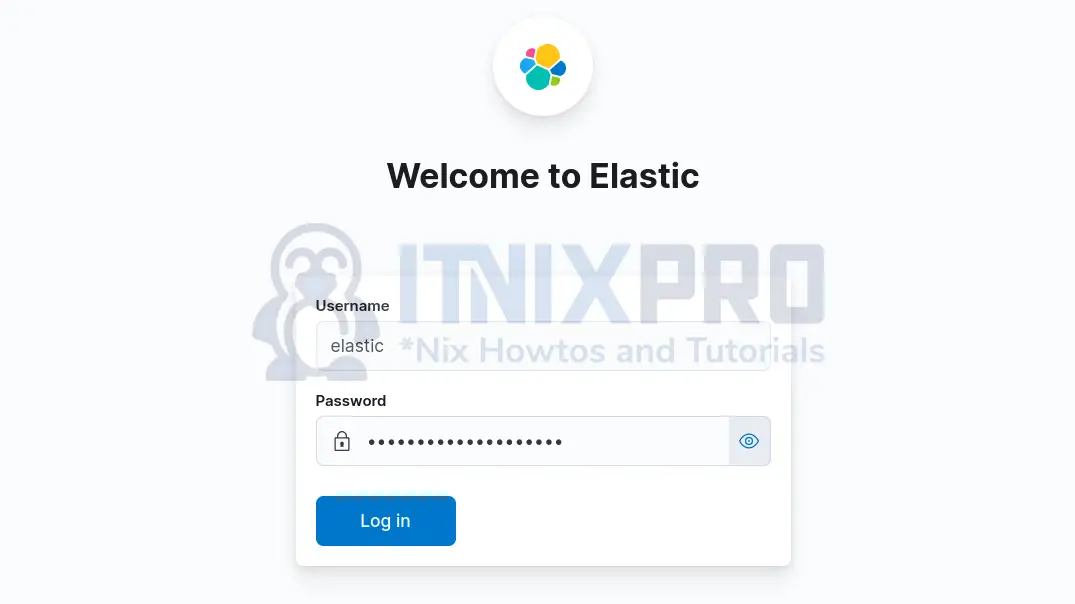
- Next, login to Kibana.
- You can use the elastic user credentials generated during the installation of Elasticsearch.
- You can reset the elastic user password using the command below;
/usr/share/elasticsearch/bin/elasticsearch-reset-password -u elasticSample output;
                                                                                                                     1/1
This tool will reset the password of the [elastic] user to an autogenerated value.
The password will be printed in the console.
Please confirm that you would like to continue [y/N]y


Password for the [elastic] user successfully reset.
New value: tf6gm-UfcWVuPoP3pU5M
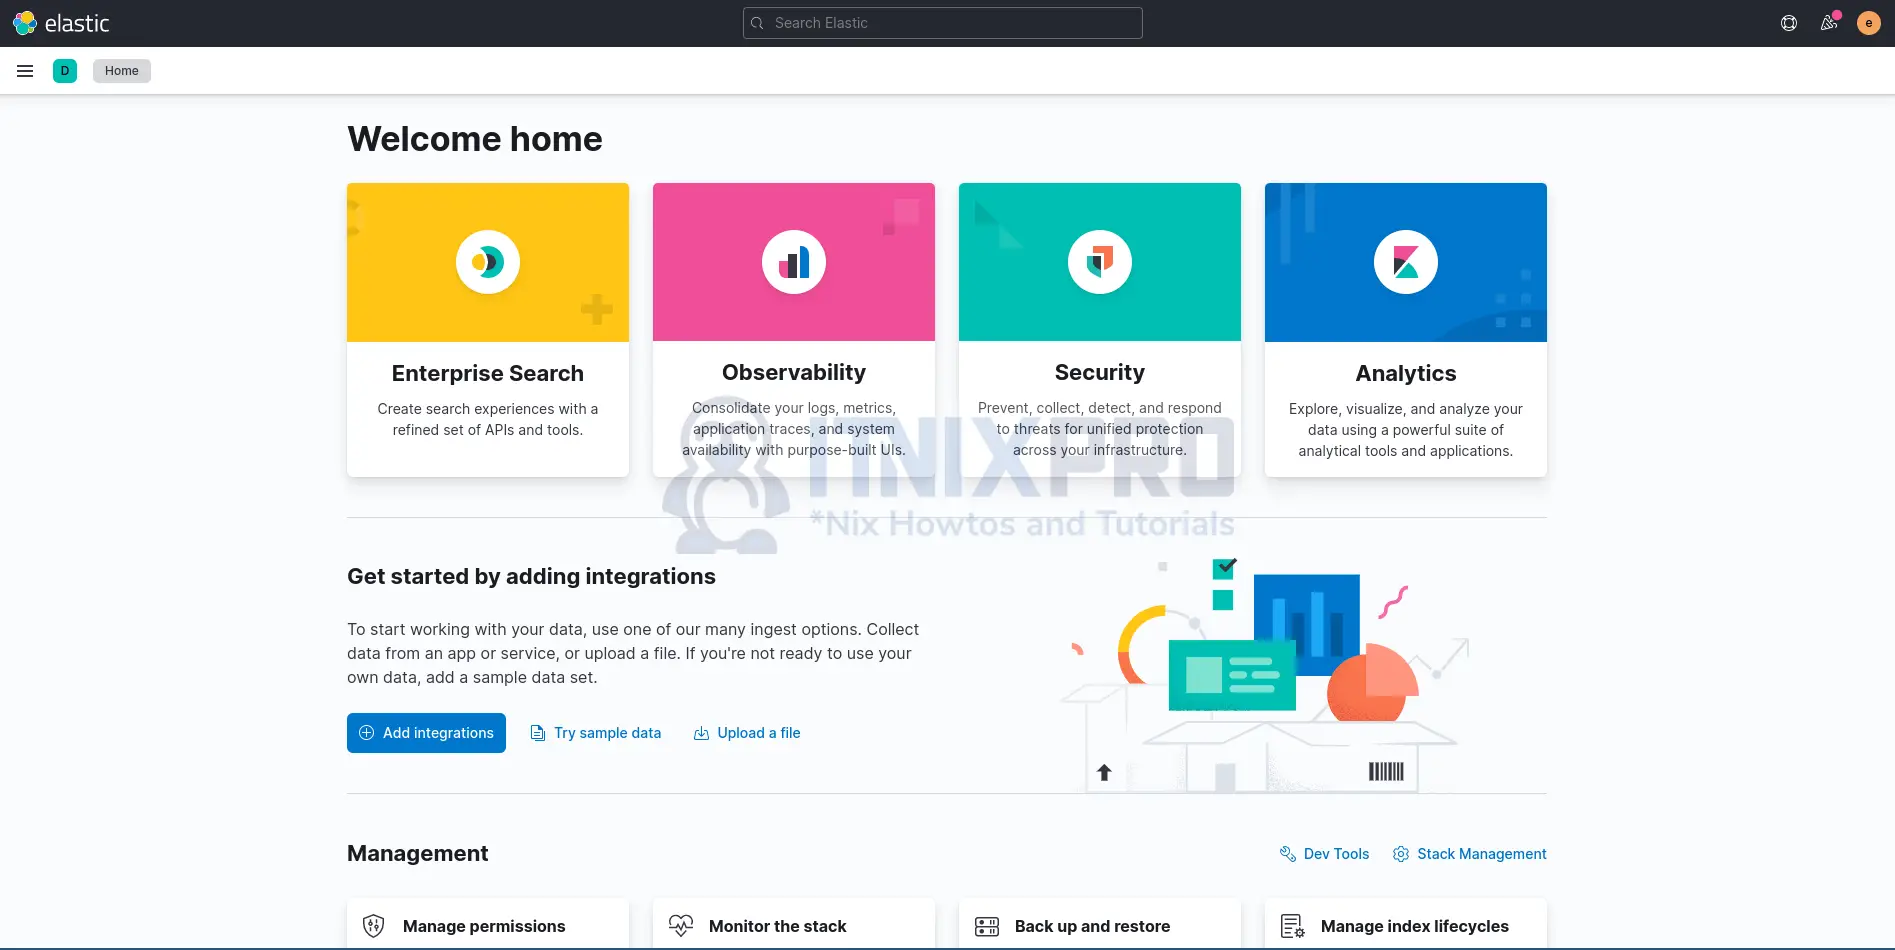
Kibana login page;
Once you logged in, click Explore on my own to proceed;
Install Logstash on Rocky Linux
- Logstash is an optional component in ELK stack. It can only be used where you want to apply custom processing to the logs collected from your various systems.
- Run the command below to install Logstash on Rocky Linux.
sudo dnf install logstash -ySample output
Dependencies resolved.
    ===================================================================
     Package      Arch       Version       Repository             Size
    ===================================================================
    Installing:
     logstash     x86_64     1:8.1.1-1     elasticsearch-8.x     433 M

    Transaction Summary
    ===================================================================
    Install  1 Package

    Total download size: 433 M
    Installed size: 689 M
    Downloading Packages:
    logstash-8.1.1-x86_64.rpm          2.7 MB/s | 433 MB     02:40
    -------------------------------------------------------------------
    Total                              2.7 MB/s | 433 MB     02:40
    Running transaction check
    Transaction check succeeded.
    Running transaction test
    Transaction test succeeded.
    Running transaction
      Preparing        :                                           1/1
      Running scriptlet: logstash-1:8.1.1-1.x86_64                 1/1
      Installing       : logstash-1:8.1.1-1.x86_64                 1/1
      Running scriptlet: logstash-1:8.1.1-1.x86_64                 1/1
    Using bundled JDK: /usr/share/logstash/jdk
    Using provided startup.options file: /etc/logstash/startup.options
    OpenJDK 64-Bit Server VM warning: Option UseConcMarkSweepGC was deprecated in version 9.0 and will likely be removed in a future release.
    /usr/share/logstash/vendor/bundle/jruby/2.5.0/gems/pleaserun-0.0.32/lib/pleaserun/platform/base.rb:112: warning: constant ::Fixnum is deprecated
    Successfully created system startup script for Logstash

      Verifying        : logstash-1:8.1.1-1.x86_64                 1/1

    Installed:
      logstash-1:8.1.1-1.x86_64

    Complete!
- We will discuss the configuration of Logstash in a separate guide.
Install ELK Stack Beats
ELK stack beats are used to collect logs and ship them to ELK stack for processing.
We will discuss how to install various beats to collect logs and sent to ELK stack.
Congratulations, you’ve made it to the end of the article. We have covered how to Install ELK Stack 8 on Rocky Linux.
Read more on ELK stack Documentation
Other Tutorials
Install Snipe-IT on Ubuntu 22.04