
Welcome to this demo on how to install CockroachDB cluster on Ubuntu 20.04. What is CockroachDB? It is geo-distributed SQL database. CockroachDB is a cloud based and globally-distributed SQL database. You can use CockroachDB as a service: dedicated, serverless and self-hosted.
Cool features
- It is distributed, horizontally scalable to grow with your application.
- Geo-distributed. This means it can handle data-center failures, place data near usage and push computational to near data.
- It an SQL database and it has rich data storage support for different languages.
- App development is made easier with schemas, indexes and transactions
This demo focuses on how to install CockroachDB cluster on Ubuntu 20.04 with self-hosted deployment option with two nodes/servers.
Please note that # means root while $ means a normal user.
Prerequisites
- Two or more Ubuntu 20.04 servers
- Root privileges in all the servers
As stated earlier, I will demonstrate using two nodes or servers with the IP addresses below.
- Node 1 IP:
192.168.0.14 - Node 2 IP:
192.168.0.15
Connection through firewall
If you have a firewall running, ensure you open ports 8080 and 26257.
- For UFW firewall, use the commands:
ufw allow 8080/tcpufw allow 26257/tcpThen reload the firewall.
ufw reloadInstall CockroachDB cluster on Ubuntu 20.04
Note: If you are using CockroachDB in production you will need to setup NTP server and use non-root user with superuser privileges.
It is time to download the package for installation. Head to server 1 and download the latest version of CockroachDB. Unpack and copy the files to your system’s path
curl https://binaries.cockroachdb.com/cockroach-v22.1.0.linux-amd64.tgz | tar -xz && sudo cp -i cockroach-v22.1.0.linux-amd64/cockroach /usr/local/bin/Create a directory to store library files that provide spatial features.
mkdir -p /usr/local/lib/cockroachCopy the library files to the directory created above:
sudo cp -i cockroach-v22.1.0.linux-amd64/lib/libgeos.so /usr/local/lib/cockroach/cp -i cockroach-v22.1.0.linux-amd64/lib/libgeos_c.so /usr/local/lib/cockroach/CockroachDB is now installed and you can confirm by checking the version:
$ cockroach version
Build Tag:        v22.1.2
Build Time:       2022/06/22 15:54:12
Distribution:     CCL
Platform:         linux amd64 (x86_64-pc-linux-gnu)
Go Version:       go1.17.11
C Compiler:       gcc 6.5.0
Build Commit ID:  fc456a26830067b6dfbb8cd87e093a28d9b833d1
Build Type:       release
Now head to the second server and repeat the process.
Create clusters
It is now time to start our clusters. First go to the first server and enter the --store, --listen-addr and --http-addr to initiate the first cluster.
cockroach start --insecure --store=server1 --listen-addr=192.168.0.14:26257 --http-addr=192.168.0.14:8080 --join=192.168.0.14:26257,192.168.0.15:26258 --backgroundSome of the flags above mean:
- –store: for storing the data of the CockroachDB cluster.
- –listen-addr: IP address the cockroachdb will be running on the server using port
25267. - –http-addr: IP address the cockroachdb web-based administration will be running on accessed via port
8080. - –insecure : I will using unsecure(http) connection
Do the same with cluster 2 on server 2 using updated IP address(192.168.0.15)
cockroach start --insecure --store=server2 --listen-addr=192.168.0.15:26258 --http-addr=192.168.0.15:8081 --join=192.168.0.14:26257,192.168.0.15:26258 --backgroundNow that the clusters are set up, it is time to join them into one cluster to the first server.
cockroach init --insecure --host=192.168.0.14:26257
Cluster successfully initialized
Access the web interface
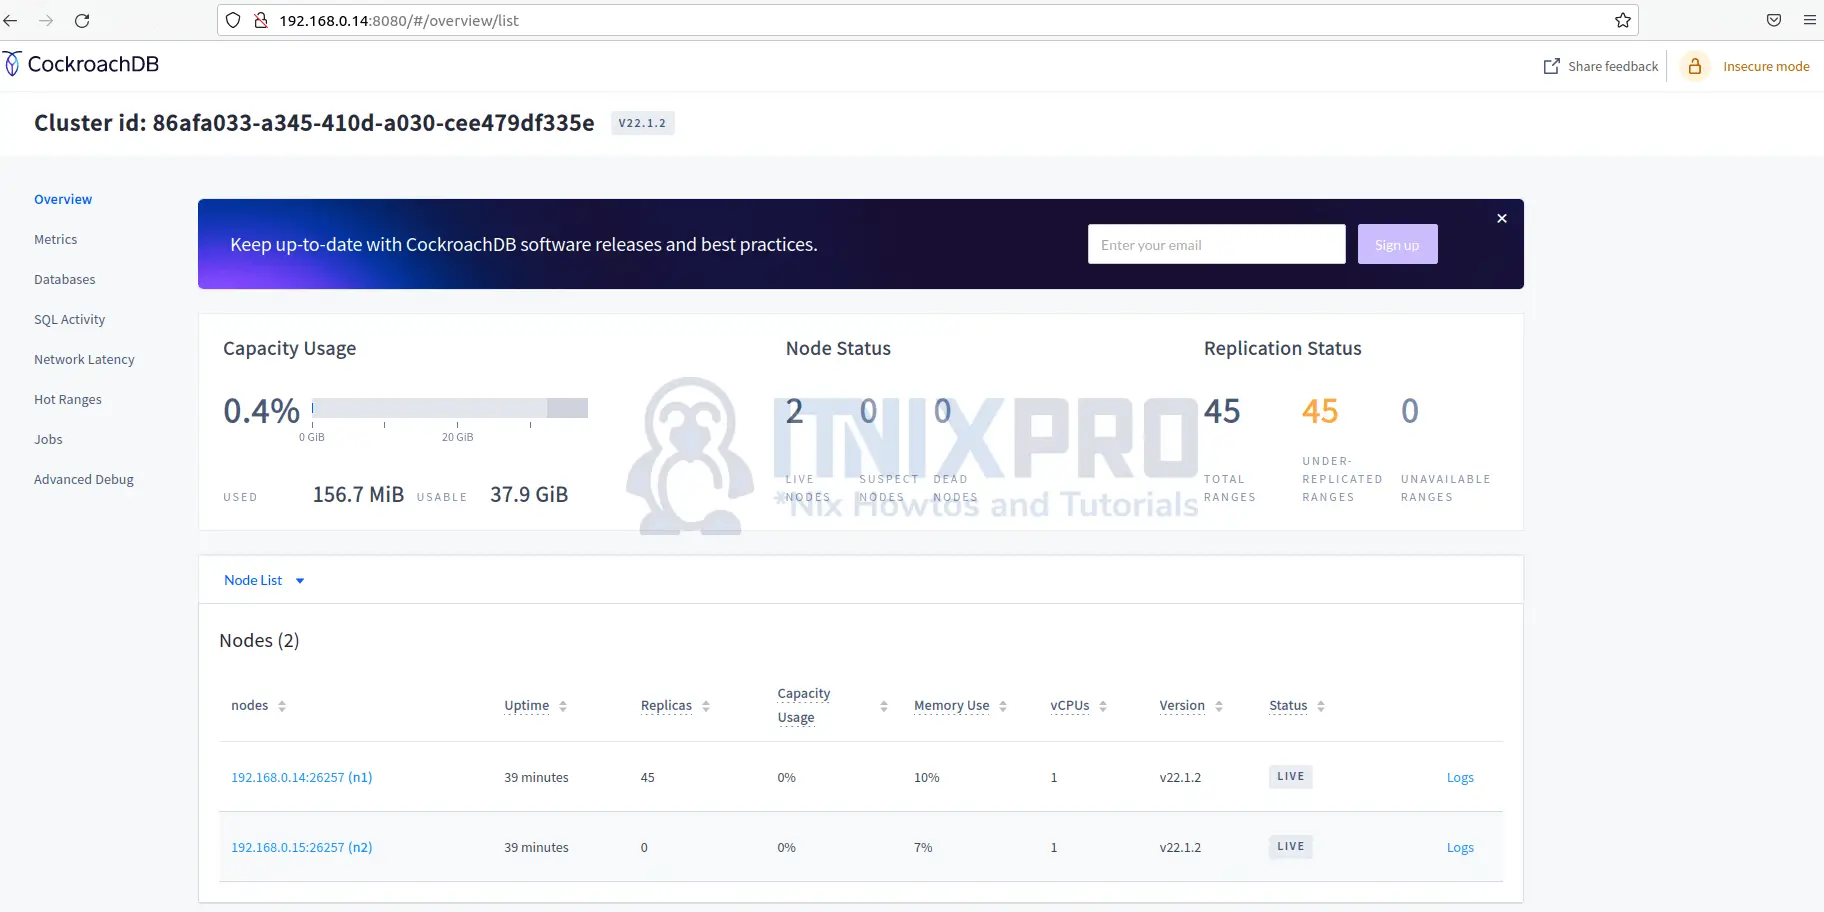
Open a web browser and point it to http://SERVER:8080 (where SERVER is the IP address of server1) i.e. http://192.168.0.14:8080
You will be redirected to web-base management console. You should note that you can’t perform edits in the web console.
Testing the clusters
Let’s actually test if our data is replicated to all nodes created above.
Connect to server 1 cluster using the command:
cockroach sql --insecure --host=192.168.0.14:26257Create a database called itnixpro
CREATE DATABASE itnixpro;Then create a table users under the same database
create table itnixpro.users (id INT PRIMARY KEY, name TEXT); Now insert some data to the table:
insert into itnixpro.users (id, name) values (1,'Joash');Check if the data can be populated:
select * from itnixpro.users;
  id | name
-----+--------
   1 | Joash
(1 row)


Time: 2ms total (execution 2ms / network 1ms)
To confirm if data is replicated to cluster 2, log in to server 2 and connect to that cluster.
cockroach sql --insecure --host=192.168.0.15:26257Now display the data on this cluster. It works! Our data has been replicated to this node successfully.
select * from itnixpro.users;
  id | name
-----+--------
   1 | Joash
(1 row)


Time: 231ms total (execution 231ms / network 0ms)
Conclusion
This is the end of this demo on how to install CockroachDB cluster on Ubuntu 20.04. You have learned how to use this awesome geo-distributed database to handle data failure.
Find out exciting features in CockroachDB documentation
Similar interesting tutorials
Install CockroachDB on Ubuntu 22.04