
By the end of this article, you will have managed to install Cacti on Ubuntu 22.04. Cacti is an open-source tool for graphic and network monitoring written in PHP. It is designed as a frontend application to RRDTool, a Time Series Database (TSDB). Cacti can be used to monitor devices on a network and servers.
Cacti supports LAMP stack, IIS webserver, and Nginx webserver. To make things simple, Cacti collects network bandwidth utilization and monitor the network traffic of a router or switch by polling over the SNMP protocol.
Install Cacti on Ubuntu 22.04
You need Apache server, MySQL/MariaDB installed before you install Cacti on Ubuntu 22.04.
Step 1: Update system packages
Update the system packages to avoid dependency issues by executing the command;
sudo apt update && sudo apt upgrade -yReboot Ubuntu 22.04 after the update
Step 2: Install PHP and required modules
Install all required PHP modules because Cacti is built using PHP.
sudo apt install libapache2-mod-php php-mysql php-xml php-gd php-snmp php-json php-intl php-mbstring php-ldap php-gmp -yUpdate PHP parameters by editing the php.ini file in client and apache2. Start with the php.ini file under apache2
sudo gedit /etc/php/*/apache2/php.iniEdit the file to look as below. You can press CTRL+F to find the lines below and update them and save the file.
date.timezone = Africa/Nairobi
memory_limit = 512M
max_execution_time = 60
Now repeat the process with the client version
sudo gedit /etc/php/*/cli/php.iniStep 3: Configure Apache Webserver
Apache2 server is already pre-installed in Ubuntu 22.04.
Create Apache configuration file for Cacti.
sudo gedit /etc/apache2/sites-available/cacti.confAdd the following lines, save and close the file.
    Alias /cacti /var/www/html/cacti

    <Directory /var/www/html/cacti>
        Options +FollowSymLinks
        AllowOverride None

        <IfVersion >= 2.3>
            Require all granted
        </IfVersion>

        <IfVersion < 2.3>
            Order Allow,Deny
            Allow from all
        </IfVersion>

        AddType application/x-httpd-php .php

        <IfModule mod_php.c>
              php_flag magic_quotes_gpc Off
              php_flag short_open_tag On
              php_flag register_globals Off
              php_flag register_argc_argv On
              php_flag track_vars On
              # this setting is necessary for some locales
              php_value mbstring.func_overload 0
              php_value include_path .
         </IfModule>

        DirectoryIndex index.php
    </Directory>
Reload apache2 server;
systemctl reload apache2Enable the Cacti configuration file.
sudo a2ensite cactiRestart and enable Apache with the commands:
sudo systemctl restart apache2
sudo systemctl enable apache2
Step 4: Install and Configure MariaDB Server
Install MariaDB which is a better version of MySQL database.
sudo apt install mariadb-server -y
Configure MariaDB
Edit the *50-server.cnf* file by running the command;
sudo gedit /etc/mysql/mariadb.conf.d/50-server.cnf
Comment out the following lines:
# collation-server = utf8mb4_general_ci
# character-set-server=utf8mb4
Then add the lines;
innodb_file_format=Barracuda
innodb_large_prefix=1
collation-server=utf8mb4_unicode_ci
character-set-server=utf8mb4
innodb_doublewrite=OFF
max_heap_table_size=128M
tmp_table_size=128M
join_buffer_size=128M
innodb_buffer_pool_size=1G
innodb_flush_log_at_timeout=3
innodb_read_io_threads=32
innodb_write_io_threads=16
innodb_io_capacity=5000
innodb_io_capacity_max=10000
innodb_buffer_pool_instances=9
Restart MariaDB service.
sudo systemctl restart mariadbStep 5: Create Cacti database
Now create a database for Cacti:
sudo mysql -u root -pEnter the commands below one after another. Replace itnixpro and intnixpro2022 with your username and password respectively.
CREATE DATABASE cacti;
GRANT ALL PRIVILEGES ON cacti.* TO 'itnixpro'@'localhost' IDENTIFIED BY 'itnixpro2022';
FLUSH PRIVILEGES;
EXIT;
Import timezone data to the MySQL database.
sudo mysql -u root -p mysql < /usr/share/mysql/mysql_test_data_timezone.sqlLogin to the MariaDB shell;
sudo mysql -u root -pEnter the commands below one by one.
GRANT SELECT ON mysql.time_zone_name TO itnixpro@localhost;FLUSH PRIVILEGES;EXIT;Step 6: Install and configure SNMP
Install snmp and rrdtool for better functioning of Cacti:
sudo apt install snmp snmpd snmp-mibs-downloader rrdtoolNow edit the config file;
sudo gedit /etc/snmp/snmp.confRemove the comment from mlbs line to look as below
# mibsGrant snmp full access to localhost
rocommunity MyCacti localhostRestart snmpd service:
sudo systemctl restart snmpdStep 7: Install Cacti on Ubuntu 22.04
Download the latest version of Cacti using wget command;
wget https://www.cacti.net/downloads/cacti-latest.tar.gzExtract the Cacti archive using the tar command and move the extracted files to /opt directory.
sudo tar -zxvf cacti-latest.tar.gzMove the extracted folder to /var/www/html/cacti directory
sudo mv cacti-1* /var/www/html/cactiImport the default Cacti database data to the newly created cacti database.
sudo mysql -u root -p cacti < /opt/cacti/cacti.sqlEdit the Cacti configuration file;
sudo mysql -u root -p cacti < /var/www/html/cacti/cacti.sqlUpdate the username and password of the Cacti config.php file by executing the command:
sudo gedit /var/www/html/cacti/include/config.phpNow change the username and password to look as follows. Use your own details.
$database_username = "itnixpro";
$database_password = "itnixpro2022";
Create a file for logging
sudo touch /var/www/html/cacti/log/cacti.logGrant the cacti directory read and write permissions and ownership:
sudo chown -R www-data:www-data /var/www/html/cacti/
sudo chmod -R 775 /var/www/html/cacti/
Add the entry below so that Cacti for polling after an interval of 5 minutes.
*/5 * * * * www-data php /var/www/html/cacti/poller.php > /dev/null 2>&1Restart the server once more.
sudo systemctl restart apache2Step 8: Start and setup Cacti website
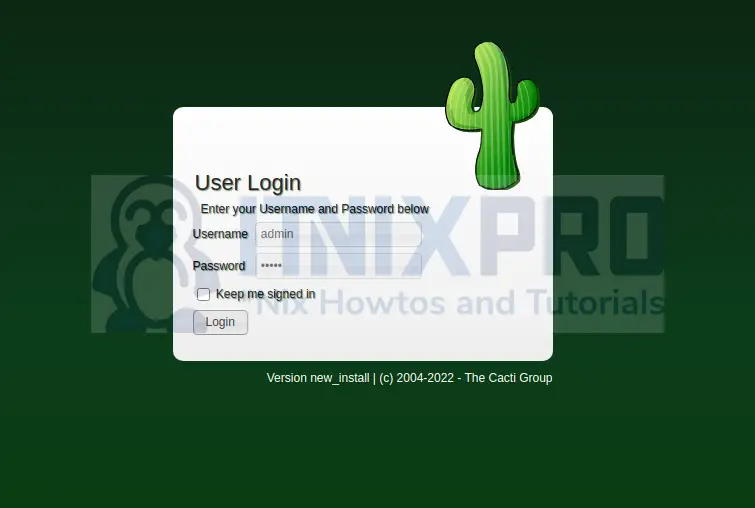
Enter the URL- http://your.ip.add.ress/cacti in your browser. Change your.ip.add.ress to your server IP. For local setup, enter the click http://127.0.0.1/cacti
Log in using admin as your username and password and click login.
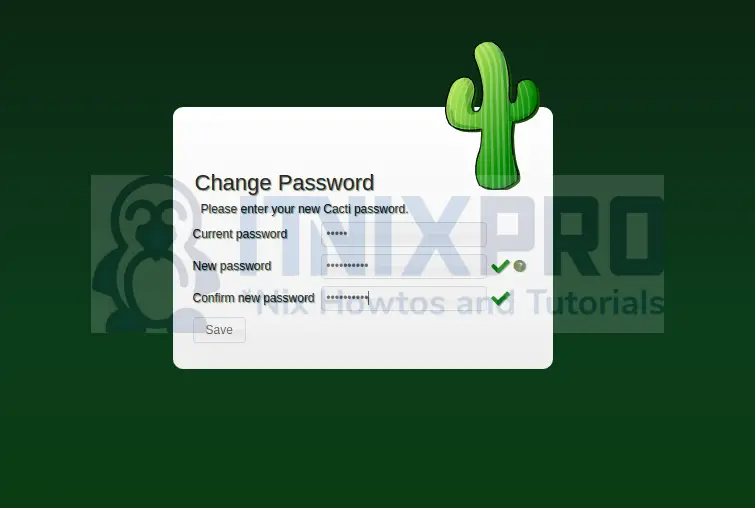
Change your password and click save.
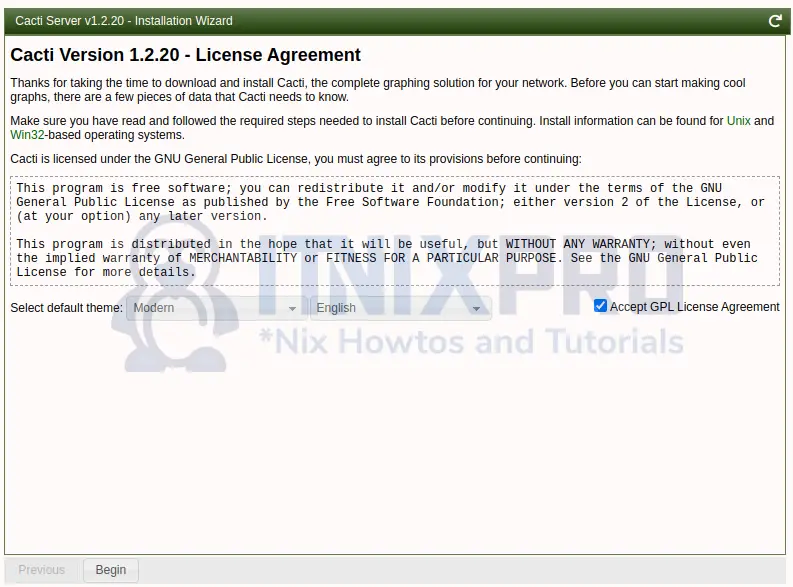
Accept the Cacti license agreement and click Begin
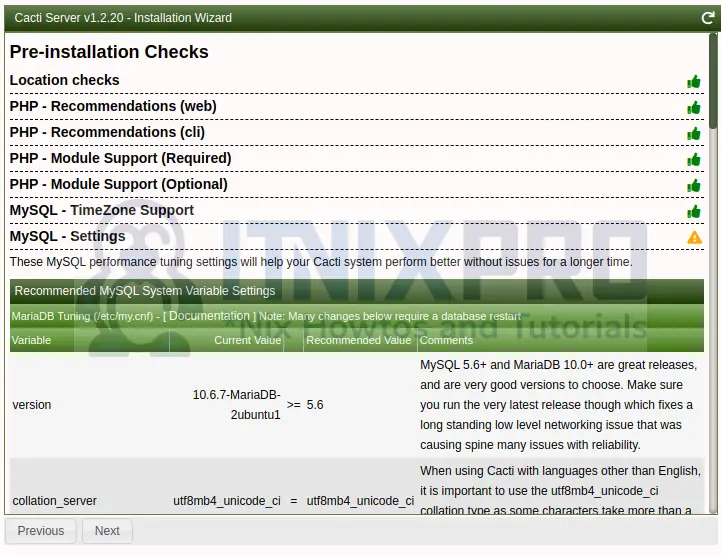
If there are no errors reported on pre-installation checks, click Next. In case of any errors, make sure they are fixed before proceeding.
Choose Primary Server as installation type:

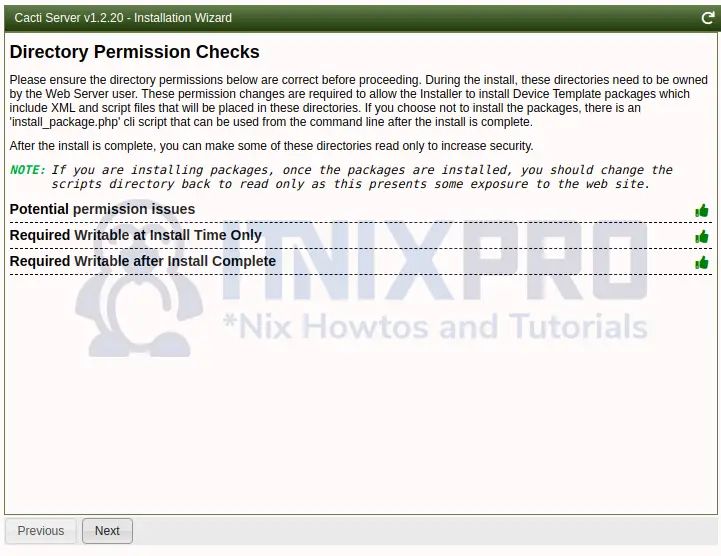
Wait for Cacti to check for required permissions. Click next if everything is okay.
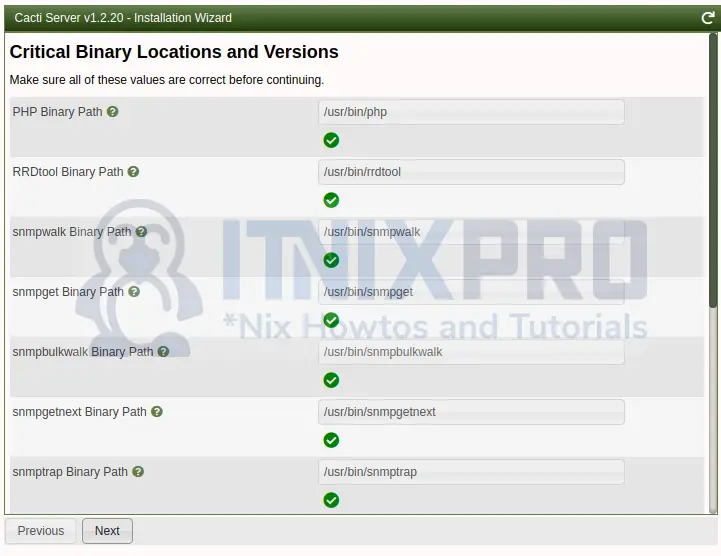
Make sure the critical binary locations are okay and click next.
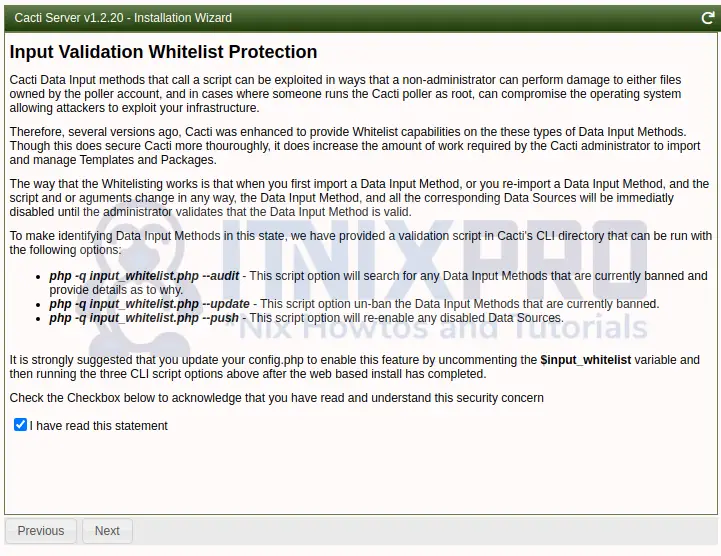
Read and confirm input validation whitelist protection.
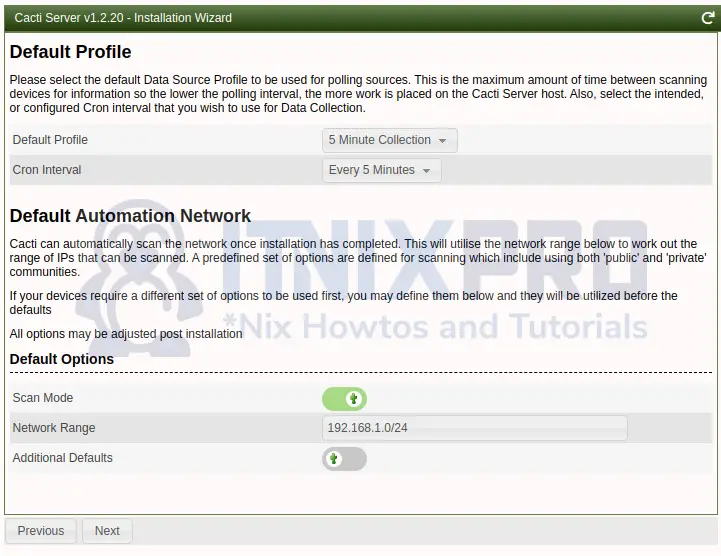
Click Next on the default profile that loads.
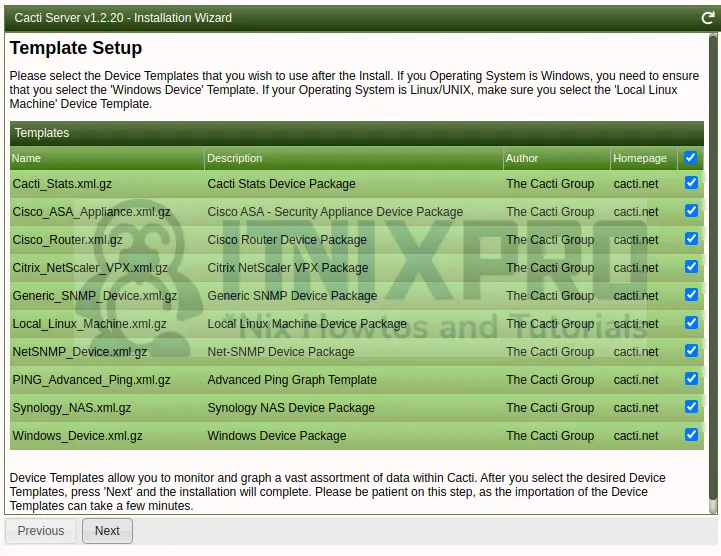
Check the device template to be used and press Finish.
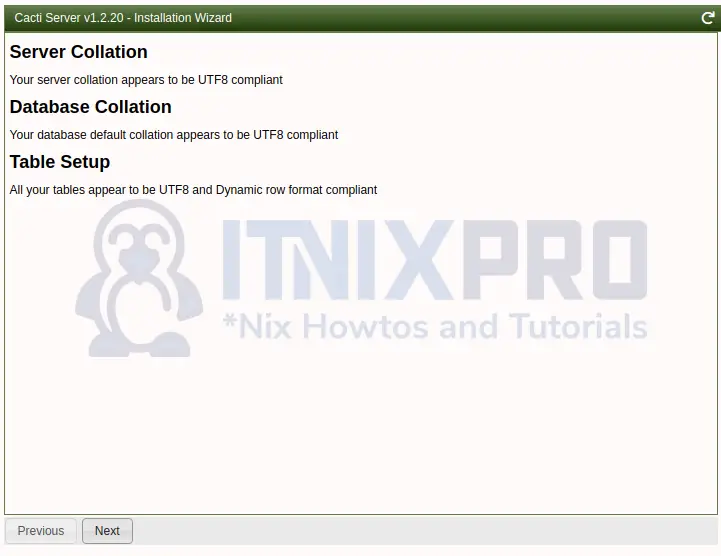
Now click Next.
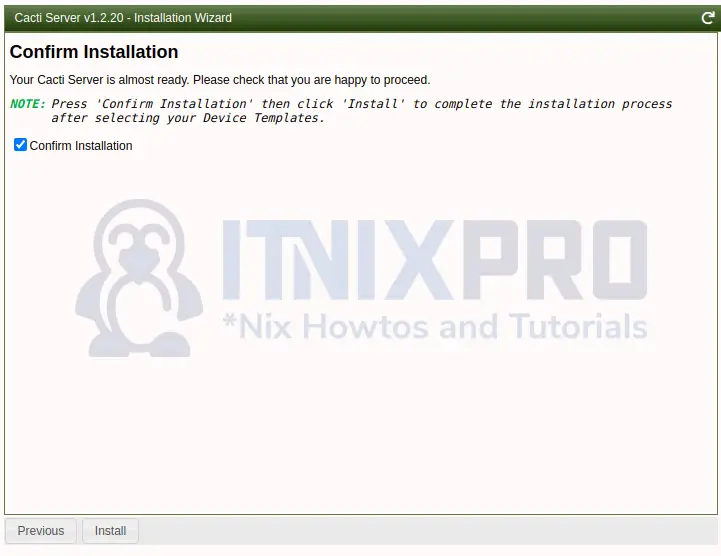
Check Confirm Installation and press Install to install Cacti on Ubuntu 22.04.
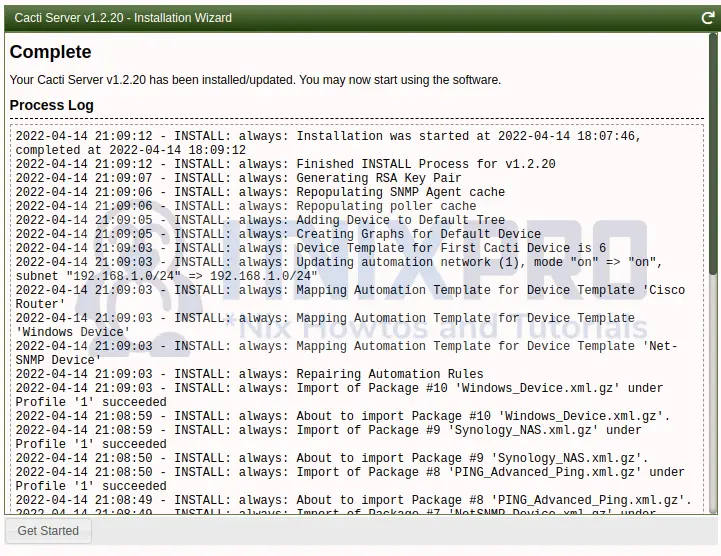
Wait for the installation to complete. Click on Get started. You will be presented with the dashboard below.
You have successfully managed to install Cacti on Ubuntu 22.04.

Conclusion
Thank you for your time and I hope this article was helpful. Since you have managed to install Cacti on Ubuntu 22.04, you go read more about Cacti info.
More interesting tutorials
Install Bacula Server with MariaDB on Ubuntu 22.04