
This article will take you through how to install Apache Tomcat on Rocky Linux 9. The Apache Tomcat software is an open-source implementation of the Jakarta Servlet, Jakarta Server Pages, Jakarta Expression Language, Jakarta WebSocket, Jakarta Annotations and Jakarta Authentication specifications.
How to Install Apache Tomcat on Rocky Linux 9
- Update your packages.
sudo dnf update- Next, install OpenJDK using the command below.
sudo dnf install -y java-17-openjdkSample output
Dependencies resolved.
======================================================================
 Package                  Arch   Version              Repo       Size
======================================================================
Installing:
 java-17-openjdk          x86_64 1:17.0.4.0.8-2.el9_0 appstream 237 k
Installing dependencies:
 copy-jdk-configs         noarch 4.0-3.el9            appstream  27 k
 java-17-openjdk-headless x86_64 1:17.0.4.0.8-2.el9_0 appstream  40 M
 javapackages-filesystem  noarch 6.0.0-3.el9          appstream  12 k
 lksctp-tools             x86_64 1.0.19-1.el9         baseos     90 k
 lua                      x86_64 5.4.2-4.el9          appstream 186 k
 lua-posix                x86_64 35.0-8.el9           appstream 131 k
 mkfontscale              x86_64 1.2.1-3.el9          appstream  31 k
 ttmkfdir                 x86_64 3.0.9-65.el9         appstream  52 k
 tzdata-java              noarch 2022c-1.el9_0        appstream 150 k
 xorg-x11-fonts-Type1     noarch 7.5-33.el9           appstream 499 k

Transaction Summary
======================================================================
Install  11 Packages

Total download size: 41 M
Installed size: 191 M
Downloading Packages:
(1/11): javapackages-filesystem-6.0.0 3.9 kB/s |  12 kB     00:02
(2/11): lksctp-tools-1.0.19-1.el9.x86  29 kB/s |  90 kB     00:03
(3/11): copy-jdk-configs-4.0-3.el9.no 113 kB/s |  27 kB     00:00
(4/11): lua-5.4.2-4.el9.x86_64.rpm    338 kB/s | 186 kB     00:00
(5/11): lua-posix-35.0-8.el9.x86_64.r 124 kB/s | 131 kB     00:01
(6/11): tzdata-java-2022c-1.el9_0.noa  88 kB/s | 150 kB     00:01
(7/11): ttmkfdir-3.0.9-65.el9.x86_64.  23 kB/s |  52 kB     00:02
(8/11): mkfontscale-1.2.1-3.el9.x86_6  20 kB/s |  31 kB     00:01
(9/11): xorg-x11-fonts-Type1-7.5-33.e  62 kB/s | 499 kB     0
Download Apache Tomcat on Rocky Linux
- Go to the Apache Tomcat download page then download the latest version.
sudo dnf install wgetwget https://archive.apache.org/dist/tomcat/tomcat-10/v10.0.23/bin/apache-tomcat-10.0.23.tar.gz- After that, create a Tomcat directory inside the
/optdirectory.
sudo mkdir /opt/tomcat- Extract Apache Tomcat to the directory created.
sudo tar -xvf apache-tomcat-10.*.tar.gz -C /opt/tomcat --strip-components=1- Then create a Tomcat group using the following command.
sudo groupadd tomcat- Give the directory required permissions.
sudo chown -R tomcat: /opt/tomcat- Make the Tomcat script executable using the command below.
sudo sh -c 'chmod +x /opt/tomcat/bin/*.sh'Apache Tomcat systemd service
- Add Tomcat by creating the system service file.
sudo nano /etc/systemd/system/tomcat.servicePaste the code below into the created file above.
[Unit]
Description=Apache Tomcat Web Application Container
Wants=network.target
After=network.target

[Service]
Type=forking

Environment=JAVA_HOME=/usr/lib/jvm/jre

Environment=CATALINA_PID=/opt/tomcat/temp/tomcat.pid
Environment=CATALINA_HOME=/opt/tomcat
Environment='CATALINA_OPTS=-Xms512M -Xmx1G -Djava.net.preferIPv4Stack=true'
Environment='JAVA_OPTS=-Djava.awt.headless=true'

ExecStart=/opt/tomcat/bin/startup.sh
ExecStop=/opt/tomcat/bin/shutdown.sh
SuccessExitStatus=143

User=tomcat
Group=tomcat
UMask=0007
RestartSec=10
Restart=always

[Install]
WantedBy=multi-user.target
- Next, reload the system daemon using the following command.
sudo systemctl daemon-reload- Enable Apache Tomcat to run on boot.
sudo systemctl enable tomcat- Then start Apache Tomcat using the command below.
sudo systemctl start tomcat- Confirm Tomcat is running using the following command.
systemctl status status tomcatSample output
● tomcat.service - Apache Tomcat Web Application Container
     Loaded: loaded (/etc/systemd/system/tomcat.service; enabled; vendor preset: disabled)
     Active: active (running) since Mon 2022-08-29 15:42:30 EAT; 54s ago
    Process: 103853 ExecStart=/opt/tomcat/bin/startup.sh (code=exited, status=0/SUCCESS)
   Main PID: 103860 (java)
      Tasks: 36 (limit: 23272)
     Memory: 85.6M
        CPU: 5.459s
     CGroup: /system.slice/tomcat.service
             └─103860 /usr/lib/jvm/jre/bin/java -Djava.util.logging.config.file=/opt/tomcat/conf/logging.properties -Djava.util.logging.manager=org.apache.juli.ClassLoaderLogManager -Djava.awt.headless=true -Dj>
Allow Apache Tomcat on your firewall
- Add Tomcat default port which is 8080 to your firewall using the command below.
sudo firewall-cmd --add-port=8080/tcp --permanent- Reload your firewall.
sudo firewall-cmd --reloadConfigure Apache Tomcat Web Interface
- Open your tomcat configuration file.
sudo nano /opt/tomcat/conf/tomcat-users.xml- Under tomcat users add the content below. Save(ctrl+s) and close(ctrl+x) the file.
<role rolename="admin-gui"/>
  <user username="admin" password="YourStrongPassword" roles="admin-gui"/>
  <role rolename="manager-gui"/>
<user username="admin" password="YourStrongPassword" roles="manager-gui"/>- After that let’s configure Tomcat to be accessible from the IP we want to.
sudo nano /opt/tomcat/webapps/manager/META-INF/context.xml- In the file opened above, add your IP address. e.g. 192.168.175.145
<Valve className="org.apache.catalina.valves.RemoteAddrValve"
allow="127\.\d+\.\d+\.\d+|::1|0:0:0:0:0:0:0:1|192.168.175.145" />- Also, update the host manager.
sudo nano /opt/tomcat/webapps/host-manager/META-INF/context.xml- Then add the IP address.
<Valve className="org.apache.catalina.valves.RemoteAddrValve"
allow="127\.\d+\.\d+\.\d+|::1|0:0:0:0:0:0:0:1|192.168.175.145" />- Next, restart tomcat using the following command.
sudo systemctl restart tomcatAccess Tomcat Web
- Open your web browser and enter your IP address followed by port 8080 e.g.
http://192.168.175.145:8080
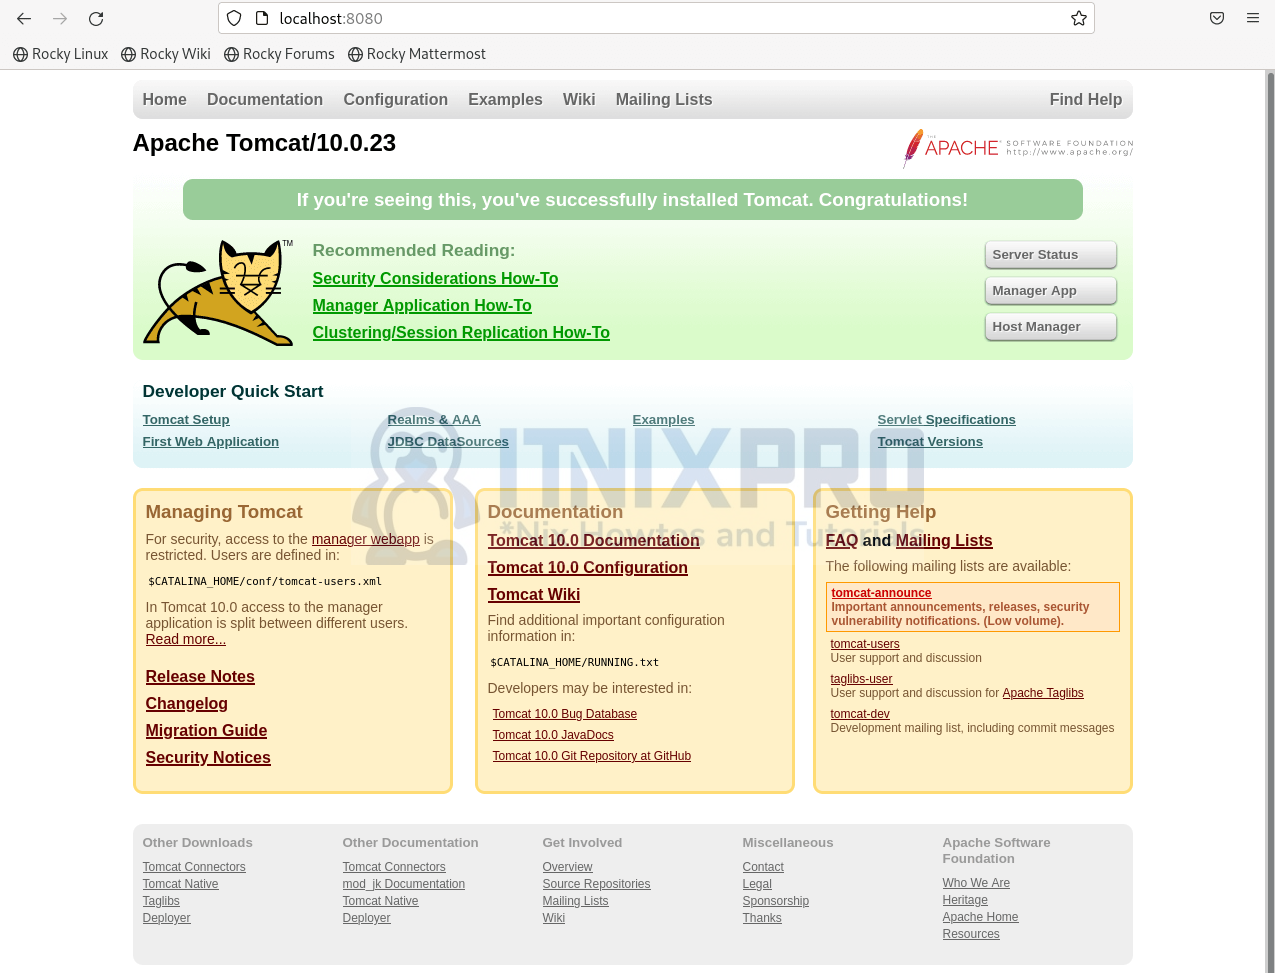
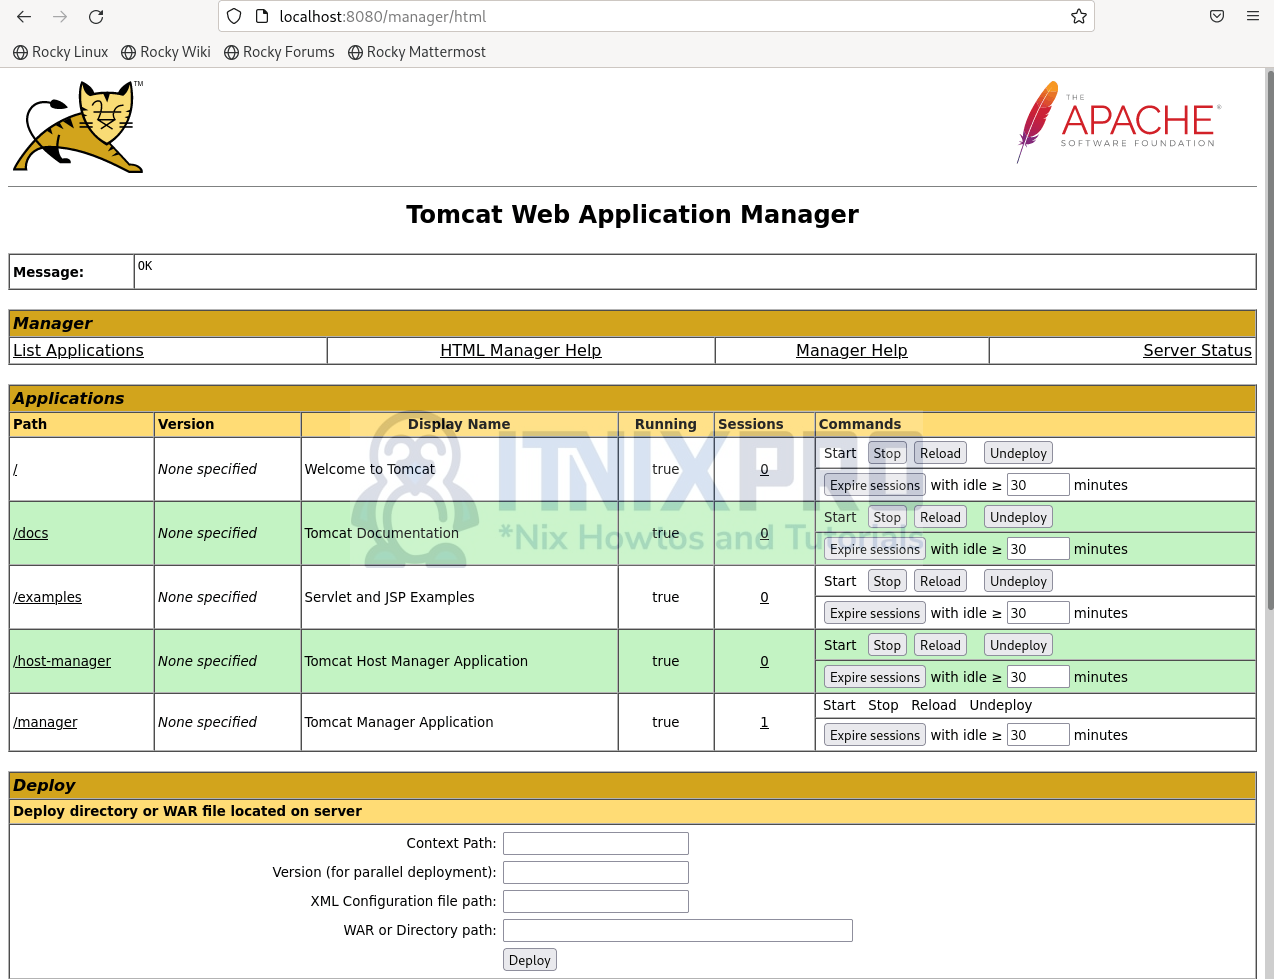
- To access the host manager simply click on the manager app then enter the user name and password that you did set previously.

- After successful authentication, you will be able to access the Host manager dashboard as shown below.
- You have made it to the end of our article, we have gone through how to install Apache Tomcat on Rocky Linux 9.
Read more on Apache Tomcat Documentation
Other Tutorials
Install Django on Rocky Linux 9