
This article is going to take you through on how to Configure Static IP Address on Ubuntu 22.04. By default Ubuntu obtains dynamic IP address from DHCP, to have static IP address you will have to configure it manually.
We are going to Configure Static IP Address on Ubuntu 22.04 using two methods.
- Configure Static IP Address on Ubuntu 22.04 via GUI
- Configure Static IP Address on Ubuntu 22.04 via Terminal
Configure Static IP Address on Ubuntu 22.04 via GUI
- Start by opening your network settings.
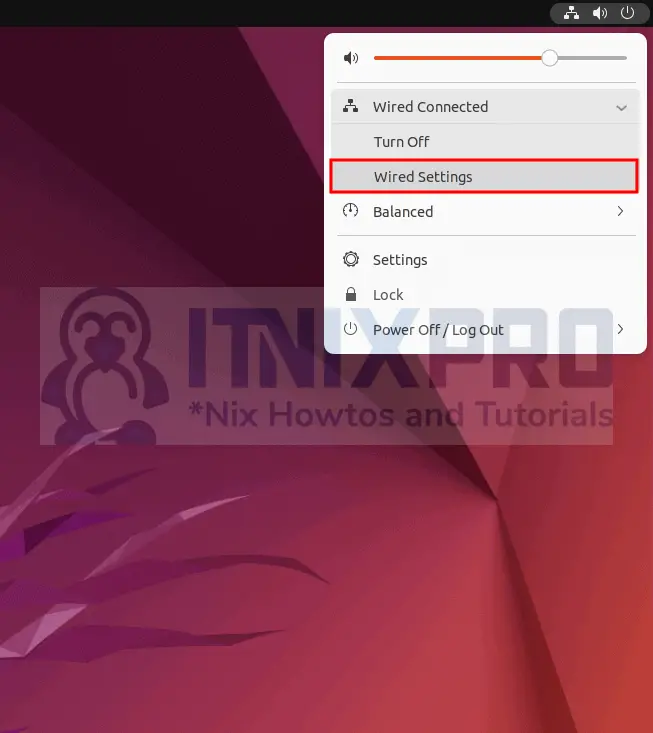
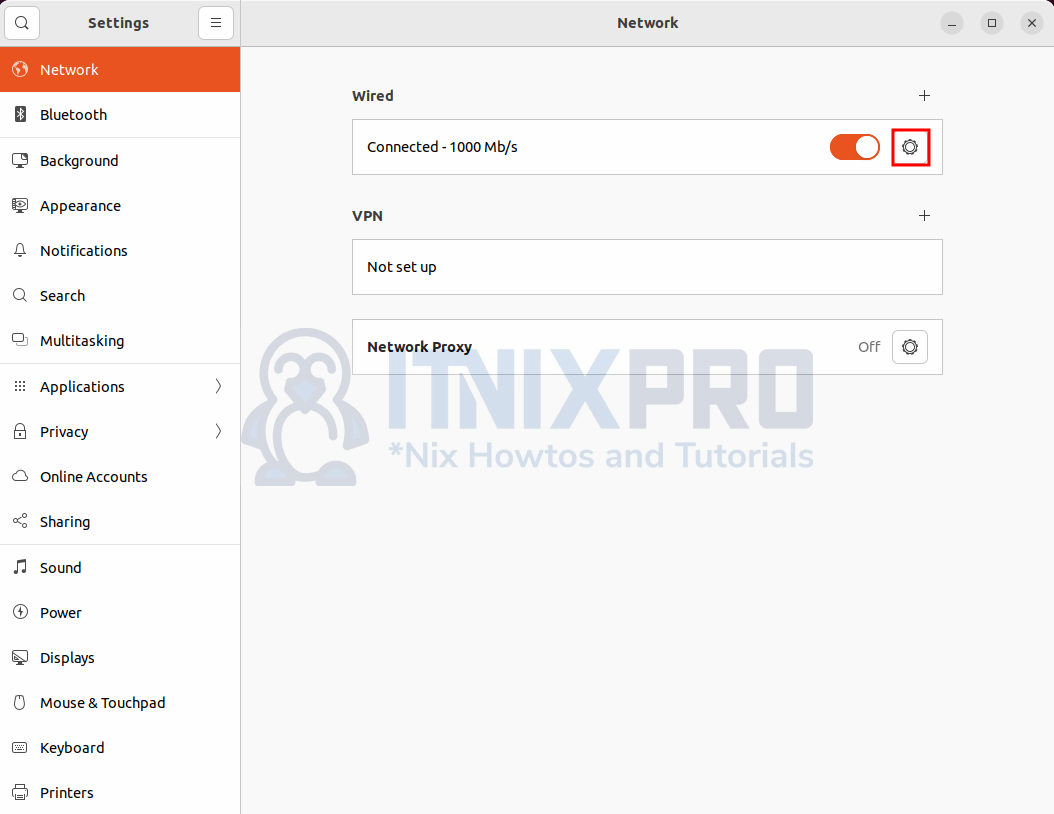
- Depending with your network connection i.e. wired or wireless, click on the gear icon to proceed on its settings.
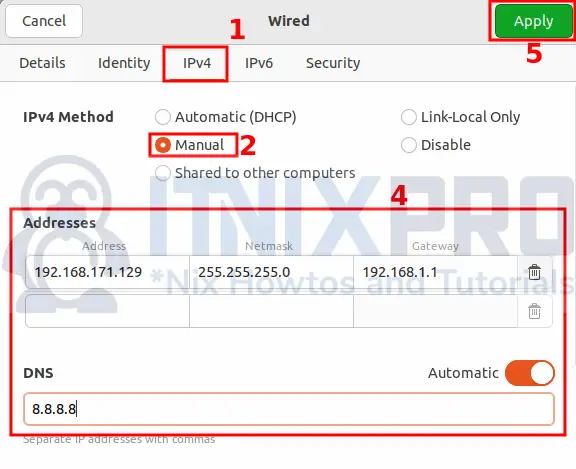
- Next, click on the IP type you want to configure. Select manual and then fill in your Address, Netmask, Gateway and DNS. After that click apply button to apply changes.
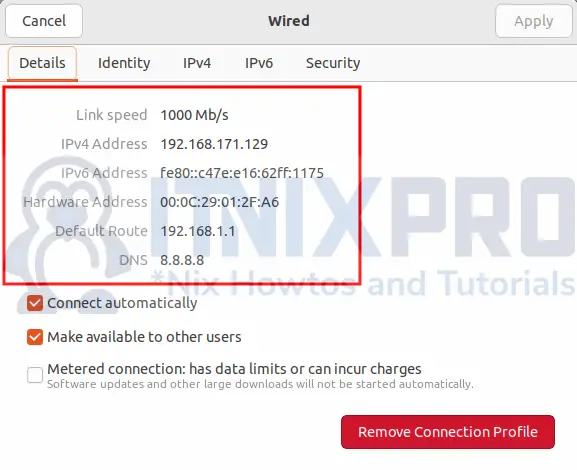
- Toggle the on and off button to restart your network for the changes to take effect.

- Feel free to confirm your static IP if it’s applied by click the gear icon again.
Configure Static IP Address on Ubuntu 22.04 via Terminal
- Check your current network interface name.
ip aSample output
2: ens33: <BROADCAST,MULTICAST,UP,LOWER_UP> mtu 1500 qdisc fq_codel state UP group default qlen 1000
    link/ether 00:0c:29:01:2f:a6 brd ff:ff:ff:ff:ff:ff
    altname enp2s1
    inet 192.168.171.129/24 brd 192.168.171.255 scope global dynamic noprefixroute ens33
       valid_lft 1737sec preferred_lft 1737sec
    inet6 fe80::c47e:e16:62ff:1175/64 scope link noprefixroute
       valid_lft forever preferred_lft forever
- Next, create a network configuration file using the command below.
sudo nano /etc/netplan/config.yamlPaste the sample file below and replace with your network details i.e address and DNS. Note, replace ens33 with your network interface name.
network:
  version: 2
  renderer: NetworkManager
  ethernets:
    ens33:
      dhcp4: no
      addresses:
        - 192.168.171.129/24
      routes:
        - to: 0.0.0.0/0
          via: 192.168.171.1
          metric: 600
      nameservers:
          addresses:
          - 8.8.8.8
          search:
          - itnixpro.com
- Save and close the file then apply changes by running the command below.
sudo netplan apply- Check if your network settings is applied using the following command.
ip aSample output
2: ens33: <BROADCAST,MULTICAST,UP,LOWER_UP> mtu 1500 qdisc fq_codel state UP group default qlen 1000
    link/ether 00:0c:29:01:2f:a6 brd ff:ff:ff:ff:ff:ff
    altname enp2s1
    inet 192.168.171.129/24 brd 192.168.171.255 scope global noprefixroute ens33
       valid_lft forever preferred_lft forever
    inet6 fe80::20c:29ff:fe01:2fa6/64 scope link
       valid_lft forever preferred_lft forever
- You have reached the end of our article, Congrats! You have learned how to Configure Static IP Address on Ubuntu 22.04.
Read more on Ubuntu Documentation
Other Tutorials
Install WPS Office on Ubuntu 22.04
Install Xrdp server on Debian 11
Install and configure Postfix as Send-Only SMTP on Debian 11