In this tutorial, you will learn how to configure Request Tracker (RT) to send mails using Postfix. Request Tracker can be configured to deliver outgoing mails via mail transfer agents such as Postfix.
Configure Request Tracker (RT) to Send Mails using Postfix
We assume that you already have Request tracker installed, up and running. If not, you can check our guide below on how to install and setup Request Tracker on Ubuntu.
Install Request Tracker (RT) on Ubuntu 20.04/Ubuntu 22.04
Install Postfix on Request Tracker Server
To configure Request Tracker to send mails using Postfix, you need to install Postfix on the server on which you are running Request Tracker.
On Ubuntu/Debian and similar derivatives;
sudo apt install postfix mailutilsOn CentOS/Rocky and RHEL Derivatives;
sudo yum install postfixFor any other Linux distro, consult their documentation on how to install Postfix.
When prompted;
- choose the mail server type configuration as Internet Site.
- Set the system mail name to your domain name e.g itnixpro.com.
Select Ok and press Enter to complete installation of Postfix.
Configure Postfix to Relay Outgoing Emails
In our setup, we will be configuring Postfix to relay outgoing emails via Gmail SMTP.
Thus, open the Postfix configuration for editing;
vim /etc/postfix/main.cfThere are only a few changes we are going to make here;
- Set the value of the relayhost, which is the Gmail SMTP server and port;
relayhost = [smtp.gmail.com]:587- Enable SMTP TLS encryption;
smtp_tls_security_level=encrypt- Configure Postfix to use IPv4 protocols when it makes or accepts network connections
inet_protocols = ipv4- Enable Postfix SASL authentication;
# SASL Authentication
smtp_sasl_auth_enable = yes
smtp_sasl_password_maps = hash:/etc/postfix/sasl_passwd
smtp_sasl_security_options = noanonymous
Save and exit the file.
Next, define the email account and password to use for email relay in the /etc/postfix/sasl_passwd. Note that to use Gmail account to relay emails from a less secure app, you need to enable 2FA on your account and generate your account app password.
App password is what will be used to authenticate to the account that is being used to deliver emails.
A good guide on how to generate app password has been published here.
vim /etc/postfix/sasl_passwd[smtp.gmail.com]:587 email-ID@gmail.com:16-character-passwordReplace email-ID and 16-character-password accordingly.
Save and exit the file.
Update the SASL password file ownership and permissions and generate the DB file.
chown root:root /etc/postfix/sasl_passwd
chmod 600 /etc/postfix/sasl_passwd
postmap /etc/postfix/sasl_passwd
Check the validity of the Postfix configuration;
postfix checkIgnore the the warning, postfix/postfix-script: warning: symlink leaves directory: /etc/postfix/./makedefs.out.
Restart and enable Postfix to run on system boot;
systemctl enable --now postfixSend a test mail from command line.
echo "This is a test mail" | \
mail -s "Test mail" [email protected]
If you check the logs, you should see status=sent.
tail -f /var/log/mail.logOct 1 20:53:26 ubuntu20 postfix/smtp[95876]: 81FF6467AE: to=<[email protected]>, relay=smtp.gmail.com[64.233.184.109]:587, delay=3.3, delays=0.02/0.02/2.1/1.1, dsn=2.0.0, status=sent (250 2.0.0 OK 1664657606 m7-20020a05600c3b0700b003a1980d55c4sm12260230wms.47 - gsmtp)Configure Request Tracker (RT) to Send Mails using Postfix
That is it. RT should now be able to deliver support emails via Postfix.
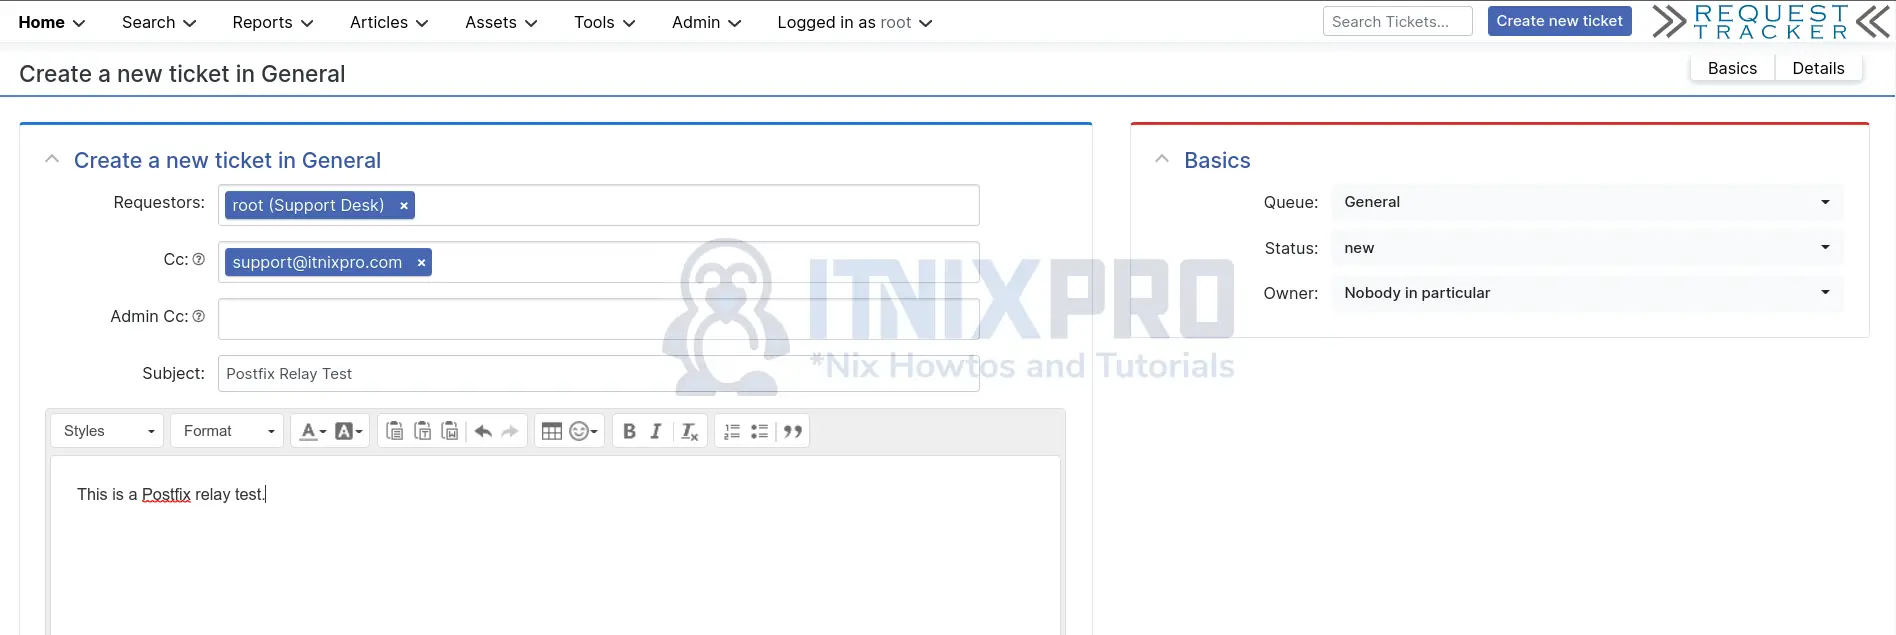
To demonstrate this, login to RT Web UI and create a ticket and cc someone;

We cc’d [email protected].
While tailing the logs;
tail -f /var/log/mail.logClick Create button on the UI to create the ticket.
Oct 1 21:37:49 ubuntu20 postfix/smtp[97748]: C3D88467AD: to=<[email protected]>, relay=smtp.gmail.com[142.251.5.108]:587, delay=3.8, delays=0.01/0.02/2.1/1.6, dsn=2.0.0, status=sent (250 2.0.0 OK 1664660269 v13-20020a05600c214d00b003b505d26776sm11122649wml.5 - gsmtp)On Support Inbox;

And that is it on how to configure Request Tracker (RT) to send mails using Postfix.
Other Tutorials;
Install Request Tracker (RT) on Debian 10
Enable Authentication Authorization and Audit Logging in Apache Solr
