This article will go through how to install pgAdmin on Rocky Linux. PGAdmin is a web and desktop graphical user interface that is used to manage administrative tasks for a Postgres database. It’s feature-rich administration and development environment for PostgreSQL.
Install PostgreSQL on Rocky Linux
How to Install pgAdmin on Rocky Linux
- Install yum-utils using the command below.
sudo dnf install yum-utilsSample output
Dependencies resolved.
====================================================================
 Package        Arch        Version               Repository   Size
====================================================================
Installing:
 yum-utils      noarch      4.0.24-4.el9_0        baseos       36 k

Transaction Summary
====================================================================
Install  1 Package

Total download size: 36 k
Installed size: 23 k
Is this ok [y/N]: y
Downloading Packages:
yum-utils-4.0.24-4.el9_0.noarch.rpm  35 kB/s |  36 kB     00:01
--------------------------------------------------------------------
Total                               8.2 kB/s |  36 kB     00:04
Running transaction check
Transaction check succeeded.
Running transaction test
Transaction test succeeded.
Running transaction
  Preparing        :                                            1/1
  Installing       : yum-utils-4.0.24-4.el9_0.noarch            1/1
  Running scriptlet: yum-utils-4.0.24-4.el9_0.noarch            1/1
  Verifying        : yum-utils-4.0.24-4.el9_0.noarch            1/1

Installed:
  yum-utils-4.0.24-4.el9_0.noarch

Complete!
- If you are using Rocky Linux 8, disable PostgreSQL common repo using the following command.
sudo yum-config-manager --disable pgdg-common- Next, add the pgAdmin 4 repo which is the latest version at the time of writing this article.
sudo rpm -i https://ftp.postgresql.org/pub/pgadmin/pgadmin4/yum/pgadmin4-redhat-repo-2-1.noarch.rpm- Update Rocky Linux so as to detect repository changes.
sudo dnf updateInstall pgAdmin 4 on Rocky Linux
- After updating repositories, install pgAdmin using the following command.
sudo dnf install pgadmin4Sample output
Dependencies resolved.
====================================================================
 Package             Arch     Version             Repository   Size
====================================================================
Installing:
 pgadmin4            noarch   6.13-1.el9          pgAdmin4    6.3 k
Installing dependencies:
 apr                 x86_64   1.7.0-11.el9        appstream   123 k
 apr-util            x86_64   1.6.1-20.el9        appstream    94 k
 apr-util-bdb        x86_64   1.6.1-20.el9        appstream    13 k
 httpd               x86_64   2.4.51-7.el9_0      appstream   1.4 M
 httpd-filesystem    noarch   2.4.51-7.el9_0      appstream    14 k
 httpd-tools         x86_64   2.4.51-7.el9_0      appstream    81 k
 libatomic           x86_64   11.2.1-9.4.el9      baseos       52 k
 pgadmin4-desktop    x86_64   6.13-1.el9          pgAdmin4     82 M
 pgadmin4-server     x86_64   6.13-1.el9          pgAdmin4     95 M
 pgadmin4-web        noarch   6.13-1.el9          pgAdmin4    8.7 k
 postgresql14-libs   x86_64   14.5-1PGDG.rhel9    pgAdmin4    283 k
 python3-mod_wsgi    x86_64   4.7.1-9.el9         appstream   942 k
 rocky-logos-httpd   noarch   90.11-1.el9         appstream    24 k
Installing weak dependencies:
 apr-util-openssl    x86_64   1.6.1-20.el9        appstream    15 k
 mod_http2           x86_64   1.15.19-2.el9       appstream   149 k
 mod_lua             x86_64   2.4.51-7.el9_0      appstream    61 k

Transaction Summary
====================================================================
Install  17 Packages

Total download size: 180 M
Installed size: 618 M
Is this ok [y/N]: y
Downloading Packages:
(1/17): pgadmin4-6.13-1.el9.noarch. 2.6 kB/s | 6.3 kB     00:02
(2/17): pgadmin4-web-6.13-1.el9.noa 4.8 kB/s | 8.7 kB     00:01
(3/17): postgresql14-libs-14.5-1PGD  24 kB/s | 283 kB     00:11
(4/17): libatomic-11.2.1-9.4.el9.x8  24 kB/s |  52 kB     00:02
(5/17): rocky-logos-httpd-90.11-1.e  85 kB/s |  24 kB     00:00
(6/17): mod_lua-2.4.51-7.el9_0.x86_ 155 kB/s |  61 kB     00:00
(7/17): httpd-tools-2.4.51-7.el9_0. 231 kB/s |  81 kB     00:00
(8/17): httpd-2.4.51-7.el9_0.x86_64 176 kB/s | 1.4 MB     00:07
(9/17): httpd-filesystem-2.4.51-7.e 116 kB/s |  14 kB     00:00
(10/17): apr-util-openssl-1.6.1-20. 146 kB/s |  15 kB     00:00
(11/17): apr-util-bdb-1.6.1-20.el9. 110 kB/s |  13 kB     00:00
(12/17): apr-util-1.6.1-20.el9.x86_ 313 kB/s |  94 kB     00:00
(13/17): python3-mod_wsgi-4.7.1-9.e 409 kB/s | 942 kB     00:02
(14/17): mod_http2-1.15.19-2.el9.x8 312 kB/s | 149 kB     00:00
(15/17): apr-1.7.0-11.el9.x86_64.rp 327 kB/s | 123 kB     00:00
(16/17): pgadmin4-desktop-6.13-1.el 151 kB/s |  82 MB     09:13
(17/17): pgadmin4-server-6.13-1.el9 144 kB/s |  95 MB     11:18
--------------------------------------------------------------------
Total                               270 kB/s | 180 MB     11:22
pgadmin4                            3.8 MB/s | 3.8 kB     00:00
Importing GPG key 0x210976F2:
 Userid     : "Package Manager (Package Signing Key) "
 Fingerprint: E869 7E2E EF76 C02D 3A63 3277 8881 B2A8 2109 76F2
 From       : /etc/pki/rpm-gpg/PGADMIN_PKG_KEY
Is this ok [y/N]: y
Key imported successfully
Running transaction check
Transaction check succeeded.
Running transaction test
Transaction test succeeded.
- After the installation, start the Apache web server.
sudo systemctl start httpd- Then enable it to run on boot.
sudo systemctl enable httpd- Check Apache status.
sudo systemctl status httpdConfigure pgAdmin 4 on Rocky Linux
- Run the configuration script. You will be prompted to enter your email and password which will be used to log in to pgAdmin.
sudo /usr/pgadmin4/bin/setup-web.shSample output
Setting up pgAdmin 4 in web mode on a Redhat based platform...
Creating configuration database...
NOTE: Configuring authentication for SERVER mode.

Enter the email address and password to use for the initial pgAdmin user account:

Email address: [email protected]
Password:
Retype password:
pgAdmin 4 - Application Initialisation
======================================

Creating storage and log directories...
Configuring SELinux...
The Apache web server is running and must be restarted for the pgAdmin 4 installation to complete. Continue (y/n)? y
Apache successfully restarted. You can now start using pgAdmin 4 in web mode at http://127.0.0.1/pgadmin4
- Next, run the command below to put SELinux in permissive mode.
sudo setenforce permissive- Then allow HTTP on your firewall.
sudo firewall-cmd --permanent --add-service=http- Reload to apply changes.
sudo firewall-cmd --reloadAccess pgAdmin4 on the Web browser
- To access pgAdmin, enter your server IP or domain name followed by
/pgadmin4e.g.http://127.0.0.1/pgadmin4then enter your credentials to log in.

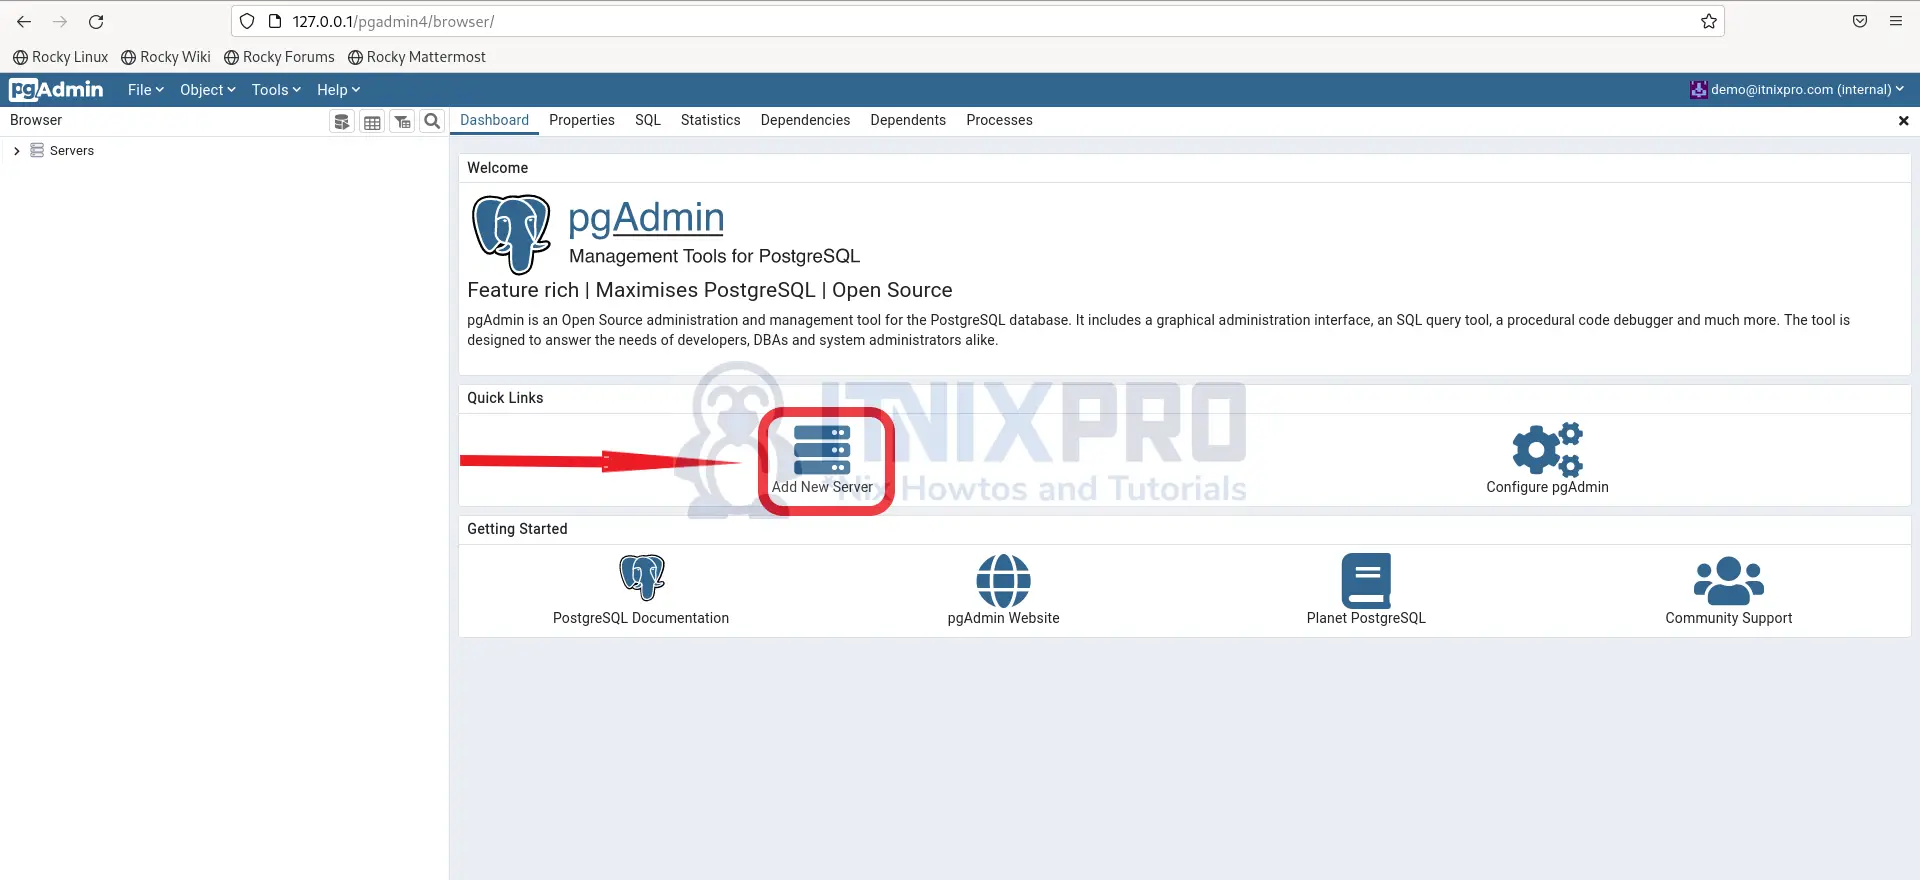
- After signing in, on the dashboard click Add New Server to connect to your database.
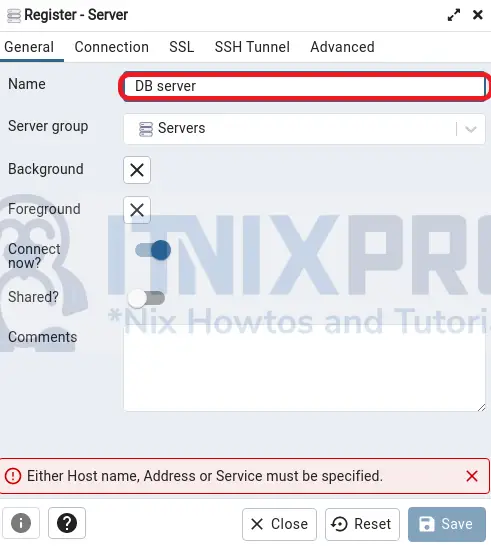
- Enter name to identify your server on the General tab.
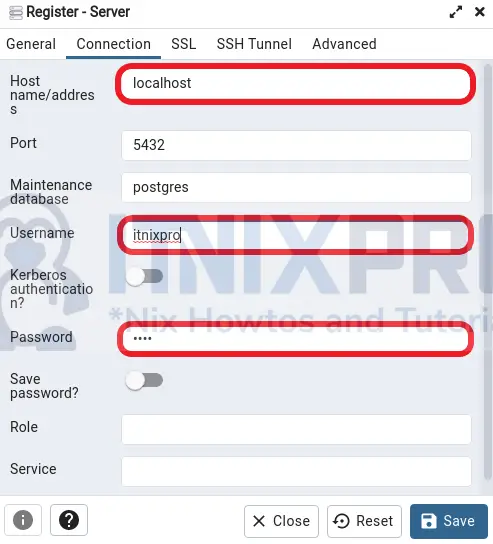
- Then enter your hostname, username and password to connect to your database.
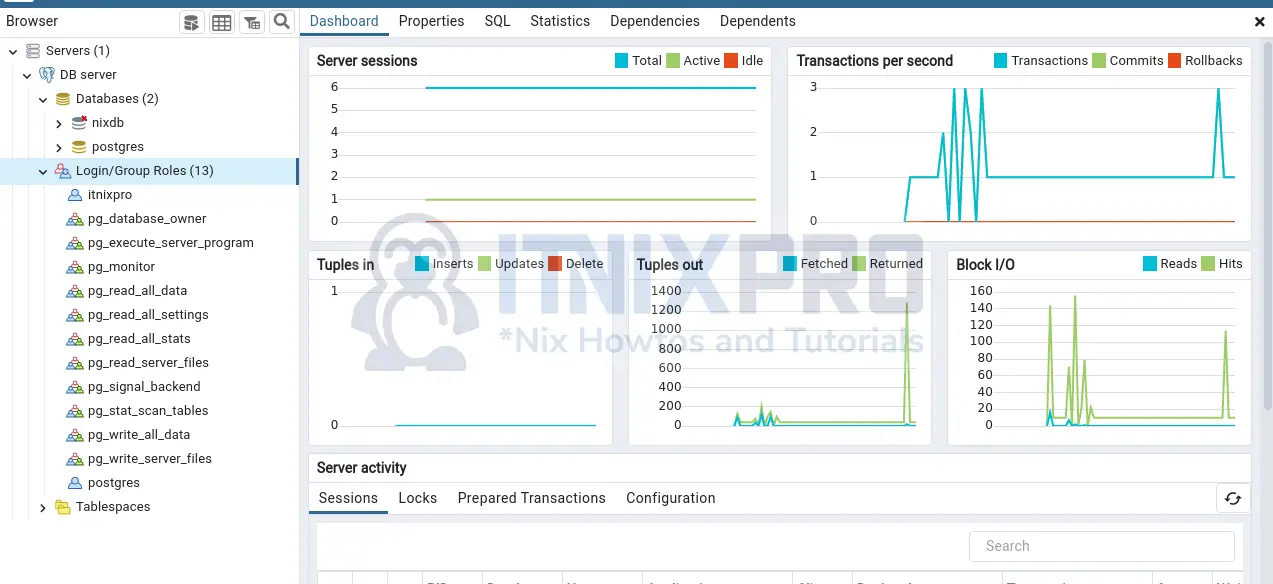
- After auth, you can manage your database from pgAdmin.
- You have reached the end of our tutorial, we have gone through how to install pgAdmin on Rocky Linux.
Read more on pgAdmin Documentation
Other Tutorials
Install pgAdmin on Ubuntu 22.04
