This article is going to take you through on how to Backup Windows systems using Veeam Agent. Veeam Agent is a backup and recovery software solution that can perform several backup types.
Install Veeam Agent
- If case you don’t have Veeam Agent already installed, navigate to Veeam download page and click DOWNLOAD NOW.
- To access the download links, you will be requested to register for a free account. Fill out your account information and submit the form. Then, to complete the account setup, check your email inbox for the link.
Backup Windows systems using Veeam Agent
- Launch configure backup from the start up menu.
- Next, give your backup job a name.
- Then choose what type of backup you want to backup, I will go with entire computer.
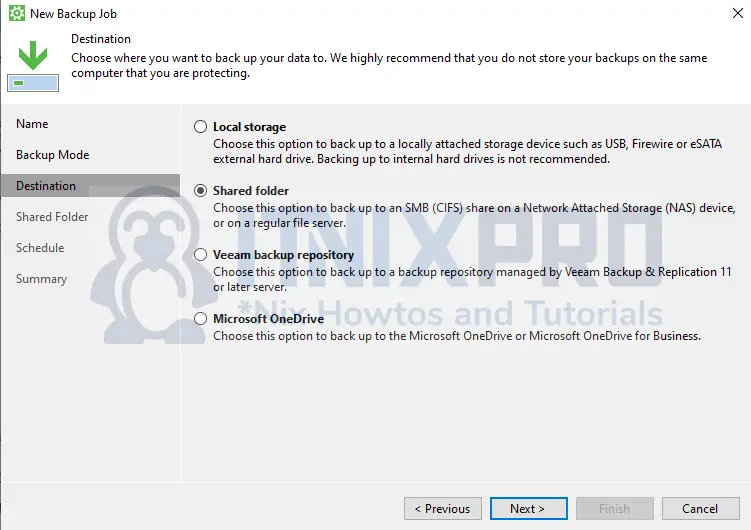
- In the destination option, I will choose Shared folder so that I can be able to save on the network.
- Enter your shared folder path or browse to locate it then set up credentials.
- Next set your backup schedule.
- Check the button to start your first backup when you click finish.
- When the backup is finished, you can find it in the backed up folder of your SMB server.
- This marks the end of our article, It’s a wrap. You have learned How to Backup Windows systems using Veeam Agent, Cheers!
Read more on Veeam Documentation
Other Tutorials
Setup NTP Server on Ubuntu 22.04


