This guide will take you through how to install VNC Server on Rocky Linux 9. Virtual Network Computing abbreviated as VNC is a graphical desktop sharing solution that enables you to control a distant computer by sending keyboard, mouse, and touch events to the VNC server.
How to Install VNC Server on Rocky Linux 9
- Update your system using the command below.
sudo dnf update- Install EPEL repository.
sudo dnf install -y epel-release- If you are using a server OS without GUI, install the desktop environment using the following command.
sudo dnf install @xfce-desktop-environment- Set default GUI.
sudo systemctl set-default graphical- Reboot your system to apply changes.
sudo reboot- Next, install TigerVNC which we will use in this example.
sudo dnf install tigervnc-server -ySample output
Dependencies resolved.
======================================================================
 Package                  Arch    Version            Repository  Size
======================================================================
Installing:
 tigervnc-server          x86_64  1.11.0-21.el9      appstream  246 k
Installing dependencies:
 dbus-x11                 x86_64  1:1.12.20-5.el9    appstream   24 k
 tigervnc-license         noarch  1.11.0-21.el9      appstream   16 k
 tigervnc-selinux         noarch  1.11.0-21.el9      appstream   25 k
 tigervnc-server-minimal  x86_64  1.11.0-21.el9      appstream  1.1 M

Transaction Summary
======================================================================
Install  5 Packages

Total download size: 1.4 M
Installed size: 3.5 M
Downloading Packages:
(1/5): dbus-x11-1.12.20-5.el9.x86_64.  25 kB/s |  24 kB     00:00
(2/5): tigervnc-selinux-1.11.0-21.el9 121 kB/s |  25 kB     00:00
(3/5): tigervnc-license-1.11.0-21.el9  73 kB/s |  16 kB     00:00
(4/5): tigervnc-server-1.11.0-21.el9. 144 kB/s | 246 kB     00:01
(5/5): tigervnc-server-minimal-1.11.0 376 kB/s | 1.1 MB     00:03
----------------------------------------------------------------------
Total                                 325 kB/s | 1.4 MB     00:04
Running transaction check
Transaction check succeeded.
Running transaction test
Transaction test succeeded.
Running transaction
  Preparing        :                                              1/1
  Installing       : tigervnc-license-1.11.0-21.el9.noarch        1/5
  Running scriptlet: tigervnc-selinux-1.11.0-21.el9.noarch        2/5
  Installing       : tigervnc-selinux-1.11.0-21.el9.noarch        2/5
  Running scriptlet: tigervnc-selinux-1.11.0-21.el9.noarch        2/5
  Installing       : dbus-x11-1:1.12.20-5.el9.x86_64              3/5
  Installing       : tigervnc-server-minimal-1.11.0-21.el9.x86_   4/5
  Installing       : tigervnc-server-1.11.0-21.el9.x86_64         5/5
  Running scriptlet: tigervnc-server-1.11.0-21.el9.x86_64         5/5
  Verifying        : dbus-x11-1:1.12.20-5.el9.x86_64              1/5
  Verifying        : tigervnc-server-minimal-1.11.0-21.el9.x86_   2/5
  Verifying        : tigervnc-server-1.11.0-21.el9.x86_64         3/5
  Verifying        : tigervnc-selinux-1.11.0-21.el9.noarch        4/5
  Verifying        : tigervnc-license-1.11.0-21.el9.noarch        5/5

Installed:
  dbus-x11-1:1.12.20-5.el9.x86_64
  tigervnc-license-1.11.0-21.el9.noarch
  tigervnc-selinux-1.11.0-21.el9.noarch
  tigervnc-server-1.11.0-21.el9.x86_64
  tigervnc-server-minimal-1.11.0-21.el9.x86_64

Complete!
- Add VNC service to your firewall.
sudo firewall-cmd --add-service=vnc-server --permanent- Reload your firewall.
sudo firewall-cmd --reload- Set the VNC password using the command below.
vncpasswdSample output
Password:
Verify:
Would you like to enter a view-only password (y/n)? n
A view-only password is not used
- Create a VNC config file using the command below.
sudo nano ~/.vnc/configPaste the configuration below into the file created above.
# create new
# session=(display manager you use)
# securitytypes=(security options)
# geometry=(screen resolution)
session=gnome
securitytypes=vncauth,tlsvnc
geometry=800x600
- Open the VNC users configuration file using the command below.
sudo nano /etc/tigervnc/vncserver.usersThen enter the display number with the user as in the example below.
## TigerVNC User assignment
#
# This file assigns users to specific VNC display numbers.
# The syntax is =. E.g.:
#
# :2=andrew
# :3=lisa

:1=demouser
:2=itnixpro
- Start the VNC server and enable it to run on boot.
sudo systemctl enable --now vncserver@:1 vncserver@:2Configure VNC Client
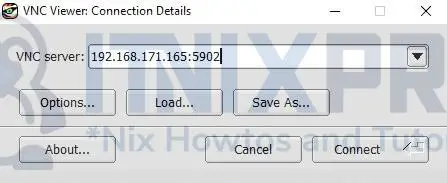
- Open your VNC client, then enter the VNC server IP address followed by port 5901 for display one, port 5902 for display two and so on in that order.

- To get your VNC server IP run the command below on Rocky Linux 9 running your VNC.
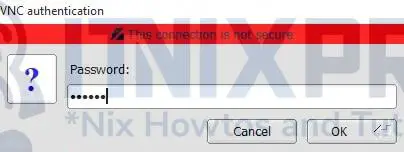
ip a- After hitting the connect button you will be prompted to enter your VNC server password as shown below.

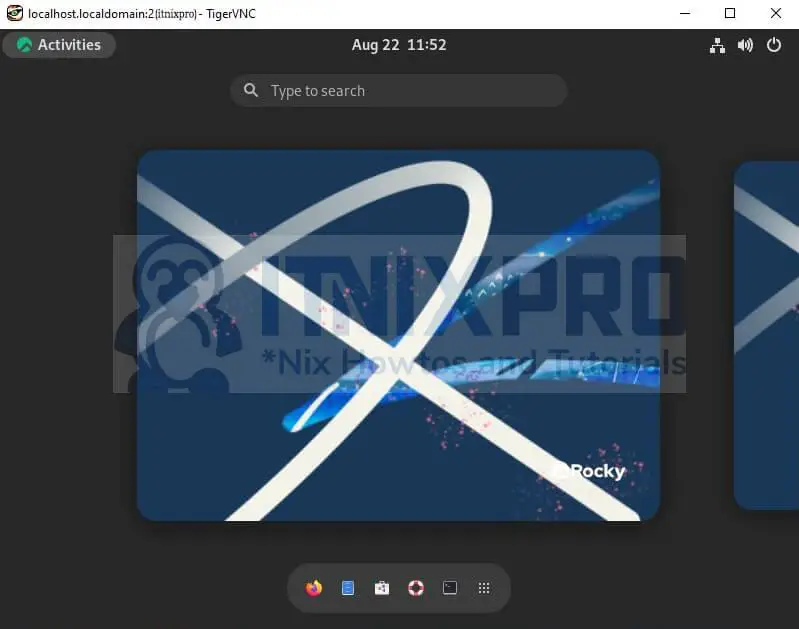
- You will be able to access the machine running the VNC server after successful authentication as shown below.

- That marks the end of our article. we have gone through how to install VNC Server on Rocky Linux 9.
Read more about TigerVNC
Other Tutorials
Install VNC Server on OpenSUSE
